Neutral Tile Cleaner

Porcelain Tiled Patio Restored Wendover

New Porcelain Patio Ruined During Installation Restored in Wendover

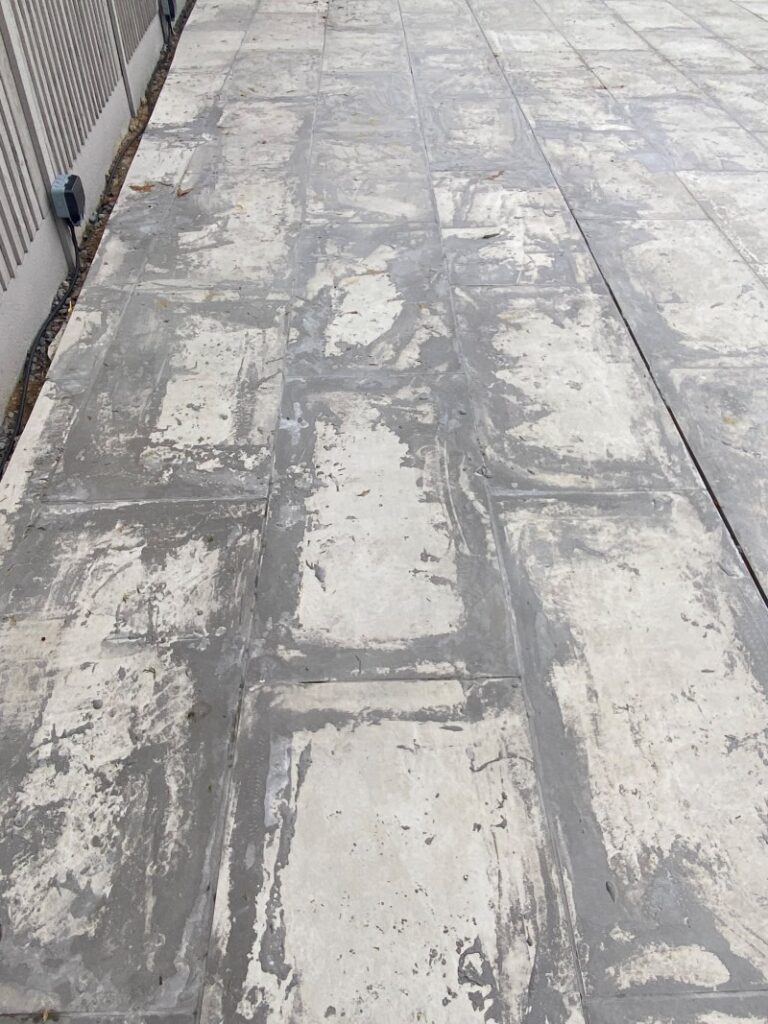
The pictures below are of a newly laid Porcelain patio at a property in Wendover. The builder had done a decent job of laying a level tiled patio, but completely ruined it when applying the grouting.

At the customer’s request the builder had used a modern cement-based grout and applied it as a slurry so he could use a squeegee to spread it into the grout lines. Unfortunately, he did not have much experience using this method or type of grouting and as he began grouting it started to rain heavily. Then instead of trying to rinse it all off before it could set, he and the customer left in place. The grout then hardened on the surface where it proved impossible to remove.

Porcelain Tiled Patio Before Cleaning Wendover

Having spoken to the customer over the phone I agreed to pop over and take a more detailed look at the problem. When coming to have a look at the job I knew how difficult it would be however after evaluating a couple of options I worked out a plan for cleaning away the excess grout and provided the customer with a quote. Happy to hear the situation could be resolved my quote was accepted and a date scheduled for the work to begin.

Porcelain Tiled Patio Before Cleaning Wendover

Removing Grout Staining from a New Porcelain Tiled Patio

From the testing earlier I knew the only product that would have a chance of removing the thick layer of grout would be Tile Doctor Grout Clean-up. It’s an acidic cleaning agent designed for this sort of problem and it this case it needed to be as strong as possible so I applied it neat.

Once applied I left it a few minutes before running over the Porcelain Tiles with a Rocky floor buffer fitted with a Silicon Carbide brush. I added extra weights to the machine to increase traction so in total it weighed in at about 65kg. All that weight going onto the patio helped scrub in the cleaning agent and although it did remove some of the cement-based grout it was not as much as expected.

The solution was to scrape off the thicker chunks of grout and I then follow up with a rotary hand tool fitted with an 80-grit brush on the end. Using the hand tool allowed me to get into the grooves of the tiles making it easier to clean as it was a rough textured porcelain tile. As I was cleaning with the hand tool, I also added more Grout Clean-up onto the tile to help soften the grout. By the end of day one we had two sections left however I know had a working solution and knew exactly what was needed to restore the patio.

By the end of day one with about 45m2 of patio remaining I realised it would be quicker with an extra pair of hands so I called neighbouring Tile Doctor Barry Woodward who covers Oxfordshire. Fortunately, Barry was available and so the next day we set about repeating the previous days method of scrapping off as much grout as possible and then going round with the hand tool spraying more Grout Clean-up on every inch of the patio. Slowly but surely, we made it through the last two sections and removed all the grout staining.

After that we gave the patio one last clean with a Tile Doctor Neutral Tile Cleaner to neutralise any acid which might still be on the surface of the Porcelain tile. In total twenty litres of Grout Clean-up were used on this job, not to mention the sweat.

Porcelain Tiled Patio After Renovation Wendover

Once complete the patio was completely transformed and looked like it had come out of a showroom. I’m pleased to say my customer was over the moon and later that day sent the following message:

My apologies when you left, I was slightly distracted by a work issue but I wanted to add my heartfelt Thanks to you and Barry for helping sort this patio out. The patio Situation has been a constant stress for the last 2 months And I’m amazed to see it in such great shape I realise it wasn’t easy and a great deal of effort was spent, you guys really are magicians. Once again thank You so much for your hard work.

Porcelain Tiled Patio After Renovation Wendover


Professional Restoration of a Porcelain Patio in Buckinghamshire

New Porcelain Patio Ruined During Installation Restored in Wendover Read More »

Modern Encaustic WC Floor Tile Renovation Marlow

Modern Encaustic Floor Tiles Renovated in Marlow

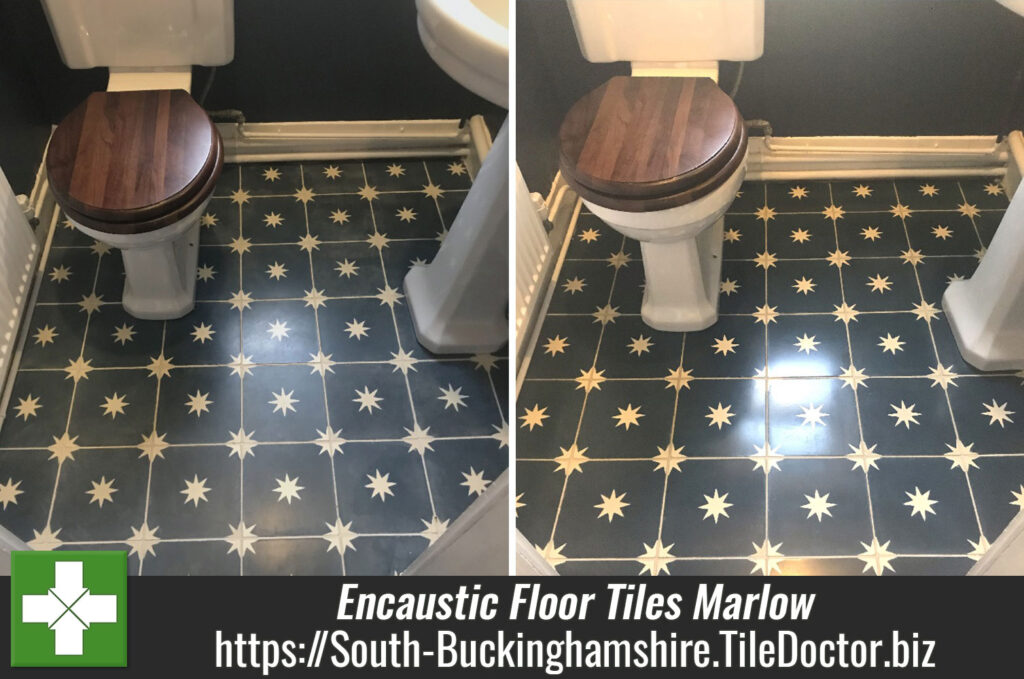
The pictures below were taken at a property in the old town of Marlow which had modern Encaustic tiles installed in the downstairs WC. Although they may appear on first appearance to be perfectly fine the owner had called us in to deal with the staining around sink area around toilet.

The tiles had only been installed six months earlier and after surveying the floor it was clear to me that the tiler hadn’t applied enough protective sealant following installation. I quoted for deep cleaning the floor with diamond burnishing pads and then re-sealing with a stronger sealer which given the small size of the floor should be completed in a day.

Modern Encaustic WC Floor Tiles Before Renovation Marlow

Deep Cleaning an Encaustic Tiled WC Floor

To remove the original sealer and deep clean the encaustic tiles I started with a 200-grit burnishing pad lubricated with water. The floor was too small for a buffer machine so I used 6-inch pads fitted to a hand buffer. This action cuts back the tiles removing the stains in the process.

After rinsing and extracting the soiling that was generated, I checked the floor to confirm the staining was gone. I could see that the 200-grit pad had done the job and there was no need to apply a coarser 100-grit so I followed up with finer 400 and 800 grit pads. Again, water was used to lubricate the process and the floor was rinsed and extracted after each pad. I went over the floor slowly to ensure each tile had a deep clean and to avoid creating any swirl marks.

Once the 400 & 800 grit pads had been applied, I buffed the tiles with a White rag to remove any excess water and get it ready for the next pad which would enhance the deep blue colours in the floor. Once the floor was dry a very fine 1500-grit pad was applied to compete the burnishing and add a slight shine to the tiles, this also leaves the floor nice and dry and ready for sealing.

Modern Encaustic WC Floor Tiles Before Renovation Marlow Modern Encaustic WC Floor Tiles After Renovation Marlow


Sealing an Encaustic Tiled WC Floor

To seal the floor, I used an oil-based sealer called Tile Doctor X-Tra Seal, which is rated for internal and external use. I allowed it to soak into the encaustic tiles which would allow the colours to really darken after the use of the burnishing pads.

After about thirty minutes I rubbed off the excess with a White cloth and then proceeded to apply a 3000-grit buffing pad to leave a smooth surface and an even shine all over the floor. I finished off with a further coat of X-Tra Seal and left for 30 minutes and repeated the same process giving a deep colour finish and leaving the floor well protected.

Modern Encaustic WC Floor Tiles After Renovation Marlow

The customer where very happy with the result and recommended us to friends of theirs who had the same tiled floor. Before leaving I spent a few minutes to discuss aftercare cleaning, which for this floor I recommend Neutral Tile Cleaner.


Professional Renovation of Stained Encaustic Tiles in Buckinghamshire

Modern Encaustic Floor Tiles Renovated in Marlow Read More »

Porcelain Tile and Grout Renovation Chalfont St Peter

End of Tenancy Renovation of Porcelain Tile and Grout in Chalfont St Peter

I recently paid a visit to a rental property in Chalfont St Peter which had Porcelain tiled floor which needed an End of Tenancy Clean. Porcelain tiling is a great choice for a rental property as its very to maintain however in this case it was the grout that was letting the floor down.

Porcelain Tiled Floor Before Cleaning Chalfont St Peter

It seems the previous tenant had tried using a white grout pen to colour the grout lines when they first moved in and since then the colourant has started flaking off resulting in a very patchy appearance and the exposed grout becoming darker.

The client wanted me to come in and clean the floor and to make the grout lines unison. The property wasn’t going to be rented out again as the owner was planning to move back in after living abroad for several years.

Deep Cleaning Porcelain Tile and Grout

On the first day I started giving the Porcelain tile and grout a much needed deep clean using a Rocky floor machine fitted with a Silicon Carbide brush and lubricated with a strong dilution of Tile Doctor Pro-Clean. Carbide brushes are perfect for hard floor cleaning and in this case had the additional advantage of cleaning away the flaky grout pen.

This cleaning process was applied section by section vacuuming up the slurry with a wet vacuum along the way. I then hand scrubbed the grout lines with Grout Colourant Pre-Treat Cleaner which is an effective ready-to-use cleaner designed to lightly etch the surface of the grout to ensure a better adhesion with the colourant. It also removes dirt, soil, soap scum and hard water deposits from grout joints. Once everywhere had been treated I mopped the floor with Neutral Tile Cleaner, rinsed with water, extracted with the wet vacuum again before finally leaving the floor to dry off overnight.

Applying White Grout Colourant to a Porcelain Tiled Floor

On day two I knew my main problem would be making sure that the White grout colourant was able to adhere to those areas of grout that had been coloured with the pen. I didn’t have to worry though as it worked perfectly. The application basically involves using a small brush to push the colourant into the grout lines and gently cleaning up the edge of the tiles to remove the excess colourant before it can dry.

After the first coat dried it brighten the floor massively however in some of areas you could still make out the old from the new so I needed to give the grout lines a second coat using the same technique as before. Once the second coat had been applied, I allowed it to settle and go off before giving the floor a check over to make sure I was happy with the result.

Porcelain Tiled Floor After Cleaning Chalfont St Peter

My customer was over the moon with the difference and was much relieved that the floor had been restored after the condition the previous tenants had left it in.


Professional Grout Restoration Services in Buckinghamshire

End of Tenancy Renovation of Porcelain Tile and Grout in Chalfont St Peter Read More »

Victorian Porch Tiles Renovated in Chesham

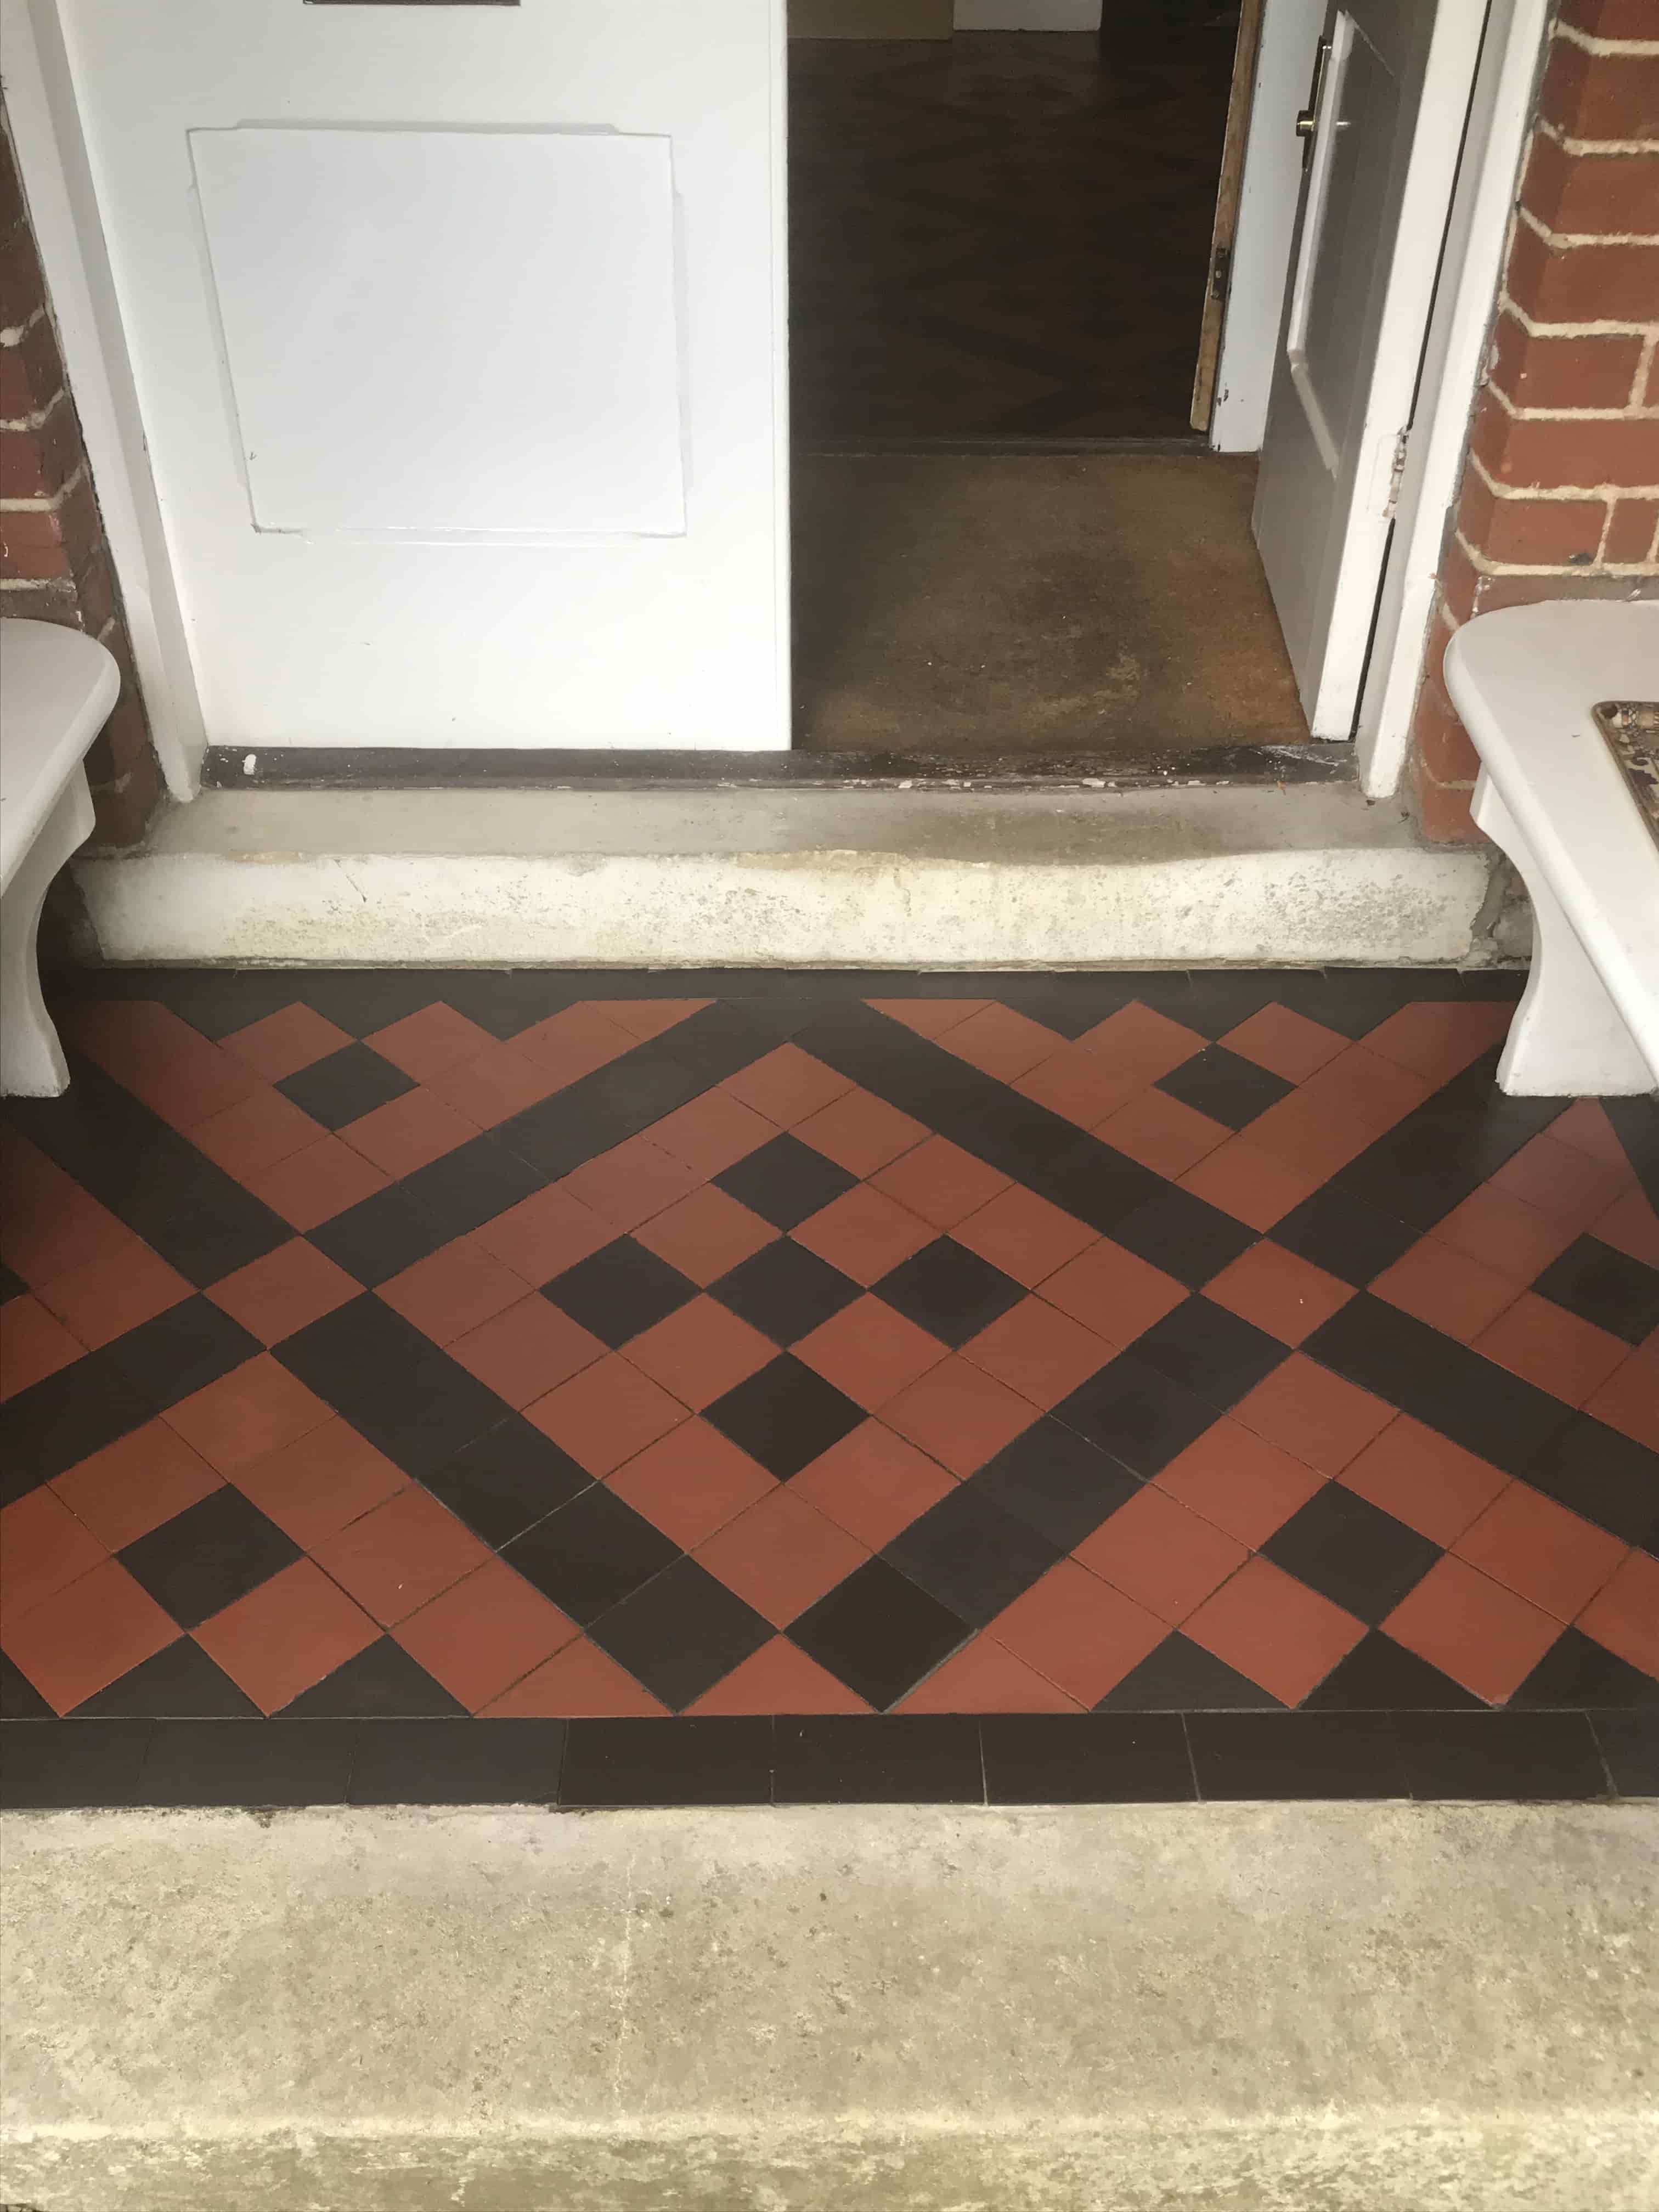
Cracked Victorian Hallway and Porch floor tiles Restored in Chesham

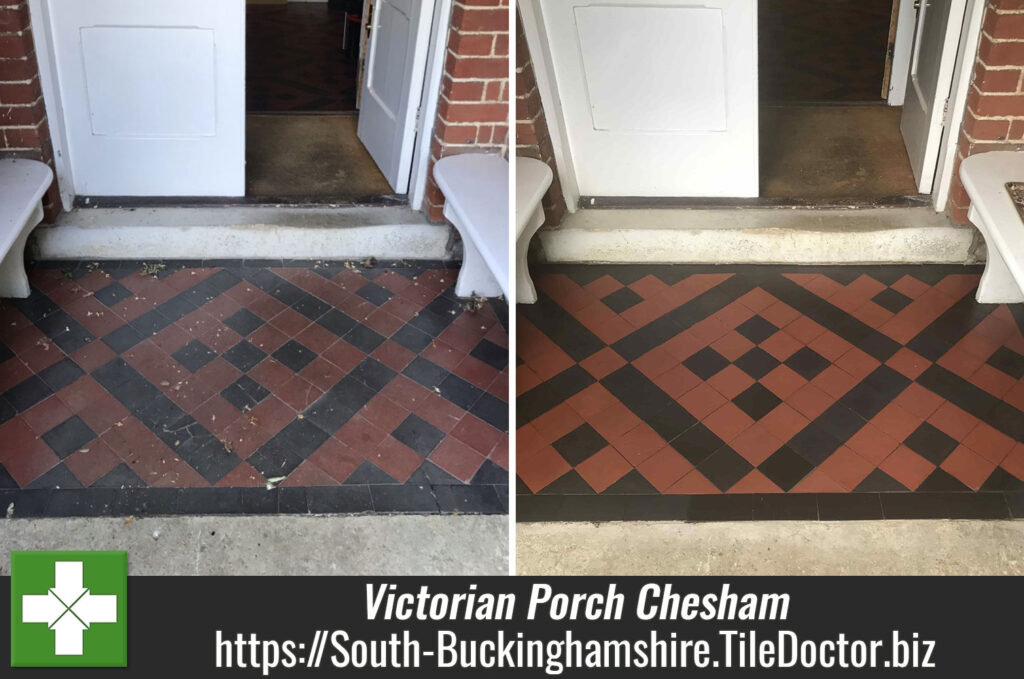
This client from Chesham got in touch due to cracked and chipped Victorian tiles in their hallway. The Victorian floor tiles in both the hall and the outside porch were over 150 years old and many of them needed replacing and relaying, they also wanted the floor to be cleaned and sealed.

Victorian Tiled Porch Floor Before Restoration Chesham

They were keen to spruce up the entrance area to the property and ensure it retained its original appearance in keeping with the age of the property. I visited site to check what needed to be done and gave them a quote for the work which they were happy to accept.

Repairing a Victorian Tiled Hallway and Porch Floor

Arriving on day one of a four-day job I marked out which tiles would need replacing as the client wanted to only do this kind of job once so any tiles with a chip or crack in had to be replaced. Fortunately, we were able to source a good range of reclamation and reproduction tiles so finding replacements to match is not too difficult. In total 90 tiles need replacing and work began by cutting out the grout lines around the broken tiles then drilling through the middle to stop any other tiles breaking around it and carefully removing them.

Victorian Tiled Hallway Floor During Restoration Chesham

We were able to remove all the damaged tiles on day one so the morning of day two began with measuring, cutting, and placing in the replacement tiles to be fixed in later that day using a flexible Mapie adhesive. With the repairs out of the way and the replacements now firmly fixed in place we would be able to start the cleaning on day three.

Deep Cleaning a Victorian Tiled Hallway and Porch Floor

To deep clean the Victorian tiles a high alkaline cleaner called Tile Doctor Pro-Clean was sprayed onto the floor, left to soak in for ten minutes and then scrubbed in with a rotary floor buffer fitted with a Black pad. A wet vacuum was then used to hoover up the slurry.

Next step was to treat the tiles to an acid rinse to neutralise any latent alkaline salts in the floor that might lead to efflorescence later and further clean up the tiles by removing grout hazing. I used Tile Doctors Acid Gel for this and worked it in this time with a coarse 200-grit diamond pad. After another rinse and extraction using the wet vacuum.

Victorian Tiled Hallway Floor During Restoration Chesham

To further improve the appearance of the tiles and blend the replacement tiles in with the original I continued the cleaning with finer grades of diamond burnishing pads until satisfied the floor was as good as it could be. Afterwards the floor was given a light mop with Tile Doctor Neutral Tile Cleaner to remove any dust etc and left it to dry off for a couple of hours. At the end of day 3 it was dry enough to accept a single base coat of Tile Doctors Colour Grow, this is a colour enhancing sealer that will help blend the new and old tiles and give a uniformed look.

Sealing a Victorian Tiled Hallway and Porch Floor

Day 4 the final day of the job I arrived and buffed over the floor with a White pad to get rid of any wet patches from putting the sealer down the day before. Then I applied two coats of using Tile Doctors X-Tra Seal onto the floor leaving a good hour in between each coat for the seal to soak into the pores of the tile and create a nice hard layer to protect them. Once both coats had dried, I went over the floor with a 3000-grit pad to give the floor a slight shine.

Victorian Tiled Hallway Floor After Restoration Chesham

The client was very happy with the finished result and before leaving I took time to recommend the use of Tile Doctor Neutral Cleaner for on-going cleaning. It’s a neutral pH cleaner that’s ideal for the regular cleaning of sealed tiles, supermarket cleaning products are generally too strong for this job and will erode the sealer.

Victorian Tiled Porch Floor After Restoration Chesham


Professional Restoration of a Victorian Tiled Hallway and Porch in Buckinghamshire

Cracked Victorian Hallway and Porch floor tiles Restored in Chesham Read More »

Scroll to Top