Ceramic Tile Cleaning

Welcome to my Work History archive where you will find detailed examples of Ceramic Tile and Grout Cleaning/Renovation work carried out in South Buckinghamshire

Cleaning Ceramic Tiles

Ceramic tiles are usually fully glazed and so do not have any pores that dirt can become ingrained into, because of this they are easy to clean with Tile Doctor Neutral Cleaner and are generally low maintenance. Textured ceramic tiles however are one exception, they have a rough surface in order to make them less slippery and are often used around wet areas such as swimming pools. Dirt is easily trapped in the textured surface and to get these clean requires a more intensive clean ideally using a rotating scrubbing pad.

Due to their low maintenance we rarely get called to deep clean Ceramic tiles however grout is a different case. The top layer of grout is actually porous and due to it being recessed we find when they are mopped it leads to a build-up of dirt on the grout causing it to discolour. This can be resolved using Tile Doctor Pro-Clean and then once clean and fully dry, seal the grout with one coat of Tile Doctor Ultra-Seal using a pipette.

Ceramic tiles are used a lot in bathrooms and shower cubicles where again we find it’s usually the grout or silicone sealant that discolours before the tiles do. In these cases we often find the appearance can be greatly improved with the use of a Grout Colourant and replacement of the silicone.

Below you will find detailed examples of work we have carried out in the past, it should give you some idea of what’s involved and what can be achieved with the right techniques and products


Ceramic Tiled Floor Before and After Renovation Uxbridge

Removal of Linseed Oil from a Ceramic Tiled Floor in Uxbridge

This is a small Ceramic tiled floor that a client had laid in his workshop next to his house in Uxbridge. As you can see from the photo the floor was in an indescribable mess and I was asked to pop round and quote for sorting it out. Uxbridge is actually classed as Middlesex but being close to the M25 and M40 I find it easy to reach.

Ceramic Tiled Workshop Floor Before Cleaning Uxbridge

As requested, I called in to survey the floor which was not a pretty site. In turns out that the tiler had applied boiled linseed oil to the floor (which the tiles did not need), and this had formed a horrible sticky residue on the surface. The client had conducted several unsuccessful attempts at cleaning up the floor and was unsure it could be rectified. Once of the attempts involved using acid which failed to remove the oil and unfortunately did do some damage to the grout causing it to discolour.

Undeterred, I was confident we could sort the problems out and restore the appearance of the tile and grout. I discussed with the client what we could do to clean the floor and we agreed a price to carry out the work out.

Cleaning a Ceramic Tiled Workshop Floor


Returning the following week, I first tackled the floor using Tile Doctor Pro-Clean applied neat, left to soak for ten minutes and then scrubbed in with a rotary floor buffer fitted with a black scrubbing pad. Pro-Clean is a highly concentrated multi-purpose tile cleaner, which when left to dwell, breaks down all types of dirt from oils through to grease and grime. It’s particularly good for very heavily soiled areas and it did a good job at removing the Linseed Oil. I rinsed the soiled solution with water and extracted the now soiled cleaning solution off the floor with wet vacuum. Wet vacuums are a great resource for Tile Doctor work, they make light work of removing liquids and this keeps the mess to a minimum.

I followed up the cleaning with a light buff of the tiles using Tile Doctor Grout Clean-up to remove the grout smears also left behind by the tiler. Cleaning the excess grout off the tiles made a huge difference to the floor, which you can see in the completed picture.
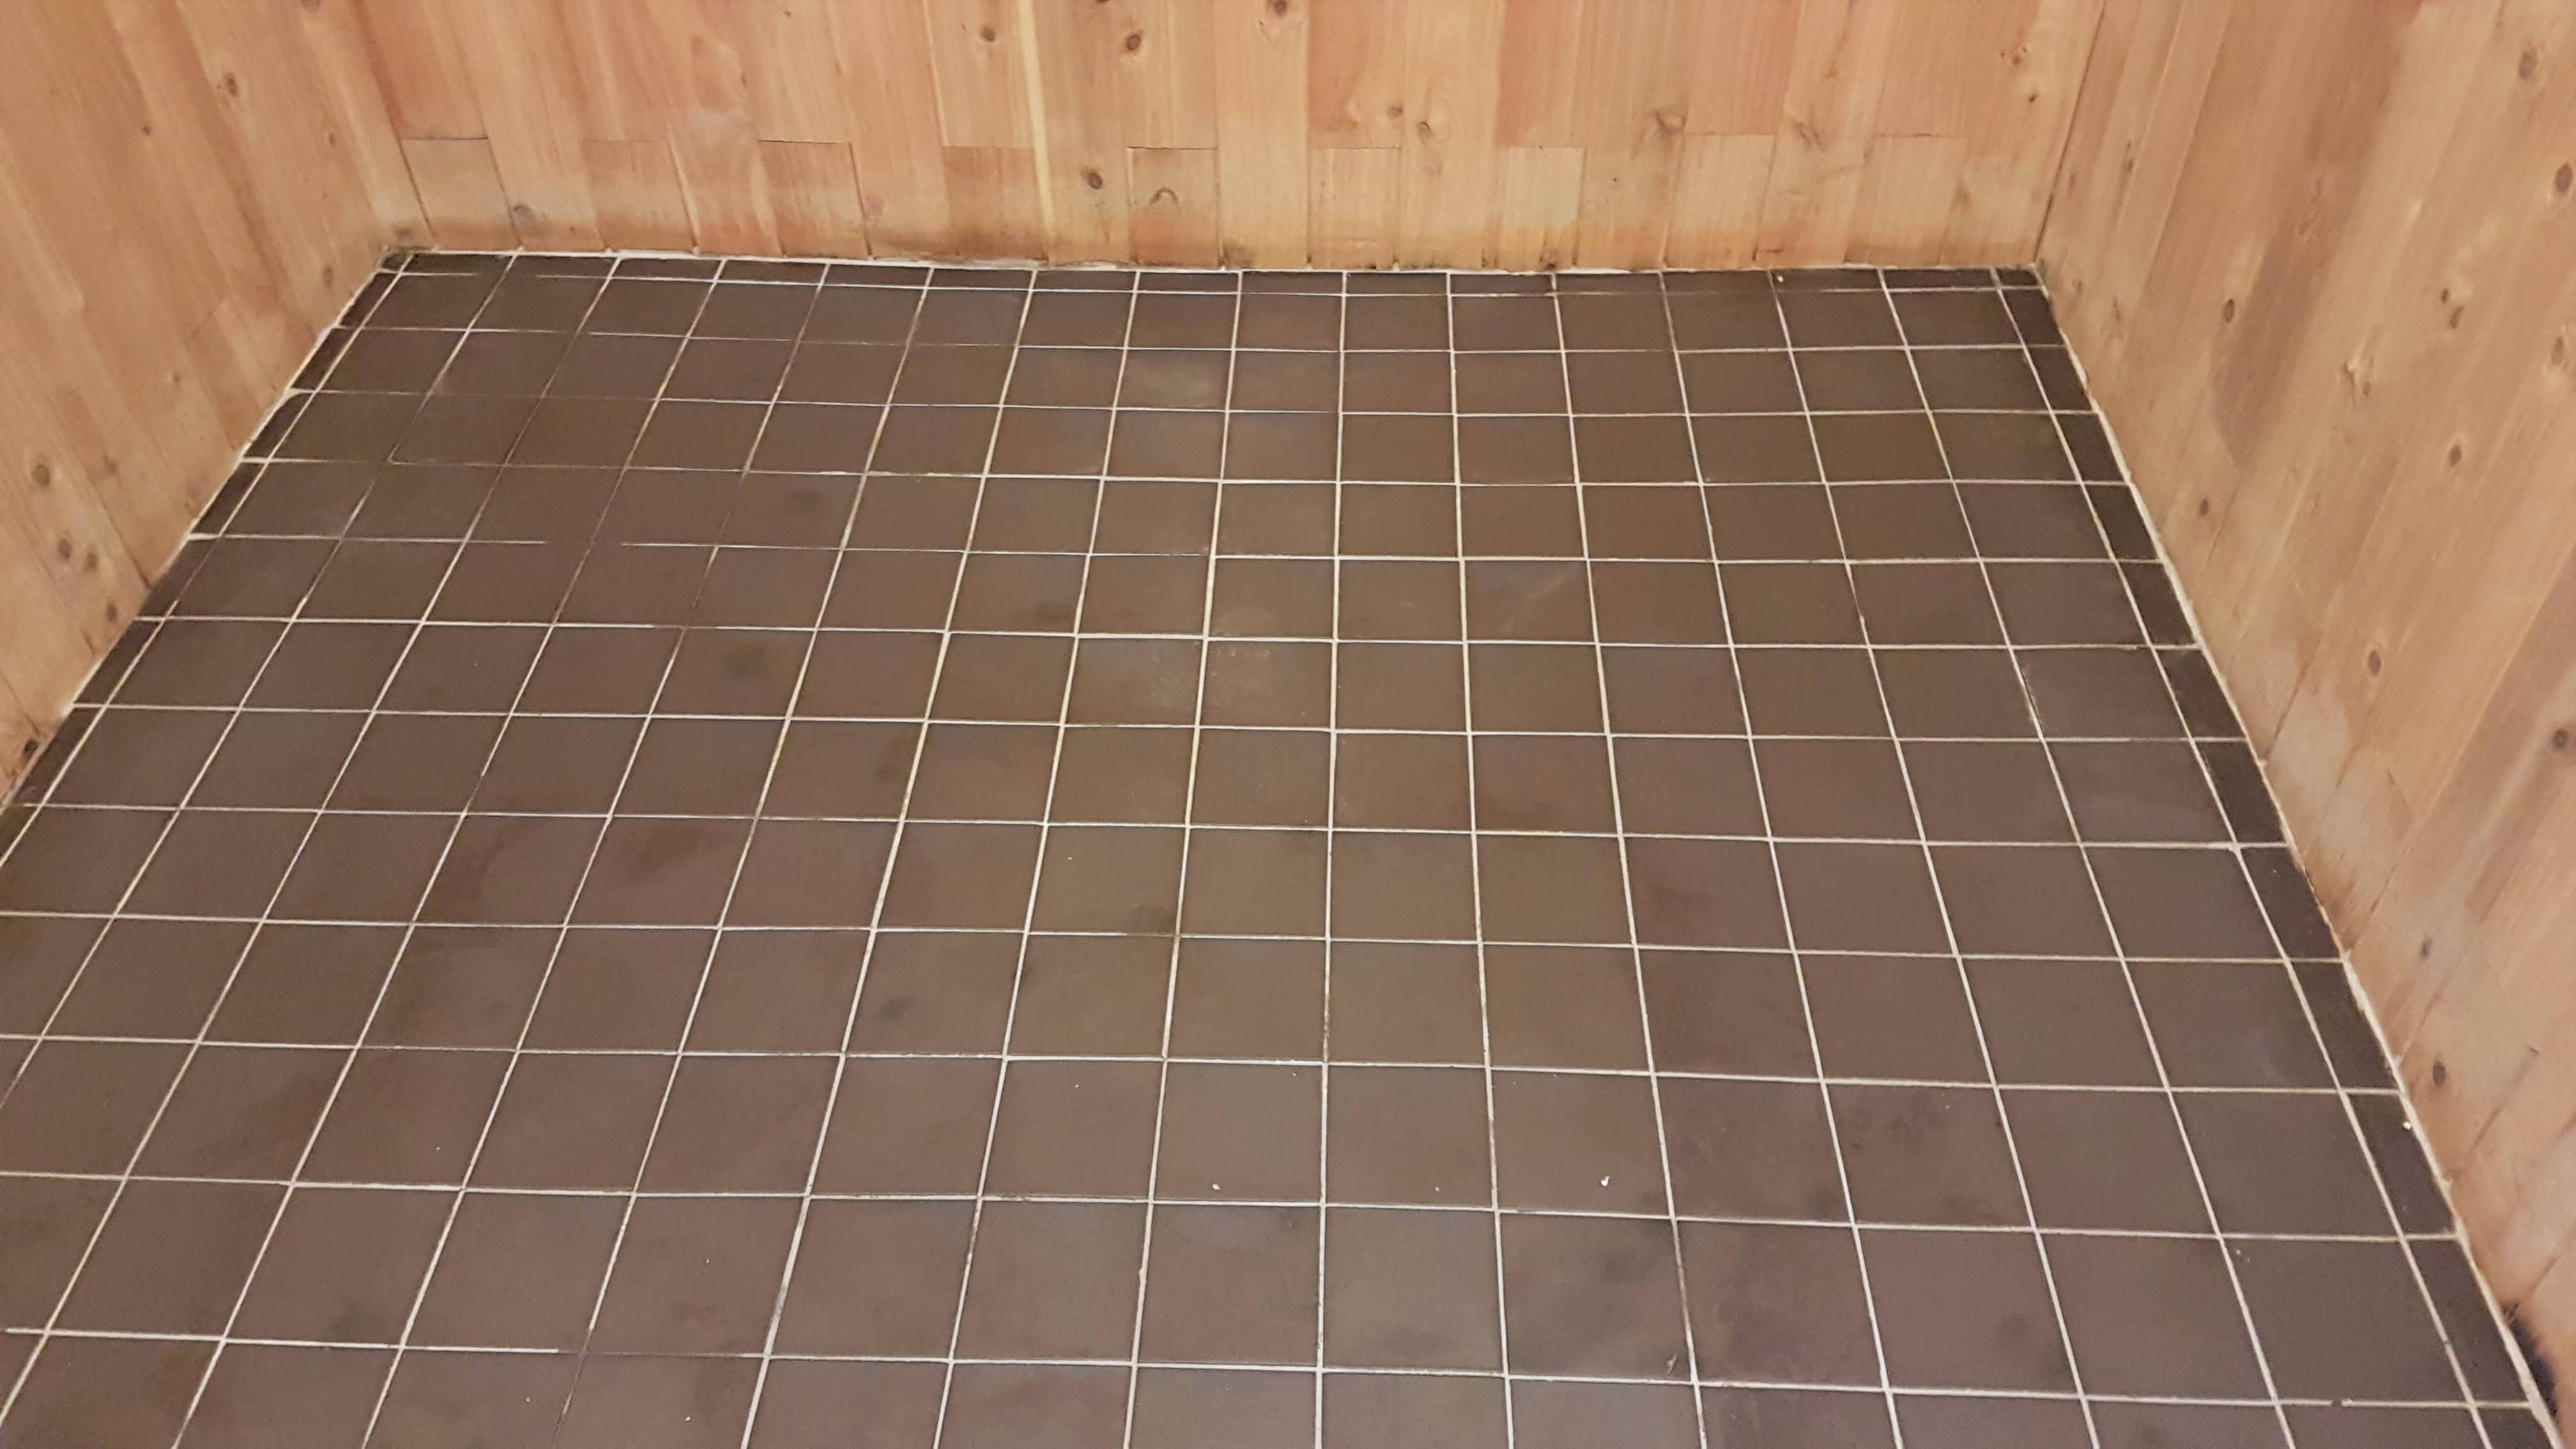
Ceramic Tiled Workshop Floor After Cleaning Uxbridge

Ceramic tiles have a glazed surface that won’t accept a sealer or Linseed Oil for that matter. There is therefore no need to apply any sealer or coating to this type of tile. They are generally very hardwearing and a suitable choice for a workshop like this. Hopefully, now the sticky oil has been removed the client will find the floor much more durable and easier to maintain.

The treatment worked well and I was able to complete the project in one day. The floor now looks like it should have done following the initial installation. Although it is only a small area, the difference is quite dramatic. My client was certainly pleased with the transformation and left the following feedback.

“Andrew is an expert in his field, and after an inexperienced tiler incorrectly used boiled linseed oil, Andrew worked to restore the tiles to their original beauty. I felt confident in him, he was a pleasure to work with, and his extremely professional. Very happy & highly recommended”


Professional Restoration of a Ceramic Tiled Workshop in Middlesex

Removal of Linseed Oil from a Ceramic Tiled Floor in Uxbridge Read More »

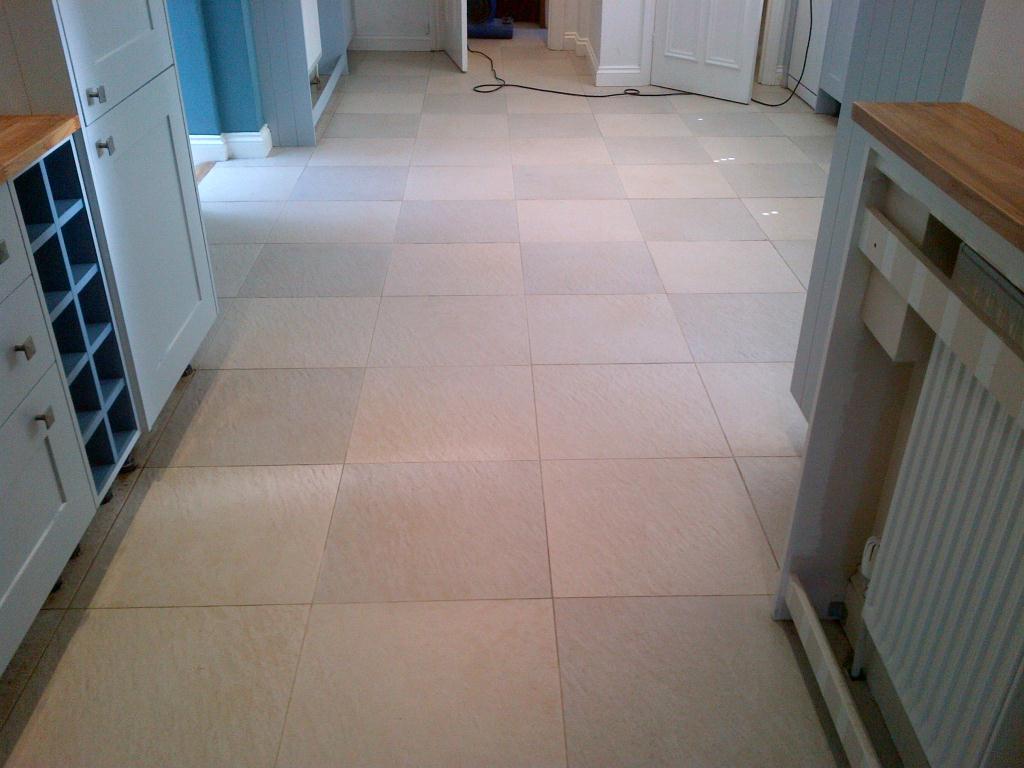
Porcelain Tiled Kitchen Floor Before and After Cleaning Henley-on-Thames

Deep Cleaning Dirty Ceramic Kitchen Tiles in Henley-on-Thames

This customer from the picturesque town of Henley on Thames got in touch to ask about cleaning and sealing her Ceramic tiled kitchen floor. Now Ceramic tiles are glazed and so normally won’t absorb a sealer so intrigued I scheduled a time to pop over and take a look. When I got here I could see the tiles were in deed dirty but as I suspected they were not Ceramic but micro porous Porcelain which does need to be sealed. In this case the sealer had worn off and dirt had become ingrained in the tiny pores of the tile.

Porcelain Tiled Kitchen Floor Before Cleaning Henley on Thames
The tiles were a Terracotta style Porcelain, but this was hardly recognisable due to the accumulation of dirt. I discussed all of this with the owner and agreed I would give the tile and grout a thorough deep clean and then reseal them to ensure the dirt was kept out of the pores in the Porcelain going forward.

Deep Cleaning a Terracotta Style Porcelain Tiled Kitchen Floor

As well as cleaning the floor I would need to remove any trace of original sealer if I was to achieve a consistent appearance later. To achieve this, I soaked the tile in a strong dilution of Tile Doctor Pro-Clean which was then left it to dwell for ten minutes, so it could get to work on breaking down old sealers and dirt.

The next stage was to work the Pro-Clean into the floor with a rotary floor buffer running on slow speed fitted with a black scrubbing pad. The cleaning solution soon changed colour with the dirt that became released. The floor was rinsed with water and the soiled cleaning solution extracted using a wet vacuum. The grout given the same treatment but this time by hand using a stiff brush and more Pro-Clean.

The floor was then rinsed again with water and then dried with a wet vacuum. Being micro-porous Porcelain, this didn’t take as long as clay tiles such natural Terracotta or Victorian.

Sealing a Terracotta Style Porcelain Tiled Kitchen Floor

The floor was then left to dry and I returned later to re-seal it for which I used a couple of coats of Tile Doctor Ultra Seal which is a natural look sealer that protects the tile from within by impregnating the pores in the tile with sealant thus preventing dirt from becoming trapped there.

Porcelain Tiled Kitchen Floor After Cleaning Henley on Thames
I think you will agree the floor now looks much cleaner and fresher, certainly my customer was happy with transformation and left the following note on the Tile Doctor feedback system.

“My manky old kitchen floor is absolutely transformed. So much easier, quicker and cheaper than getting the floor replaced. Andrew did an amazing job, highly recommended. Yvonne B, Henley”


Deep Cleaning and Sealing a Micro-Porous Porcelain Tiled Kitchen Floor in Buckinghamshire

Deep Cleaning Dirty Ceramic Kitchen Tiles in Henley-on-Thames Read More »

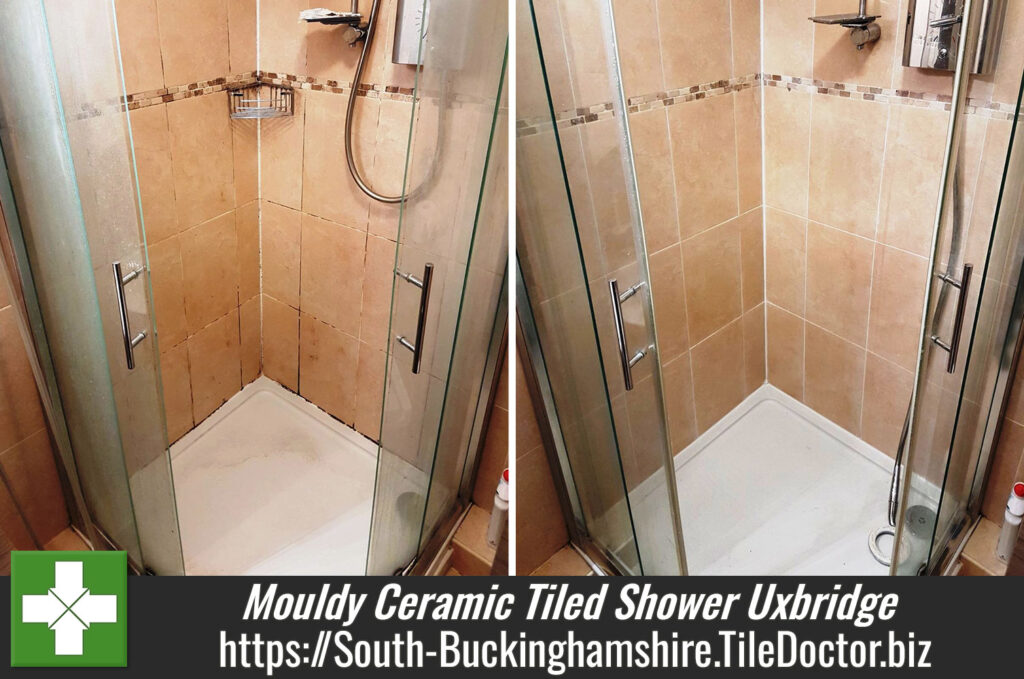
Mouldy Ceramic Tiled Shower Renovated in Uxbridge

Mouldy Ceramic Tiled Shower Renovated in Uxbridge

Ceramic and most Porcelain tiles are very easy to clean which makes them a good choice for shower cubicles, the one problem you will find though is that due to the cementitious nature of grout the top layer does attract dirt as can silicone. As a result, we recommend rinsing down showers with Tile Doctor Oxy-Pro on a regular basis or the problem will build. Mould can also be a problem especially if your bathroom is quite small or has inadequate ventilation to extract the hot steam in which mould thrives.

Ceramic Tiled Shower Cubicle Before Cleaning Uxbridge
This Ceramic tiled shower cubicle at a house in Uxbridge had all these problems and would need something much stronger to deal with the mould and remove the limescale which had also built up. Limescale from hard water is a problem that affects 60% of the UK with the South and East of England is particularly impacted due to the local chalk and limestone geology the water is filtered through. Buckinghamshire is known to have hard to very hard water and these tiny mineral deposits build up slowly on the surfaces of shower cubicles during use.

Deep Cleaning a Ceramic Tiled Shower Cubicle

To get the shower cubicle clean I began by spaying the tile and grout down with Tile Doctor Duo Clean which is a dual action product that is designed to clean grout and remove mould. You leave the product on the tiles for ten minutes and then scrub it in with a stiff brush, it’s hard work and you need to repeat in the stubborn areas, but it gets good results.

The tile and grout were then rinsed down with water and left to dry whilst I popped out for lunch. On my return I dried off any damp areas with a heat gun and took a step back to review the work I had done.

The results were good but unfortunately there were still a few dark stains in the grout which I was unlikely to be able to remove. When this happens, I find the best solution to achieve a consistent appearance is to apply a grout colourant to the grout. Tile Doctor grout colourants come in ten colours are relatively straight forward to apply, I always keep some of the popular colours in stock and on this occasion, I felt a White colourant would work best.

Normally the first stage would be to prepare the grout first with a pre-treater but given the grout had already been scrubbed hard I was able to move onto applying the colourant with a small brush. Grout Colourants not only recolour and rejuvenate the grout lines but also adds a barrier over the grout sealing it in and protecting it from further staining.

Whilst waiting for the colourant to dry I stripped out the mouldy sealant strip between the tile and shower tray and replaced with mould resistant silicone.

Ceramic Tiled Shower Cubicle Before Cleaning Uxbridge
The shower cubicle now looks much fresher and I’m sure will be a pleasure to take a shower in.

Professional Renovation of a Ceramic Tiled Shower Cubicle in Buckinghamshire

Mouldy Ceramic Tiled Shower Renovated in Uxbridge Read More »

Night Club WC Tile Cleaning After

Cleaning Ceramic Wall and Floor Tiled Toilets in a London Night Club

Our client’s project was to refurbish four toilets in a London Night Club but didn’t want the expense of replacing all the existing ceramic floor and wall tiles; after come across our web site we were invited to visit the club and provide a demonstration after which we were awarded the contract. Our main task on this project was to deep clean the ceramic wall tiles and floors and colour seal grout lines which had over the years had stained to a yellow appearance.

Night Club WC FloorTile Cleaning Before Night Club WC FloorTile Cleaning Before

Night Club Toilet Cleaning Day One

We started by giving all the tiles a though deep clean with Tile Doctor Pro-Clean which is a strong alkaline cleaner that is able to penetrate into the tile and lift the years of built up soiling on the tile and grout lines. This was followed with a further treatment of on the wall tile grout lines using Tile doctor Grout Clean up and another deep clean with Pro-Clean and pressure cleaned using our powerful truck mounted system which cleans under heat and high pressure and returns all the slurry to our recovery tanks for disposal.

Night Club WC Tile Cleaning After Night Club WC FloorTile Cleaning Before

Night Club Toilet Cleaning Day Two and Three

The tiles looked fantastic and like new again with the exception of the grout lines which although being deep cleaned of twenty years of dirt and grease still had a yellow appearance. The solution was to use a Grout Colourant to colour all the grout lines white again, the product we use is brilliant as not only does it give the appearance of newly applied grout is also protects the grout with a waterproof and stain proof barrier that is very easy to clean. Once dried we removed all the excess grout colourant residue from the tile and then polished the tiles to a pleasing high shine.

Night Club Urinal Wall Tile Cleaning Night Club WC Tile Cleaning After

The client was totally satisfied and impressed with our work which cost a fraction of what it could of cost to replace all the wall tiles. In fact a member of the management team was adamant that we had replaced the tile and grout as he thought it impossible we could of managed this good as new look any other way.


Commercial Tile Cleaning at a London Night Club

Cleaning Ceramic Wall and Floor Tiled Toilets in a London Night Club Read More »

Ceramic Tile Wendover After

Deep Cleaning Textured Ceramic kitchen floor tiles Wendover Bucks

We were asked to clean these textured ceramic floor tiles in Wendover Bucks which had become heavily soiled and ingrained with dirt leaving the tiles with a black appearance, the grout lines had also become stained and discoloured. Our customer had tried all types of cleaning agents but could never get the desired effect.

Ceramic Tile Wendover Washing Ceramic Tile Wendover Washing

Cleaning a Textured Ceramic Tiled Floor

A dilution of Tile Doctor Pro-Clean alkaline tile cleaner was applied throughout the tiled floor and worked in with the aid of a scrubbing pad fitted to a rotary machine, a stiff hand brush was also used along the grout lines and this managed to lift most of the soiling from the floor.

Next step was to use our powerful truck mounted heated turbo system which jet washed the remaining particles out of the crevasses of the stone. This system uses high pressure heated water though a spinner tool, it’s an amazing tool that returns the dirty water directly back to a recovery tank leaving the floor chemical free and neutralised.

Before leaving I recommended to the customer that regular use of Tile Doctor Neutral Tile cleaner would help to keep their tile and grout in better condition.

Ceramic Tile Wendover After Ceramic Tile Wendover After


Deep Cleaning Ceramic Tiles in Buckingham

Deep Cleaning Textured Ceramic kitchen floor tiles Wendover Bucks Read More »

Ceramic Tile and Grout Before and After

Grout colour seal and Ceramic tile clean in Chalfont St Giles

We were asked to improve the appearance of this Ceramic tiled floor and Grout installed in a kitchen in Chalfont St Giles which over a few years had become difficult to keep clean and the grout lines had become stained and discoloured.

Ceramic Tile and Grout Before Ceramic Tile and Grout Before

Cleaning Tile and Grout

Our first task on day one was to clean the Ceramic tiles and Grout so we created a diluted 50/50 mixture of tile doctor Pro-Clean and Nanotech UltraClean, the two products combine to provide a very powerful tile friendly alkaline cleaner with tiny sized abrasive particles. This was left to soak into the tile and grout before being agitated and scrubbed with a scrubbing machine running on low speed. We also used stiff grout hand brushes along the grout lines. Once we were happy with the overall condition of the tile and grout it was washed down using clean water and the resultant soiled solution extracted from the floor using a wet vacuum. I’m pleased to say that using this method we were able to return the tile and grout back to its original colour.

Whilst this was a fantastic transformation the grout lines being porous would untreated soon become dirty and discoloured. The only answer to this problem is a permanent colour seal to the grout lines which not only aids the future floor cleaning, but improves the whole appearance of the floor.

Applying the Grout Colour

Before applying a Grout Colour it’s important to ensure the grout is clean of grease and dirt naturally we had just cleaned this floor so this was not a problem I only mention it in case you were considering taking on a similar task yourself.

Once the grout has dried you can start applying the colourant which is a relatively straightforward process of squeezing the product onto a toothbrush and running it onto the grout. Don’t be tempted to use an old toothbrush for this purpose as it may contaminate the colourant leading to discolouration in the finish.

We completed the project the next day using an Aqua Mix sand coloured Grout Colourant; the customer was extremely pleased and commented how whole clean and efficient the process was.

Ceramic Tile and Grout After Ceramic Tile and Grout After


Tile Cleaning and Grout Colouring in Buckinghamshire

Grout colour seal and Ceramic tile clean in Chalfont St Giles Read More »

=================================

South Buckinghamshire Tile Doctor

================================= Read More »

Scroll to Top