Work by Category

South-Buckinghamshire-Tile-Doctor

Welcome to my Work History archive where you will find detailed examples of Tile, Grout and Stone Cleaning and Renovation work carried out through South Buckinghamshire.

To make things easier to find I have organised the posts by the most popular types of Tile and Stone. I also renovate other materials so if you’re looking for something else do get in touch as it’s highly likely we have the solution.

Popular requests include Ceramic Tile, Encaustic Cement, Fireplaces, Flagstone Pavers, Grout Cleaning, Limestone, Marble, Porcelain Tile, Quarry Tile, Sandstone, Slate, Terracotta Tile, Terrazzo Floors, Travertine, Victorian Flooring and Vinyl Floors.

Porcelain Tiled Patio Restored Wendover

New Porcelain Patio Ruined During Installation Restored in Wendover

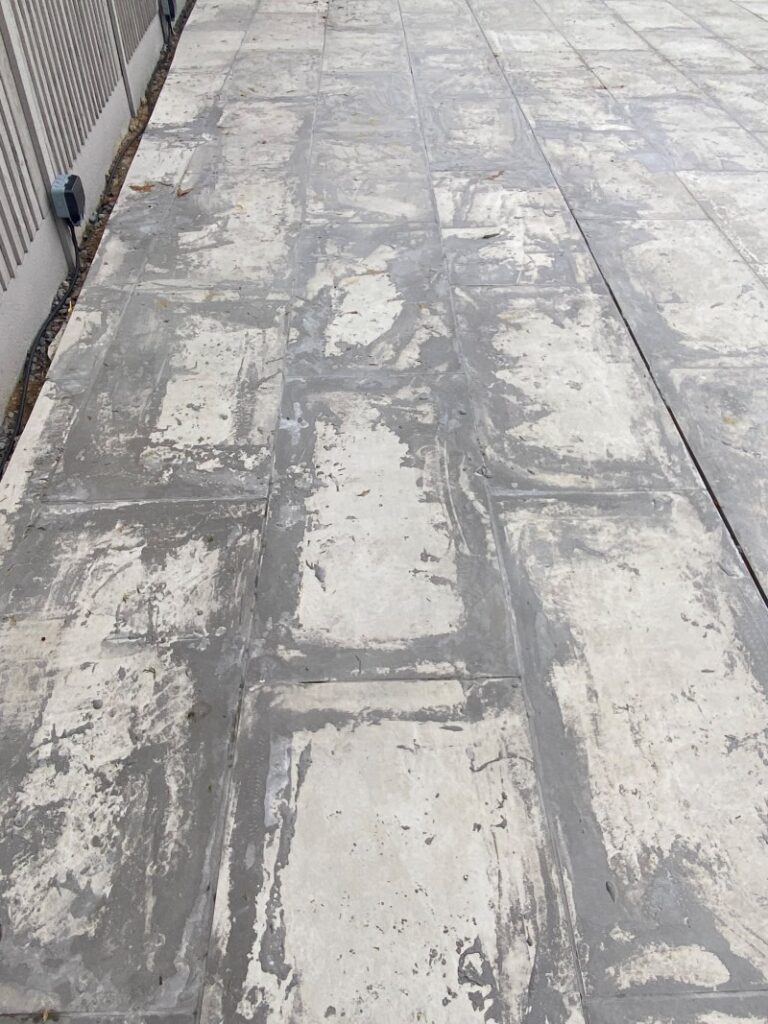
The pictures below are of a newly laid Porcelain patio at a property in Wendover. The builder had done a decent job of laying a level tiled patio, but completely ruined it when applying the grouting.

At the customer’s request the builder had used a modern cement-based grout and applied it as a slurry so he could use a squeegee to spread it into the grout lines. Unfortunately, he did not have much experience using this method or type of grouting and as he began grouting it started to rain heavily. Then instead of trying to rinse it all off before it could set, he and the customer left in place. The grout then hardened on the surface where it proved impossible to remove.

Porcelain Tiled Patio Before Cleaning Wendover

Having spoken to the customer over the phone I agreed to pop over and take a more detailed look at the problem. When coming to have a look at the job I knew how difficult it would be however after evaluating a couple of options I worked out a plan for cleaning away the excess grout and provided the customer with a quote. Happy to hear the situation could be resolved my quote was accepted and a date scheduled for the work to begin.

Porcelain Tiled Patio Before Cleaning Wendover

Removing Grout Staining from a New Porcelain Tiled Patio

From the testing earlier I knew the only product that would have a chance of removing the thick layer of grout would be Tile Doctor Grout Clean-up. It’s an acidic cleaning agent designed for this sort of problem and it this case it needed to be as strong as possible so I applied it neat.

Once applied I left it a few minutes before running over the Porcelain Tiles with a Rocky floor buffer fitted with a Silicon Carbide brush. I added extra weights to the machine to increase traction so in total it weighed in at about 65kg. All that weight going onto the patio helped scrub in the cleaning agent and although it did remove some of the cement-based grout it was not as much as expected.

The solution was to scrape off the thicker chunks of grout and I then follow up with a rotary hand tool fitted with an 80-grit brush on the end. Using the hand tool allowed me to get into the grooves of the tiles making it easier to clean as it was a rough textured porcelain tile. As I was cleaning with the hand tool, I also added more Grout Clean-up onto the tile to help soften the grout. By the end of day one we had two sections left however I know had a working solution and knew exactly what was needed to restore the patio.

By the end of day one with about 45m2 of patio remaining I realised it would be quicker with an extra pair of hands so I called neighbouring Tile Doctor Barry Woodward who covers Oxfordshire. Fortunately, Barry was available and so the next day we set about repeating the previous days method of scrapping off as much grout as possible and then going round with the hand tool spraying more Grout Clean-up on every inch of the patio. Slowly but surely, we made it through the last two sections and removed all the grout staining.

After that we gave the patio one last clean with a Tile Doctor Neutral Tile Cleaner to neutralise any acid which might still be on the surface of the Porcelain tile. In total twenty litres of Grout Clean-up were used on this job, not to mention the sweat.

Porcelain Tiled Patio After Renovation Wendover

Once complete the patio was completely transformed and looked like it had come out of a showroom. I’m pleased to say my customer was over the moon and later that day sent the following message:

My apologies when you left, I was slightly distracted by a work issue but I wanted to add my heartfelt Thanks to you and Barry for helping sort this patio out. The patio Situation has been a constant stress for the last 2 months And I’m amazed to see it in such great shape I realise it wasn’t easy and a great deal of effort was spent, you guys really are magicians. Once again thank You so much for your hard work.

Porcelain Tiled Patio After Renovation Wendover


Professional Restoration of a Porcelain Patio in Buckinghamshire

New Porcelain Patio Ruined During Installation Restored in Wendover Read More »

Limescale Stained Slate Shower Floor Renovated Penn

Removing Limescale from Slate Wet Room Tiles in Penn

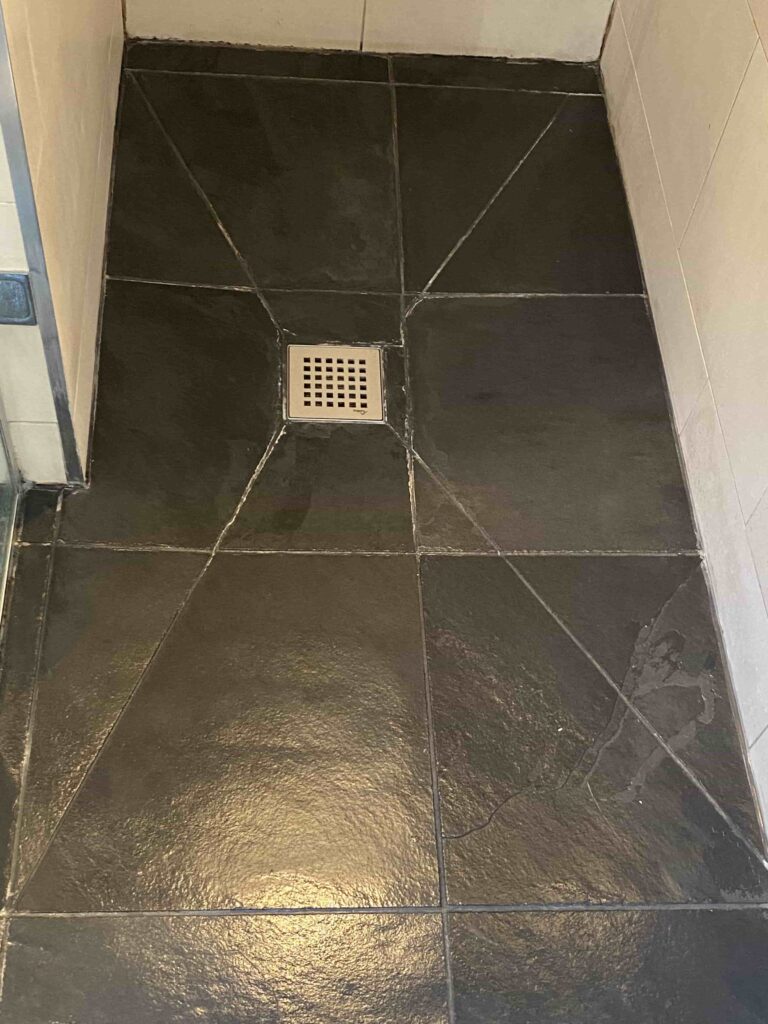
This is a great example of what we can achieve with very stained Slate Tiles so well worth sharing. The customer was from Penn in Buckinghamshire and as you can see from the photo below the Slate tiled floor in their wet room was heavily stained with thick limescale mainly around the shower trap where the water collects.

Limescale Stained Slate Shower Floor Before Cleaning Penn

Buckinghamshire is known for its hard water problems which basically means the water contains high levels of calcium carbonate. These deposits are carried in the water and left on the tiles after each shower resulting in Limescale. You can reduce the problem by installing a water softener and it can be dissolved using some of the strong products you find in supermarkets however these are acidic and can etch natural stone if you are not careful. Always read the label!

In this case my customer had just moved into the house and wanted to improve the look of the bathroom and then eventually they planned to change the whole bathroom itself, but in the meantime wanted it cleaned and restored.

Cleaning a Slate Tiled Shower Floor

To renovate the Slate tiles, I started with the application of a strong dilution of an alkaline product made by Tile Doctor called Pro-Clean. This is a great grout cleaner and when used as a strong dilution it will also strip off any sealer remaining on the Slate.

I used the usual method of spraying the Pro-Clean onto the tile and grout and leaving it to soak in for at least ten minutes so it can get to work. It was then scrubbed in with hand tools and an 80-grit silicon carbide brush which is a very effective combination. This gave the stone a deep clean and removed some of the thick limescale on the tiles which was rinsed off with water.

Once the floor had been cleaned and stripped back, I used another Tile Doctor product called Grout Clean-up which is an acidic cleaner and is applied in the same way. Because the build-up of Limescale was so thing I found that a lot of pressure was needed when scrubbing the tiles and, in some areas, I needed to use a scrapper to take off the top layer.

Sealing a Slate Tiled Shower Floor

After cleaning off all the limescale and giving the stone a good rinse, I dried the floor using a white rag and left it to dry off so it would dry enough for sealing. After giving the floor time to dry I used tile doctors oil-based sealer called X-Tra seal putting down a thick coat and allowing the tiles to soak up the sealer. After some time, the floor was then buffed with a cloth to remove the excess and then a second coat was applied.

Limescale Stained Slate Shower Floor After Cleaning Penn

X-Tra Seal adds the oil back into the stone which restores the dark tones and bring out the natural colour in the Slate, its also rated for external use so will cope well with the damp conditions of the wet room. After that coat had dried a 6-inch 1500-grit buffing pad was used to remove excess sealer and add a slight sheen to the floor.

The fresh sealer should make the Slate less prone to limescale deposits however its not going to prevent the problem indefinitely. Also, for the aftercare of sealed shower tiles, I recommend Aqua-Pro which is a mild cleaning product designed for regular use and won’t harm the sealer like many of the stronger products you find in supermarkets.


Professional Restoration of a Slate Tiled Shower in South Buckinghamshire

Removing Limescale from Slate Wet Room Tiles in Penn Read More »

Modern Encaustic WC Floor Tile Renovation Marlow

Modern Encaustic Floor Tiles Renovated in Marlow

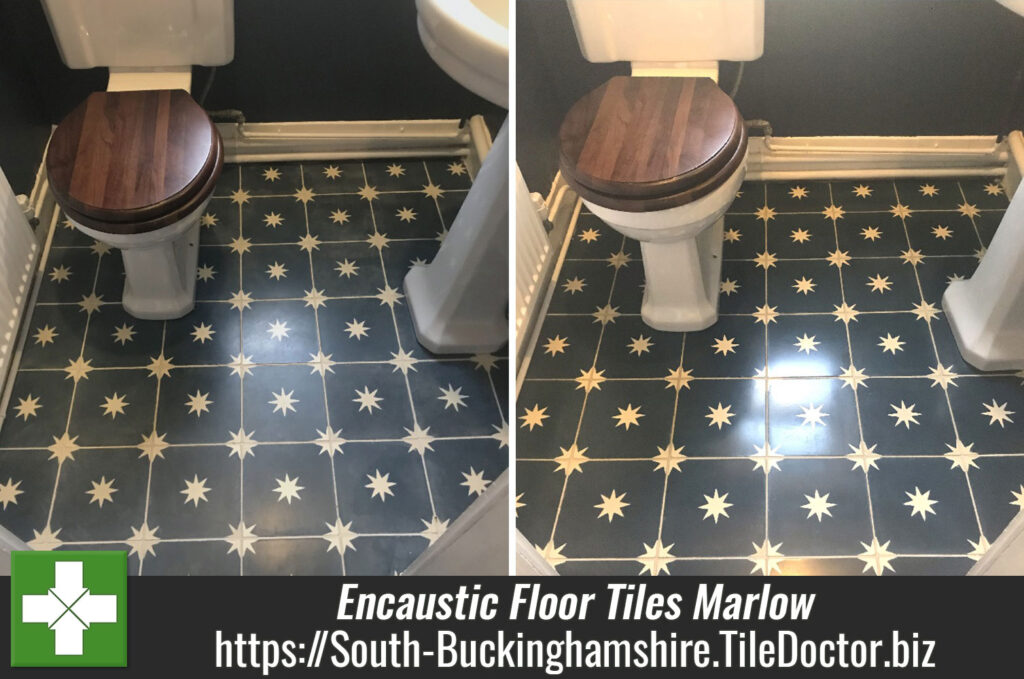
The pictures below were taken at a property in the old town of Marlow which had modern Encaustic tiles installed in the downstairs WC. Although they may appear on first appearance to be perfectly fine the owner had called us in to deal with the staining around sink area around toilet.

The tiles had only been installed six months earlier and after surveying the floor it was clear to me that the tiler hadn’t applied enough protective sealant following installation. I quoted for deep cleaning the floor with diamond burnishing pads and then re-sealing with a stronger sealer which given the small size of the floor should be completed in a day.

Modern Encaustic WC Floor Tiles Before Renovation Marlow

Deep Cleaning an Encaustic Tiled WC Floor

To remove the original sealer and deep clean the encaustic tiles I started with a 200-grit burnishing pad lubricated with water. The floor was too small for a buffer machine so I used 6-inch pads fitted to a hand buffer. This action cuts back the tiles removing the stains in the process.

After rinsing and extracting the soiling that was generated, I checked the floor to confirm the staining was gone. I could see that the 200-grit pad had done the job and there was no need to apply a coarser 100-grit so I followed up with finer 400 and 800 grit pads. Again, water was used to lubricate the process and the floor was rinsed and extracted after each pad. I went over the floor slowly to ensure each tile had a deep clean and to avoid creating any swirl marks.

Once the 400 & 800 grit pads had been applied, I buffed the tiles with a White rag to remove any excess water and get it ready for the next pad which would enhance the deep blue colours in the floor. Once the floor was dry a very fine 1500-grit pad was applied to compete the burnishing and add a slight shine to the tiles, this also leaves the floor nice and dry and ready for sealing.

Modern Encaustic WC Floor Tiles Before Renovation Marlow Modern Encaustic WC Floor Tiles After Renovation Marlow


Sealing an Encaustic Tiled WC Floor

To seal the floor, I used an oil-based sealer called Tile Doctor X-Tra Seal, which is rated for internal and external use. I allowed it to soak into the encaustic tiles which would allow the colours to really darken after the use of the burnishing pads.

After about thirty minutes I rubbed off the excess with a White cloth and then proceeded to apply a 3000-grit buffing pad to leave a smooth surface and an even shine all over the floor. I finished off with a further coat of X-Tra Seal and left for 30 minutes and repeated the same process giving a deep colour finish and leaving the floor well protected.

Modern Encaustic WC Floor Tiles After Renovation Marlow

The customer where very happy with the result and recommended us to friends of theirs who had the same tiled floor. Before leaving I spent a few minutes to discuss aftercare cleaning, which for this floor I recommend Neutral Tile Cleaner.


Professional Renovation of Stained Encaustic Tiles in Buckinghamshire

Modern Encaustic Floor Tiles Renovated in Marlow Read More »

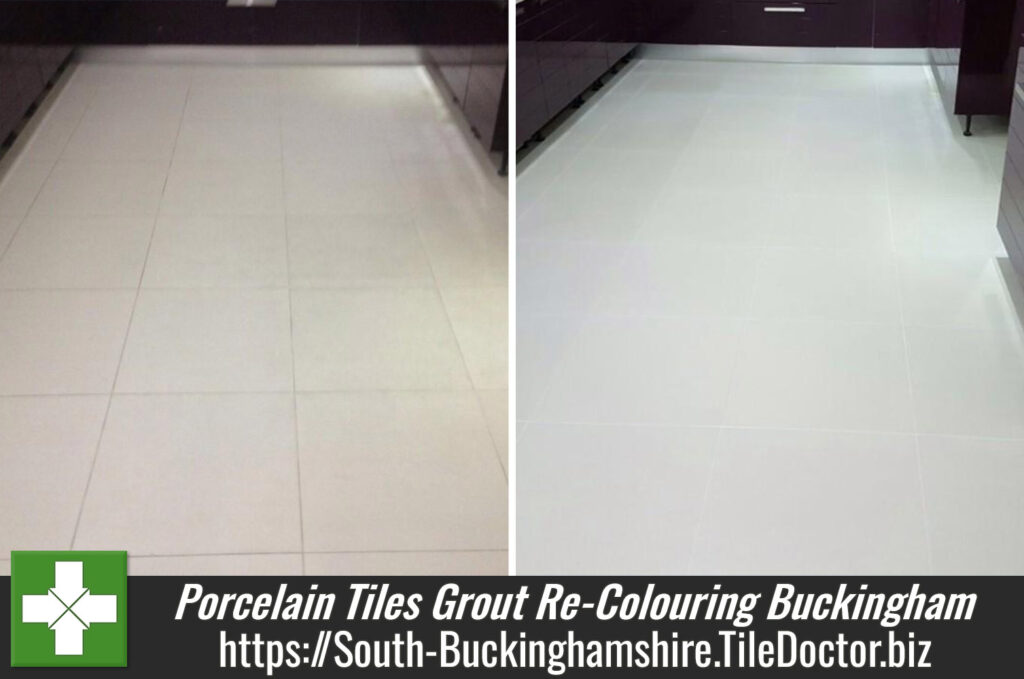
Porcelain Tile and Grout Renovation Chalfont St Peter

End of Tenancy Renovation of Porcelain Tile and Grout in Chalfont St Peter

I recently paid a visit to a rental property in Chalfont St Peter which had Porcelain tiled floor which needed an End of Tenancy Clean. Porcelain tiling is a great choice for a rental property as its very to maintain however in this case it was the grout that was letting the floor down.

Porcelain Tiled Floor Before Cleaning Chalfont St Peter

It seems the previous tenant had tried using a white grout pen to colour the grout lines when they first moved in and since then the colourant has started flaking off resulting in a very patchy appearance and the exposed grout becoming darker.

The client wanted me to come in and clean the floor and to make the grout lines unison. The property wasn’t going to be rented out again as the owner was planning to move back in after living abroad for several years.

Deep Cleaning Porcelain Tile and Grout

On the first day I started giving the Porcelain tile and grout a much needed deep clean using a Rocky floor machine fitted with a Silicon Carbide brush and lubricated with a strong dilution of Tile Doctor Pro-Clean. Carbide brushes are perfect for hard floor cleaning and in this case had the additional advantage of cleaning away the flaky grout pen.

This cleaning process was applied section by section vacuuming up the slurry with a wet vacuum along the way. I then hand scrubbed the grout lines with Grout Colourant Pre-Treat Cleaner which is an effective ready-to-use cleaner designed to lightly etch the surface of the grout to ensure a better adhesion with the colourant. It also removes dirt, soil, soap scum and hard water deposits from grout joints. Once everywhere had been treated I mopped the floor with Neutral Tile Cleaner, rinsed with water, extracted with the wet vacuum again before finally leaving the floor to dry off overnight.

Applying White Grout Colourant to a Porcelain Tiled Floor

On day two I knew my main problem would be making sure that the White grout colourant was able to adhere to those areas of grout that had been coloured with the pen. I didn’t have to worry though as it worked perfectly. The application basically involves using a small brush to push the colourant into the grout lines and gently cleaning up the edge of the tiles to remove the excess colourant before it can dry.

After the first coat dried it brighten the floor massively however in some of areas you could still make out the old from the new so I needed to give the grout lines a second coat using the same technique as before. Once the second coat had been applied, I allowed it to settle and go off before giving the floor a check over to make sure I was happy with the result.

Porcelain Tiled Floor After Cleaning Chalfont St Peter

My customer was over the moon with the difference and was much relieved that the floor had been restored after the condition the previous tenants had left it in.


Professional Grout Restoration Services in Buckinghamshire

End of Tenancy Renovation of Porcelain Tile and Grout in Chalfont St Peter Read More »

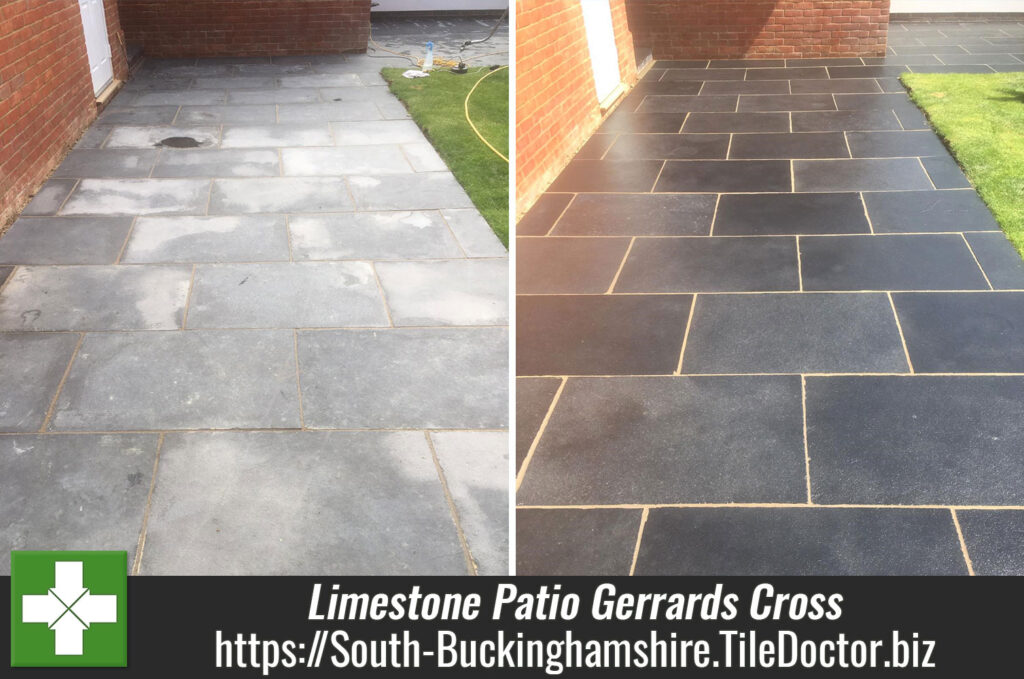
Black Limestone Patio Renovation Gerrards Cross

Dull Black Limestone Patio Renovated in Gerrards Cross

This customer from Gerrards Cross contacted me about their Black Limestone patio which had not been laid that long ago but was already in need of attention. Having spoken to the owner on the phone I arranged to visit the property so I could assess the issues in full and prepare a quote.

Black Limestone Patio Before Renovation Gerrards Cross

I visited the property to survey the patio and could immediately see that the Black Limestone flags looked washed out and grey, nothing like the beautiful dark stone he was expecting. It was clear that the installers hadn’t done anything to the stone after laying the patio, excess grout (grout haze) needed removing and no protective sealer had been applied resulting in staining from plant pots and spillages.

I recommended a restorative treatment involving deep cleaning, removing the grout smears, oiling to restore texture and the application of a colour enhancing sealer. This process would restore its original appearance and get the patio looking as it should.

Black Limestone Patio Before Renovation Gerrards Cross

Happy to hear the situation could be resolved my quote was accepted and a date scheduled for the work to begin.

Cleaning and Restoring a Black Limestone Tiled Patio

I arrived on the first day and started by helping the customer move furniture off the patio so I had a clear work area. Then work started off by scrubbing the stone with a Rocky floor machine fitted with a silicon carbide brush. This action gets into the stone giving them a deep clean, with the brush I also applied Tile Doctor Pro-Clean which is a strong alkaline cleaner and left that down for fifteen minutes to soak in first. With the dirt released from the stone onto the surface a wet vacuum is used to hoover up the resultant slurry.

Once cleaned the patio was inspected and I could see there was still evidence of grout haze on the Limestone so I used a 400-grit burnishing pad with water to take if off and then left the patio to dry out overnight ready for sealing. This work as actually carried out in the summer of 2022 so the weather wasn’t a problem.

Sealing a Limestone Tiled Patio

On the second day work started by checking the moisture readings of the Limestone tiles using a damp meter. The readings were within tolerance so I was able to apply an initial coat of Tile Doctor Colour Grow sealer which is a colour enhancing impregnator that soaks into the pores of the stone. A very thick first coat was applied and allowed to soak in which it did very quickly.

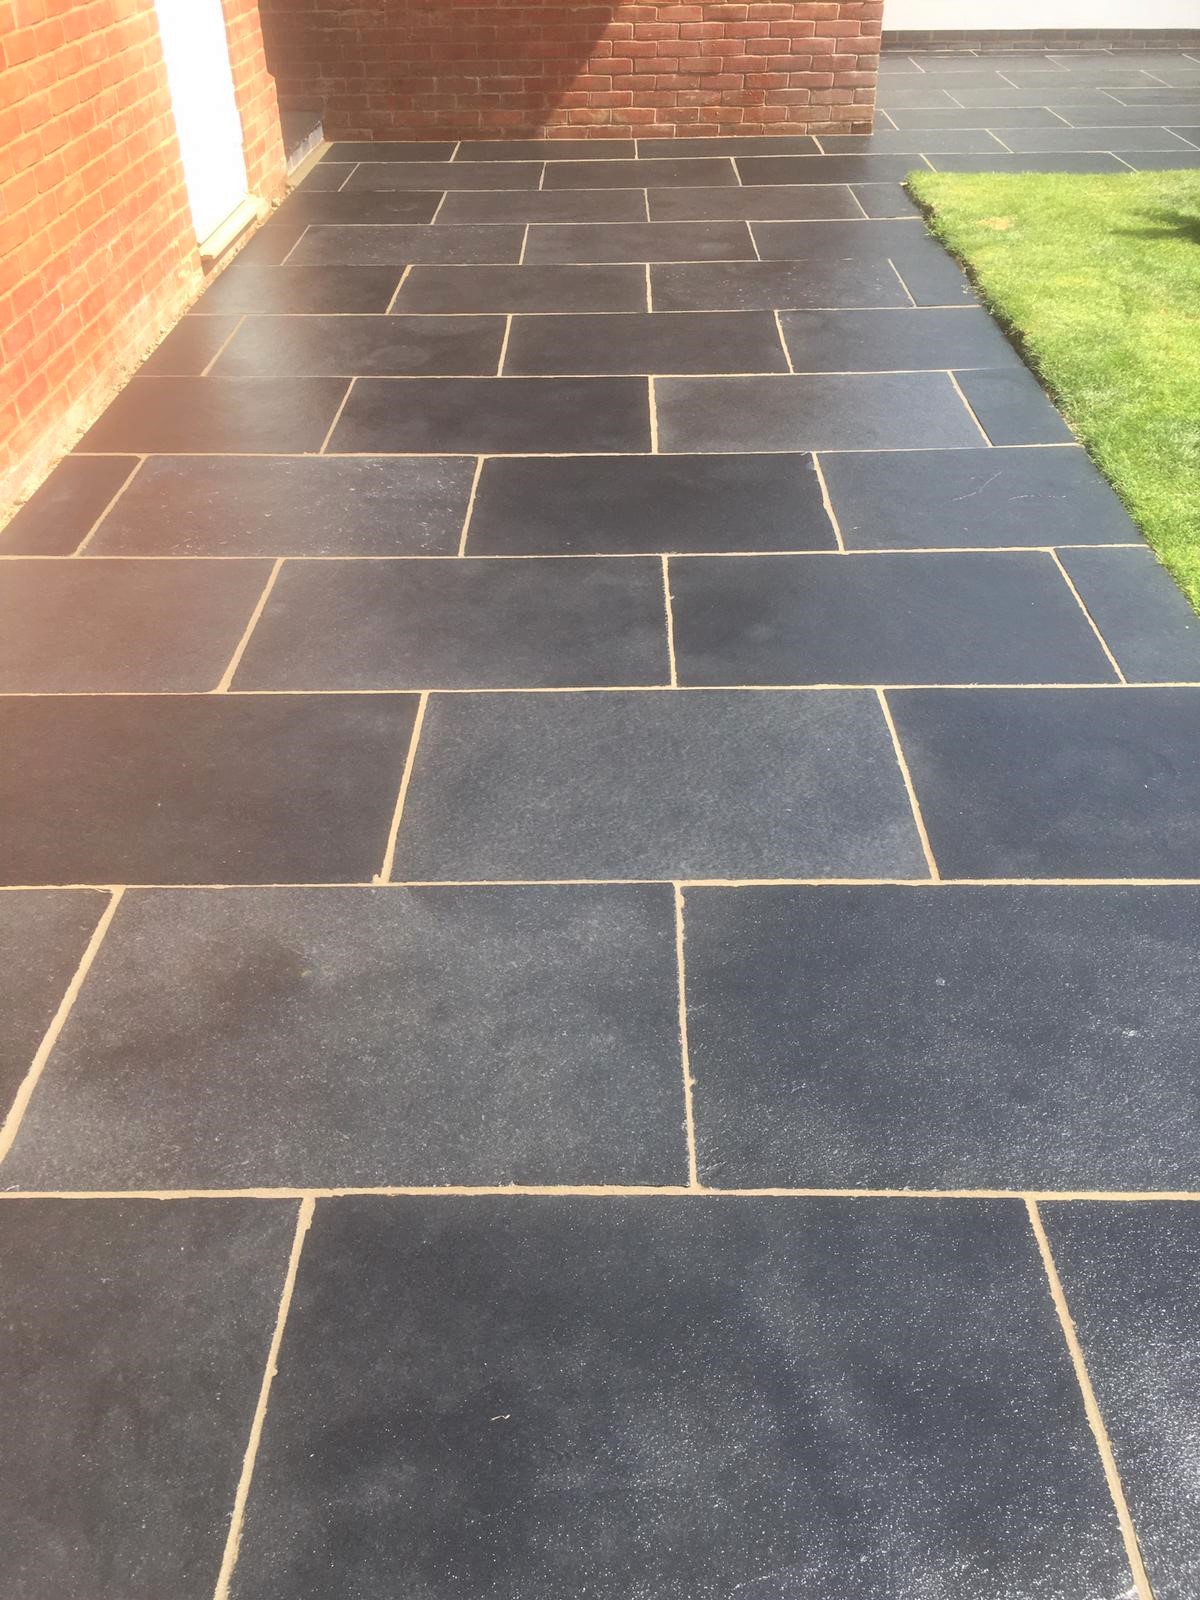
This was then followed by a thick coat of Tile Doctor Stone Oil and allowed to soak in for roughly an hour before buffing it with a cloth to collect any excess residue. The Stone Oil gave the tiles a very deep black colour which seeped into the stone and this is exactly the appearance my customer wanted. It was quite the transformation from the dull washed-out looking patio that was here before.

Black Limestone Patio After Renovation Gerrards Cross

Finally, I applied a third and final coat of Tile Doctor Ultra-Seal resulting in a resilient sandwich of coatings that should keep the stones appearance for some time to come. This last coat was applied using a microfibre cloth allowing it to seep into the stone. Once I felt the Black Limestone had dried sufficiently, I used a white buffing pad to buff over the patio and remove any residue.

The customer was very happy with his new patio and recommended me to a neighbour who had a similar problem with their patio.

Black Limestone Patio After Renovation Gerrards Cross


Professional Restoration of a Black Limestone Patio in Buckinghamshire

Dull Black Limestone Patio Renovated in Gerrards Cross Read More »

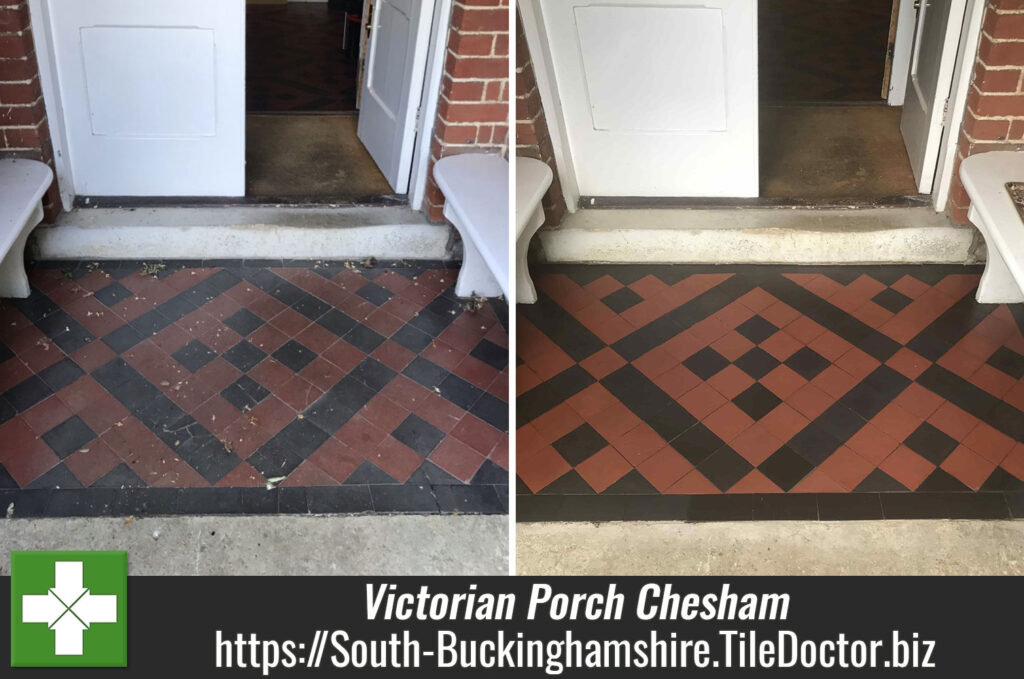
Victorian Porch Tiles Renovated in Chesham

Cracked Victorian Hallway and Porch floor tiles Restored in Chesham

This client from Chesham got in touch due to cracked and chipped Victorian tiles in their hallway. The Victorian floor tiles in both the hall and the outside porch were over 150 years old and many of them needed replacing and relaying, they also wanted the floor to be cleaned and sealed.

Victorian Tiled Porch Floor Before Restoration Chesham

They were keen to spruce up the entrance area to the property and ensure it retained its original appearance in keeping with the age of the property. I visited site to check what needed to be done and gave them a quote for the work which they were happy to accept.

Repairing a Victorian Tiled Hallway and Porch Floor

Arriving on day one of a four-day job I marked out which tiles would need replacing as the client wanted to only do this kind of job once so any tiles with a chip or crack in had to be replaced. Fortunately, we were able to source a good range of reclamation and reproduction tiles so finding replacements to match is not too difficult. In total 90 tiles need replacing and work began by cutting out the grout lines around the broken tiles then drilling through the middle to stop any other tiles breaking around it and carefully removing them.

Victorian Tiled Hallway Floor During Restoration Chesham

We were able to remove all the damaged tiles on day one so the morning of day two began with measuring, cutting, and placing in the replacement tiles to be fixed in later that day using a flexible Mapie adhesive. With the repairs out of the way and the replacements now firmly fixed in place we would be able to start the cleaning on day three.

Deep Cleaning a Victorian Tiled Hallway and Porch Floor

To deep clean the Victorian tiles a high alkaline cleaner called Tile Doctor Pro-Clean was sprayed onto the floor, left to soak in for ten minutes and then scrubbed in with a rotary floor buffer fitted with a Black pad. A wet vacuum was then used to hoover up the slurry.

Next step was to treat the tiles to an acid rinse to neutralise any latent alkaline salts in the floor that might lead to efflorescence later and further clean up the tiles by removing grout hazing. I used Tile Doctors Acid Gel for this and worked it in this time with a coarse 200-grit diamond pad. After another rinse and extraction using the wet vacuum.

Victorian Tiled Hallway Floor During Restoration Chesham

To further improve the appearance of the tiles and blend the replacement tiles in with the original I continued the cleaning with finer grades of diamond burnishing pads until satisfied the floor was as good as it could be. Afterwards the floor was given a light mop with Tile Doctor Neutral Tile Cleaner to remove any dust etc and left it to dry off for a couple of hours. At the end of day 3 it was dry enough to accept a single base coat of Tile Doctors Colour Grow, this is a colour enhancing sealer that will help blend the new and old tiles and give a uniformed look.

Sealing a Victorian Tiled Hallway and Porch Floor

Day 4 the final day of the job I arrived and buffed over the floor with a White pad to get rid of any wet patches from putting the sealer down the day before. Then I applied two coats of using Tile Doctors X-Tra Seal onto the floor leaving a good hour in between each coat for the seal to soak into the pores of the tile and create a nice hard layer to protect them. Once both coats had dried, I went over the floor with a 3000-grit pad to give the floor a slight shine.

Victorian Tiled Hallway Floor After Restoration Chesham

The client was very happy with the finished result and before leaving I took time to recommend the use of Tile Doctor Neutral Cleaner for on-going cleaning. It’s a neutral pH cleaner that’s ideal for the regular cleaning of sealed tiles, supermarket cleaning products are generally too strong for this job and will erode the sealer.

Victorian Tiled Porch Floor After Restoration Chesham


Professional Restoration of a Victorian Tiled Hallway and Porch in Buckinghamshire

Cracked Victorian Hallway and Porch floor tiles Restored in Chesham Read More »

Smooth Indian Sandstone Kitchen Floor Renovation Gerard's Cross

Smooth Indian Sandstone Kitchen Floor Transformed in Gerrards Cross

This client in Gerrard’s Cross wanted to be able to see the different colours and features in their Sandstone Kitchen floor and to remove the ring marks which you can see in the photograph. They had just moved into the house in and loved the Stone floor but soon realised the previous owners hadn’t taken much care of it. They tried a selection of supermarket products to clean the floor but none of them made much of difference.

Smooth Indian Sandstone Floor Before Cleaning Gerrards Cross

I carried out a site visit and it was clear to me that what was once a light Sandstone have literally darkened with all the dirt it had absorbed. I was confident that the dark stone could be deep cleaned and lightened to give them what they wanted, and then protected with a fresh sealer to ensure it remained that way. I worked out a quotation which they agreed to, and we arranged a date for the work to start.

Deep Cleaning a Sandstone Tiled Kitchen Floor

Day one of the work started by deep cleaning the Indian Sandstone tiles and removing as much of the dirt that become stuck in the pores of the stone as possible. To do this the floor was wetted with a strong dilution of Tile Doctor Pro-Clean which is our go to tile and grout cleaning product.

After leaving it to soak in for ten minutes the solution was scrubbed int the stone and grout using a rotary floor buffer which was setup with a black scrubbing pad. This action drew the dirt and any remaining old sealer out to the surface where the soiling could be extracted with a wet vacuum.

The next step was to refinish the surface of the stone using a set of Tile Doctor’s Diamond Burnishing Pads. Starting with a 400-grit pad to remove the ring marks in the floor created from plant pots and then continuing through the different grits from 800 to 1500 grit which gave the floor a natural sheen and then a 3000-grit pad to finish. The floor is rinsed with water between pads and the slurry generated extracted with the wet vacuum as before.

The lower grit pads are applied with water to help lubricate the process however the last pad is applied almost dry with only a little water sprayed onto the floor so by the time the process in completed its well on its way to being dry.

Sealing a Sandstone Tiled Kitchen Floor

I left the floor to fully dry off overnight and came back the next day to apply the sealer. Before starting thought I gave the floor another run over with the 3,000-grit pad just to tighten the pores before sealing.

To seal two coats of Tile Doctors Ultra-Seal were applied, this is an almost invisible product recommended for use in food preparation areas that leaves the stone in a natural finish which was the effect my client had requested. They had long French patio doors leading onto the garden and wanted to allow as much light in as possible because before the floor was cleaned the room was quite dark.

After allowing the seal to soak into the Indian sandstone I gave the floor one last buff with a fresh 3000 grit pad to burnish more of a natural sheen onto the floor and to bring out the colour definition.

Smooth Indian Sandstone Floor After Cleaning Gerrards Cross

Once complete the floor was transformed from dark to light and looked so much cleaner. My client was very impressed by the work and surprised at how different the floor looked with the colours coming through and said she would recommend me to her friends and family in the area.

For after care I recommended the use of Tile Doctor Stone Soap which is a gentle cleaner that won’t degrade the sealer and will help keep the patina on the stone. Most supermarket tile cleaning products are simply too strong for a sealed floor so it’s always worth checking the label in detail before buying.


Professional Renovation of an Indian Sandstone Tiled Sandstone floor in South Buckinghamshire

Smooth Indian Sandstone Kitchen Floor Transformed in Gerrards Cross Read More »

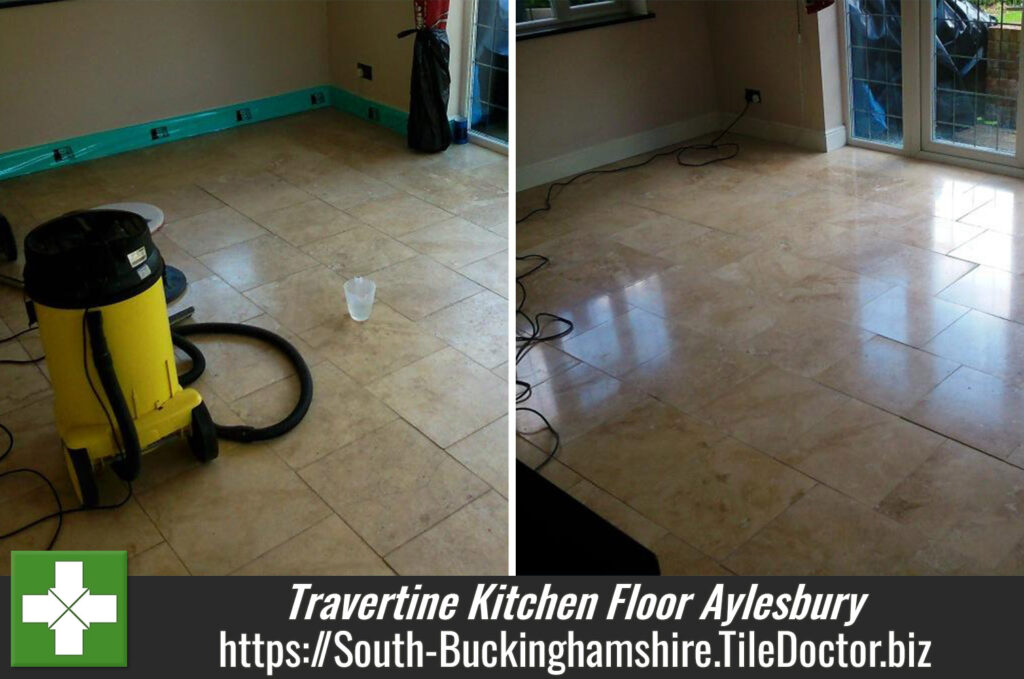
Dirty Travertine Kitchen Floor Renovated in Amersham

20-Year-Old Travertine Kitchen Floor Give Deep Clean and Seal in Amersham

This client from Amersham contacted us regarding their Travertine Kitchen floor which they were simply not able to keep clean. Frustratingly any spillage went straight into the floor and stained the tiles. I called them to discuss the problem and offered to come round and survey the floor which is a free service we offer.

I can provide a quote over the phone, but my preference is to visit and test different cleaning products and techniques on the floor before quoting. Doing it this way allows me to work out an accurate quote and gives the customer the confidence I can resolve their problems.

After agreeing a suitable time to call I visited the property and could instantly see that their main problem was the sealer protecting their Kitchen tiles had failed and as described dirt was becoming stuck in the pores of the stone. Natural stone like Travertine is porous and without a sealer in place dirt becomes lodged in its pores where is becomes very difficult to shift.

Travertine Kitchen Floor Before Deep Cleaning Amersham

The kitchen was stunning but let down by the dirty floor which had been installed around twenty years ago when a new extension has been added to the property. Typically, a sealer should last between three and five years depending on use and what cleaning products are used to maintain it, so it wasn’t surprising that the original sealer had worn off.

I quoted for deep cleaning the floor including the removal of the old sealer and then applying a robust impregnating sealer which is recommended for Travertine. Happy with the price we scheduled a date for the work to be done.

Deep Cleaning a Travertine Tiled Kitchen Floor

On the first day the floor was given a thorough deep clean using a strong dilution of Tile Doctor Pro-Clean, this product is our go to Tile and Grout Cleaner and when used in a strong dilution is strong enough to remove sealers. You find with sealers that they wear down first in the busiest sections of the floor so its important to remove all the sealer from across the floor or you end up with layering.

Pro-Clean is a strong alkaline cleaning product and it’s sprayed onto the tile and grout and then left for ten minutes before working it in, this allows it time to soak into the pores and start breaking down the dirt.

The floor is then scrubbed using a Rocky floor machine fitted with a series of diamond burnishing pads of increasing grits. This process generates a lot of soiling, and this is hoovered up with a wet vacuum after each pad.

The work begins with a coarse 400-grit burnishing pad which strips the Travertine and I work up to a 3000-grit pad which really brings up the finish of the stone to a slight sheen as the client requested. The floor was then left overnight to dry.

Sealing a Travertine Tiled Kitchen Floor

On day two I started on the sealing process first checking that the floor had dried sufficiently to accept the sealer. After discussing sealer options with the client earlier they had expressed a preference for a natural look, so I chose to apply a sealer called Tile Doctor Ultra-Seal which doesn’t colour the stone in any way and is almost undetectable.

Ultra-Seal is an impregnating sealer that works by soaking into the pores of the stone occupying the space and thereby preventing dirt from becoming ingrained there. Two coats were applied with a microfibre cloth allowing it to soak into the tile for a few hours before walking on it.

Once the seal had dried, I went over the tiles again with the 3000-grit pad which buffs of any excess sealant and brings up the sheen. Now with the floor being completely protected with Tile Doctor Ultra Seal the client shouldn’t have any problem with spillages which can be simply wiped away.

Travertine Kitchen Floor After Deep Cleaning Sealing Amersham

Once finished the deep pitted dirt was gone and the floor looked much lighter and cleaner. My client was very impressed with the transformation and has recommended us to her friend who also lives in Amersham and has a similar stone floor.

I mentioned earlier that a sealer’s life can be impacted by the product you use for regular cleaning, it’s a fact that most supermarket tile cleaners are simply too strong and can damage the sealer so before leaving I took time to discuss aftercare cleaning and for Travertine, I recommend the use of Tile Doctor Stone Soap which as well as gently cleaning the stone also helps maintain the patina.


Professional Restoration of a Travertine Tiled Kitchen in South Buckinghamshire

20-Year-Old Travertine Kitchen Floor Give Deep Clean and Seal in Amersham Read More »

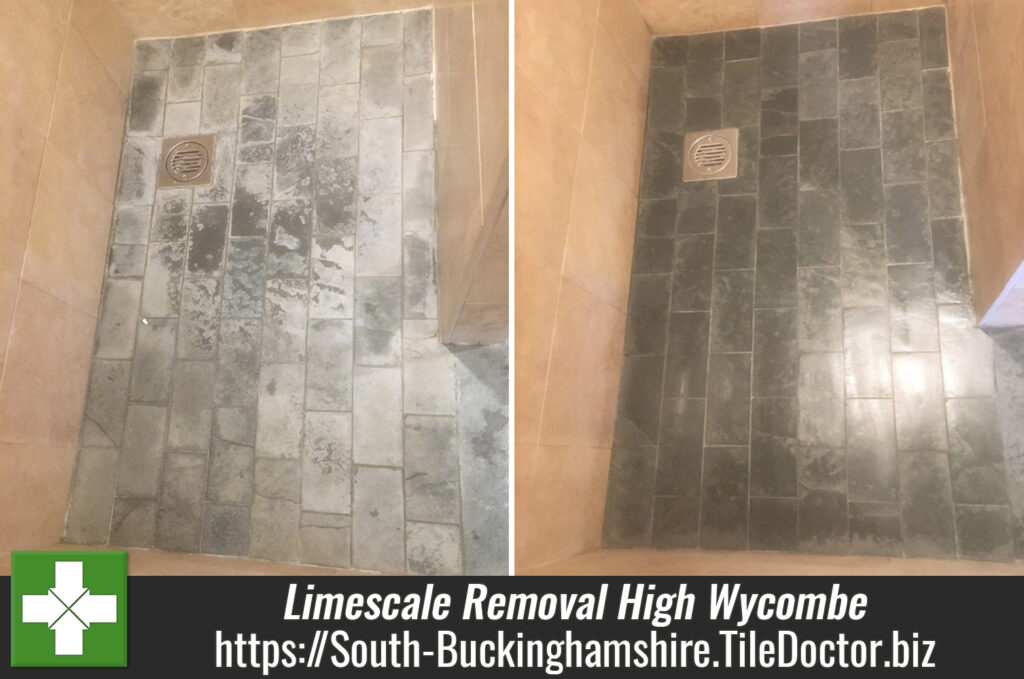
Slate Shower Floor Tiles Before After Limescale Cleaning in High Wycombe

Removing Limescale from a Slate Shower Floor in High Wycombe

I received this enquiry from a client in High Wycombe who needed the Slate tiled shower floor cleaning. I visited site to view the problem and it turns out this was a bit of an understatement; the whole floor was completely covered in limescale, and this had turned the Slate tiles white over time.

Limescale Stained Slate Shower Floor Before Cleaning High Wycombe

Limescale is a big problem for High Wycombe which is classed as a hard water area which basically means the water contains high levels of calcium carbonate. These deposits are carried in the water and left on the tiles after each shower. You can install a water softener to alleviate the problem but that won’t solve this client’s current issue. There are numerous limescale removal products that you can buy in supermarkets however these are acidic and can etch natural stone if you are not careful. Always read the label!

Cleaning a Slate Tiled Shower Floor

The limescale build up on this floor was really bad so I felt the best approach would be to use a light acidic cleaning product to help remove the worst of it and then to refinish the appearance and removing any etching of the tiles using a series of diamond encrusted stone burnishing pads. I provided the client with a quote based on this solution and it was accepted.

To start removing the limescale I applied neat Tile Doctor Grout Clean-up which is an acid cleaner that can remove grout smears and other mineral deposits such as in this case calcium carbonate deposits. I then used my handheld polishing machine with a very coarse 80-grit diamond brush attached and scrubbed it to remove the crust of the limescale.

I then applied more Tile Doctor Grout Clean-up and watched the remaining scale fizz away; the floor was then rinsed to remove the soil using water and our wet vacuum. The next step was to apply a 400-grit six-inch diamond pad, again fitted to the hand polisher to buff the floor and prepare it for the new seal.

Sealing a Slate Tiled Shower Floor

After waiting for the stone to dry I was able to finish the floor with a fresh sealer. For this I applied one coat of Tile Doctor Colour Grow which was left to soak in and then buffed with a clean cloth to remove the excess. I then applied one coat of Tile Doctor Stone Oil to restore the natural oil in the stone and buffed this in, I then finished with one more coat of Tile Doctor Colour Grow and buffed the floor with a 3000-grit diamond pad to bring up the polished appearance of the stone even further.

Limescale Stained Slate Shower Floor After Cleaning High Wycombe

The client was delighted with the restoration and surprised at how we had managed to shift the limescale. the shower looked a lot more inviting! For aftercare I recommended cleaning with Tile Doctor Stone Soap which will help build patina and maintain the polished appearance of the stone.


Professional Restoration of a Slate Tiled Shower Floor in South Buckinghamshire

Removing Limescale from a Slate Shower Floor in High Wycombe Read More »
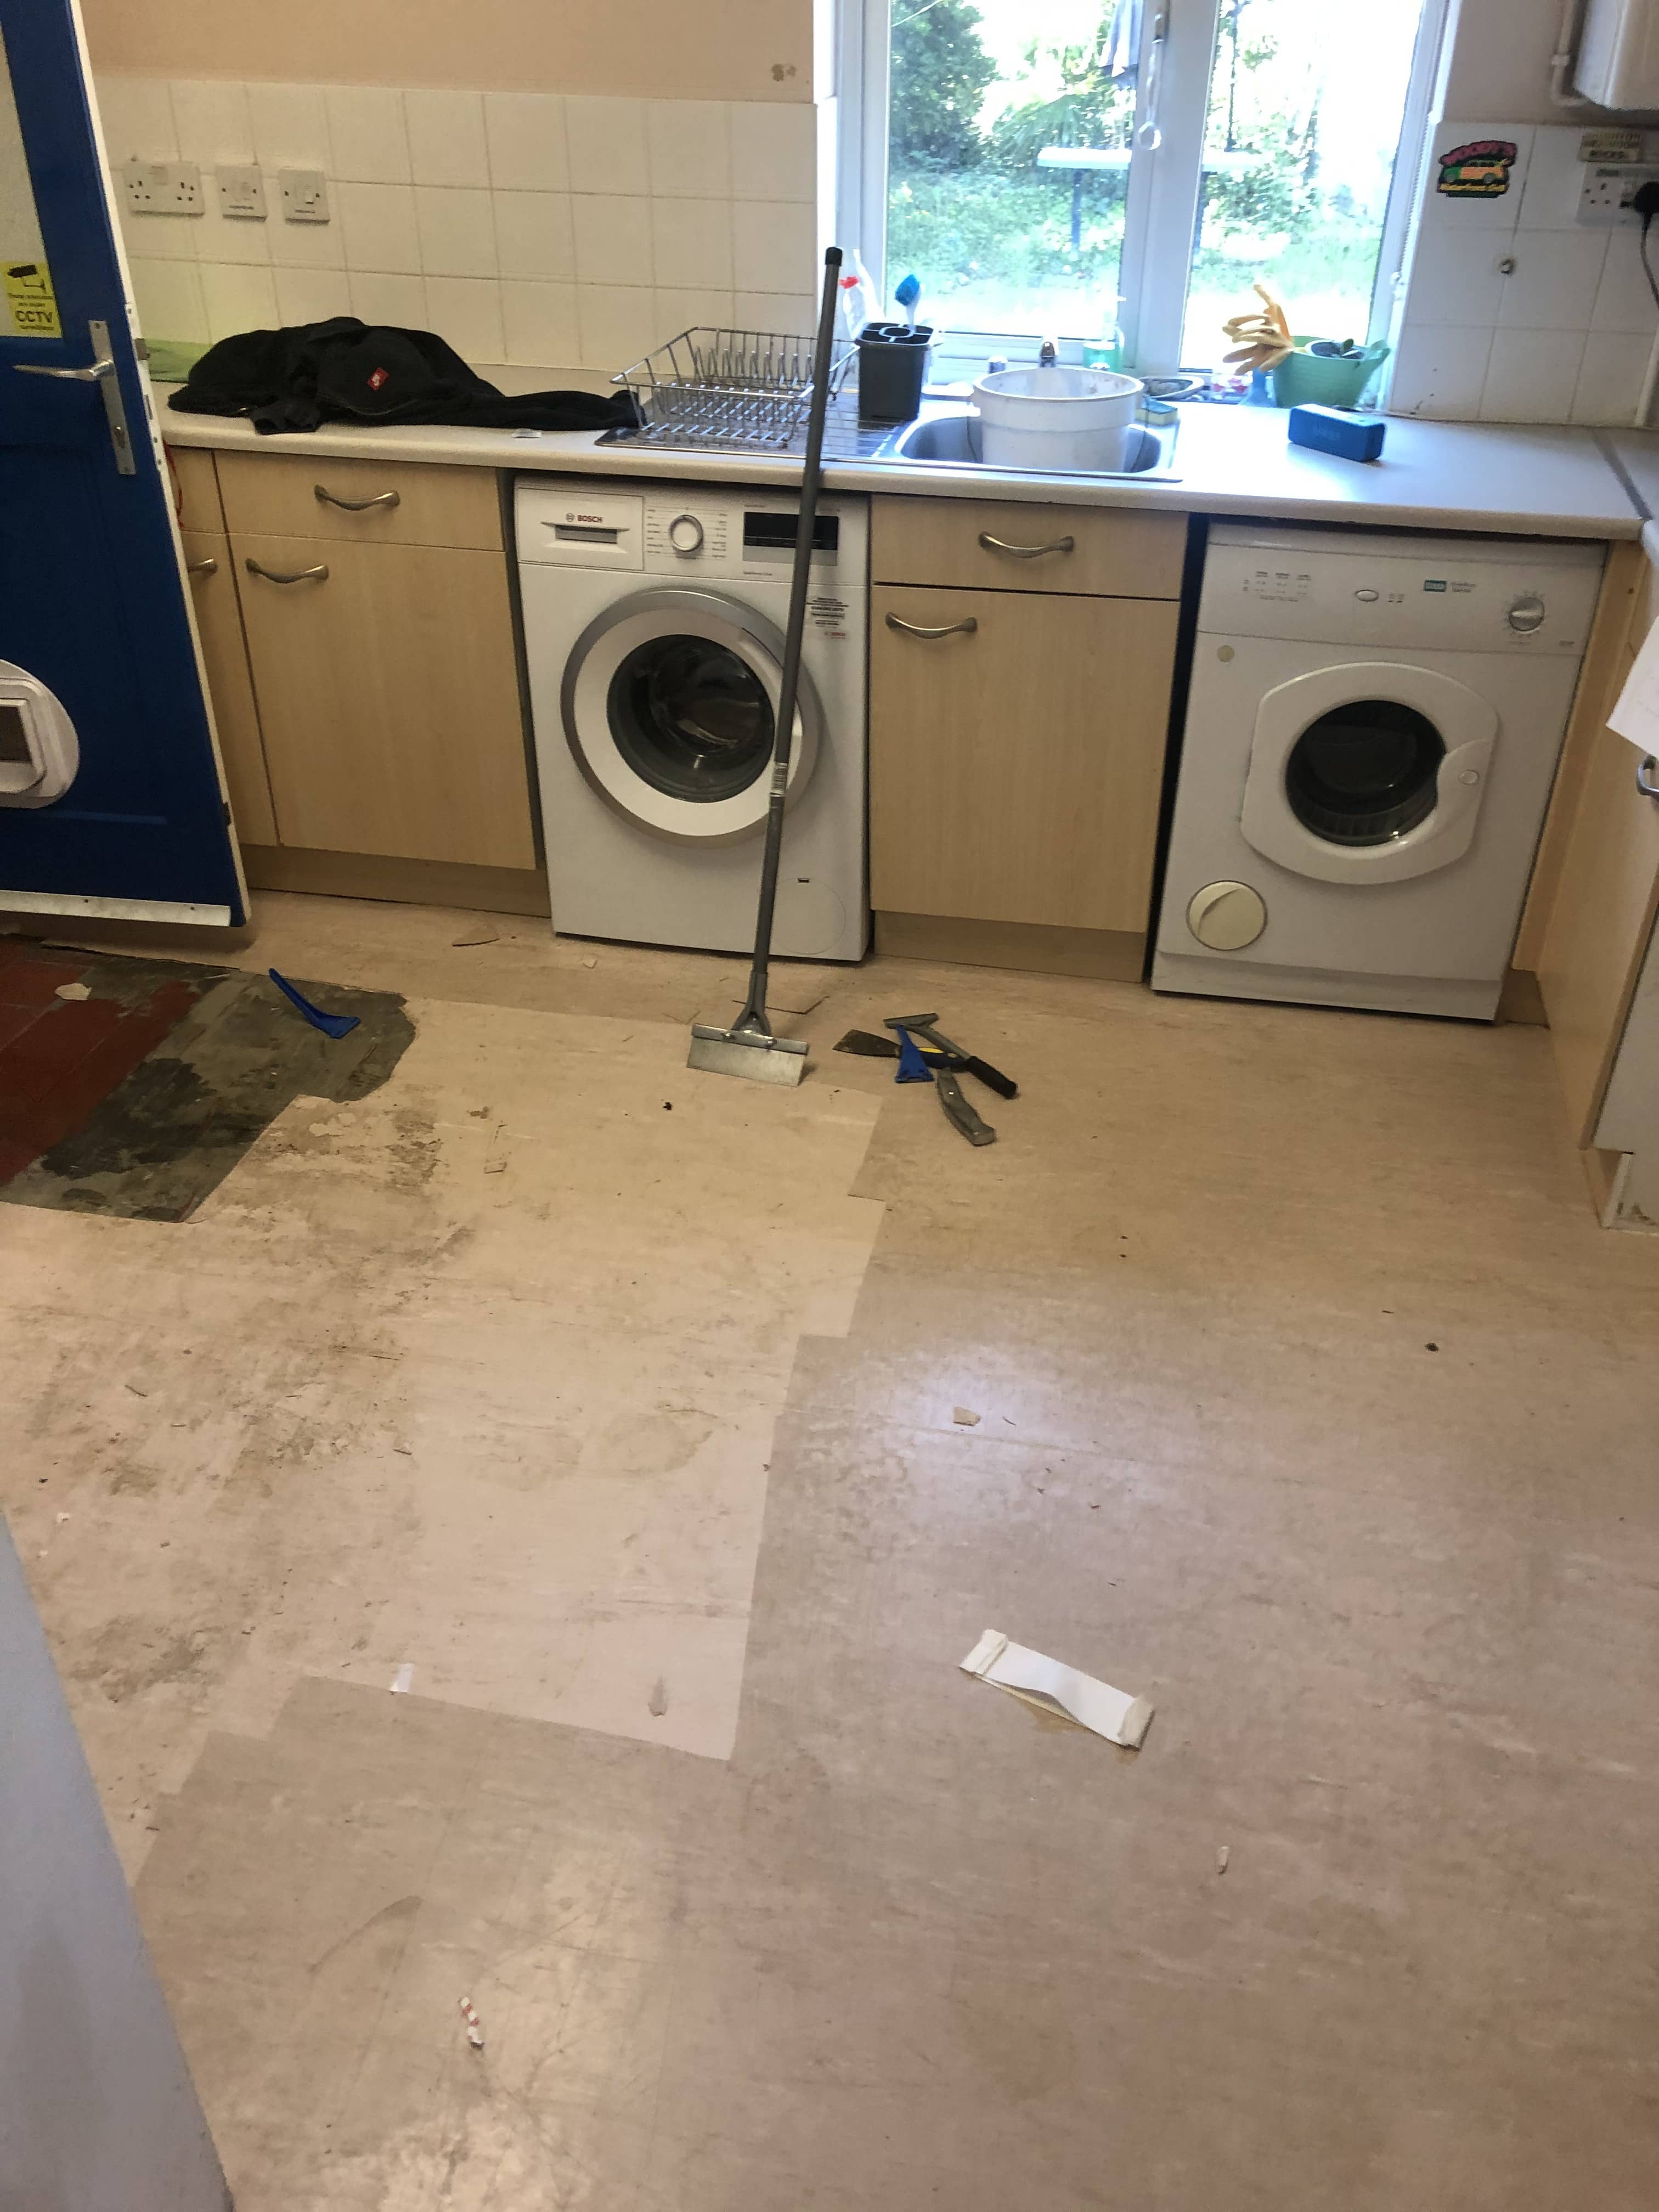
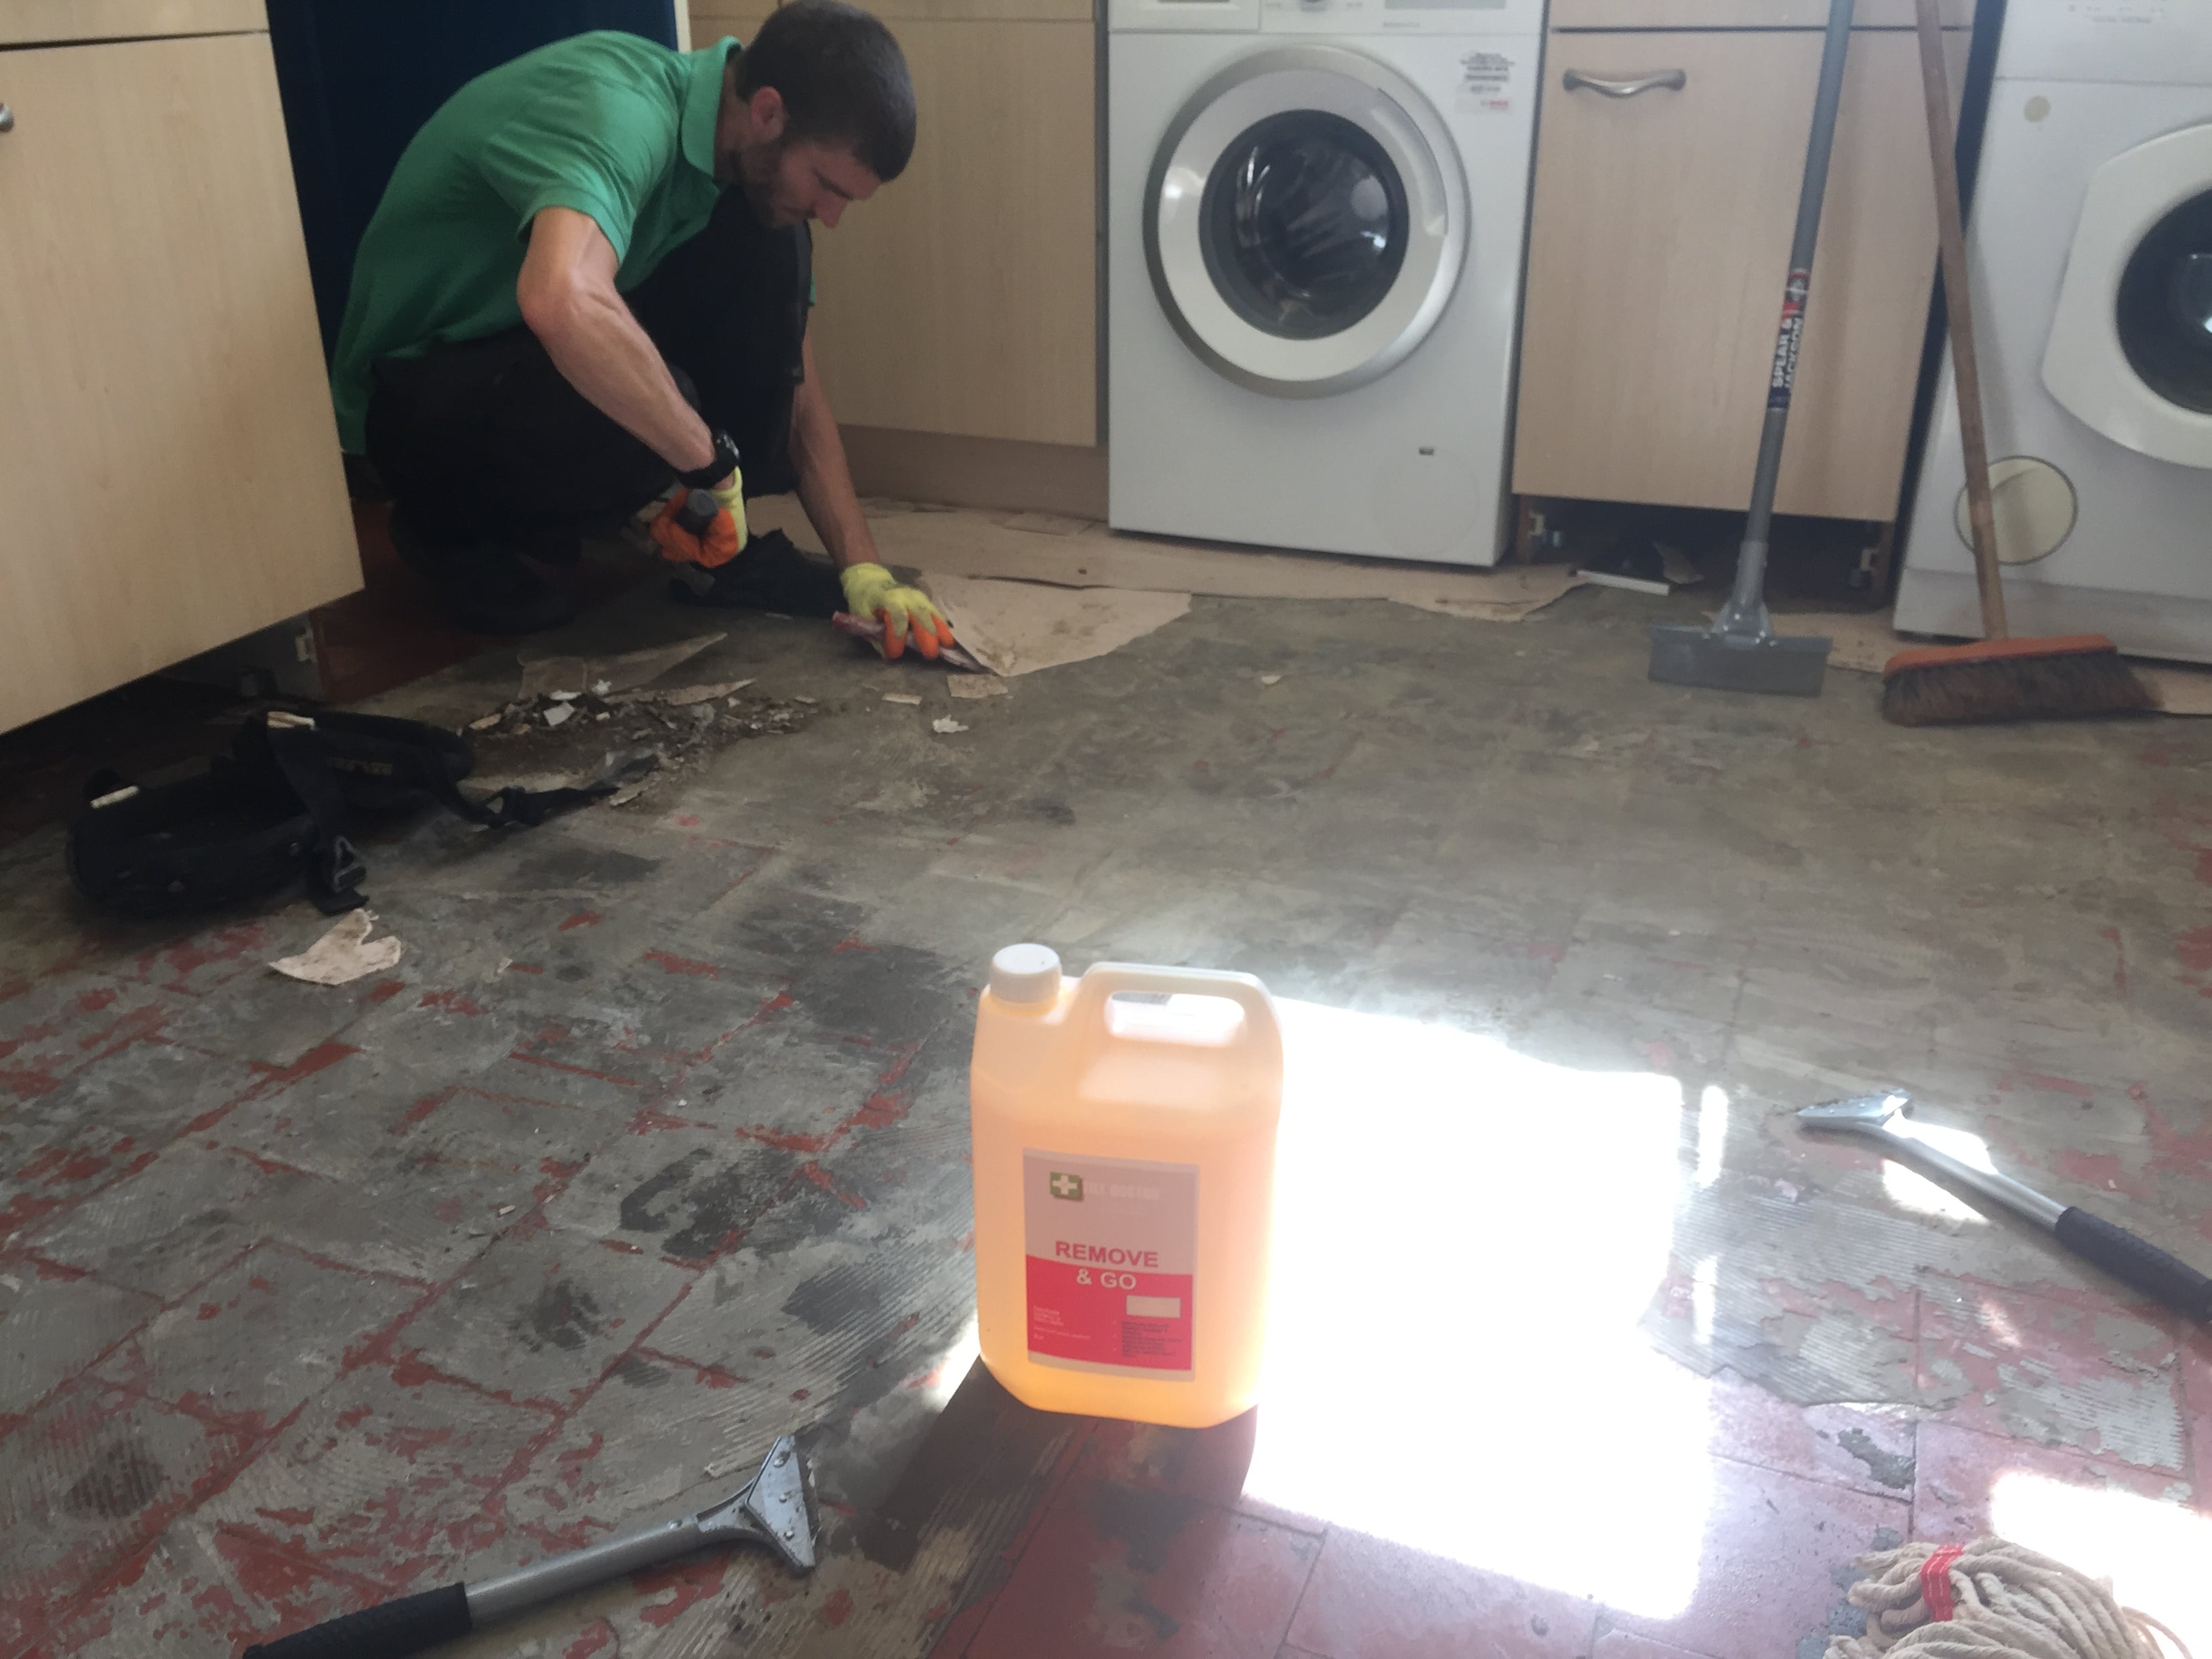
Quarry Tiled Floor Before After Renovation Ruislip

Quarry Tiled Floor Hidden Under Lino Restored in Ruislip

This client in Ruislip had discovered a Quarry tiled floor hidden under two layers of old (and now horrible) lino. Unhappy with the Lino she decided the best thing to do would be to investigate having the Quarry tiles restored. It is amazing how tastes change over the years and classic period floors are definitely making a comeback. Period features like these are quite sought after and can add a lot of value to a property, so restoring it was a wise decision and worth investigating.

Lino Covered Quarry Tiled Floor During Restoration Ruislip Lino Covered Quarry Tiled Floor During Restoration Ruislip

On inspection the lino was well stuck to the tiles, it was clear it would take some time to lift and we wouldn’t know what to fully expect beneath until we started work. Non the less I gave her a quote for the work which she was happy to go ahead with and a date was booked in the diary.

Cleaning a Lino Covered Quarry Tiled Kitchen Floor

We started by removing the lino using various methods such as scraping, cutting, and pulling always mindful not to cause any damage to the tiles underneath. Unfortunately, the lino had been secured in place with strong adhesive so once we had removed the lino we were left with a thick layer of glue and a thin concrete screed that had been used to level the floor.

Lino Covered Quarry Tiled Floor During Restoration Ruislip

To deal with this the floor was soaked in a strong dilution of Tile Doctor Remove and Go which was left to dwell for some time before being scrubbed in. We find doing this gives the product time to soften the compounds making it easier to remove. Hands scrapers were employed to scrape off the glue and again care was taken not to damage the tile. The process had to be repeated to get the glue off but overall, it did a good job dealing with the glue and cement.

Once the Quarry tiles had been exposed however it was clear more work was needed to clean them up. The main problem was cement residue, so I used a combination of Tile Doctor Acid Gel, steam and a needle gun to remove the rest of the screed from the floor.

Lino Covered Quarry Tiled Floor During Restoration Ruislip Lino Covered Quarry Tiled Floor During Restoration Ruislip

The floor really did need a lot of work to restore it!

Once all of the cement was removed the floor was given a thorough rinse with water, the soil was then extracted with a wet vacuum and once I was satisfied it was as clean as it could be the floor was left to dry out overnight.

Sealing a Quarry Tiled Kitchen Floor

On the second day the floor was first checked for moisture using a damp meter, its not a good idea to add sealer to damp tiles as it will effect the result. I was satisfied the floor was dry and began the process of applying a couple of coats of Tile Doctor Colour Grow tile sealer. This is a colour intensifying sealer that will protect the Quarry tiles by soaking into the pores and occupying the space thereby preventing contaminates becoming ingrained in the tile. Additionally, Colour Grow is a fully breathable sealer which is an important consideration when sealing old floor like these which need to breath. Being covered in Vinyl for many years many also have trapped moisture under the floor.

Lino Covered Quarry Tiled Floor After Restoration Ruislip

The newly revealed quarry tiled floor responded amazingly well to the restoration and once the sealer had drier the Quarry tiles had a nice sheen appearance without looking too shiny. It was a lot of work but well worth the effort and my customer was delighted. For aftercare I recommended cleaning the floor with Tile Doctor Neutral Tile Cleaner, this is pH balanced and will ensure the newly applied seal lasts and is not compromised.

Lino Covered Quarry Tiled Floor After Restoration Ruislip


Professional Restoration of a Quarry Tiled Floor in South-Buckinghamshire

Quarry Tiled Floor Hidden Under Lino Restored in Ruislip Read More »

Victorian Tiled Hallway Renovation Chesham

Victorian Tiled Hallway Floor Deep Cleaned and Sealed in Chesham

This customer had just moved into a property in Chesham around eighteen months ago. During that time, they had completely renovated the property and in the process had pulled up the hallway carpet to discover a lovely Victorian tiled floor which appeared to be in good condition but very dirty. Period features like these can add a lot of value to a house these days and so they decided to investigate having it professionally cleaned and contacted me for a quote.

Victorian Tiled Hallway Floor Before Cleaning Chesham

Although I can give some indication of price over the phone you never know exactly what to expect so my preference is to visit the property a conduct a test clean. It’s a little trickier to do this now due to COVID-19 but using a combination of PPE, maximum ventilation and social distancing measures I was able to work on the floor. The tiles were in good order with no replacements needed so my focus would be removing carpet adhesive and ingrained dirt. The test went well, and I followed up with a quotation which was accepted, and a date arranged to do the work.

Deep Cleaning a Victorian Tiled Hallway Floor in Chesham

I had worked out previously that the quickest was to deep clean the floor and remove the glue and any old seal was to apply Tile Doctor Remove and Go which as its name suggests is a coatings removed designed for Tiled floors. My method was to spray strong a dilution of Remove and Go onto the Victorian tiles and leave it to soak in for fifteen minutes. Then it was scrubbed in with a black scrubbing pad fitted to a rotary machine. The soil was rinsed off using a minimal of water and extracted with a wet vacuum.

Victorian Tiled Hallway Floor During Cleaning Chesham

Once the floor had dried, I inspected the tiles and could see more work would be needed to get the white tiles really sparkling. For this I went over the floor using a 200-grit resurfacing pad using water to lubricate the process, I also used handheld burnishing blocks of different grits to do the edges. With this extra effort and another rinse with water to remove the soil the floor looked great, and so I left for the day so it could dry out ready for sealing.

Sealing a Victorian Tiled Hallway Floor

I came back the next day and started by taking moisture readings with a damp meter to ensure the tiles were dry and ready for sealing. This is important as you don’t want to apply sealer to a damp tile and old floors can suffer from damp issues due to the lack of a damp proof membrane.

All was well with the floor, so I was able to move straight onto sealing which started with the application of a single coat of Tile Doctor Colour Grow. This is an impregnating sealer that soaks into the pores of the tile enhancing colour and adding protection. Once this had dried, I followed up with another seven coats of Tile Doctor Seal and Go which adds further protection and leaves a nice subtle sheen to the tiles. This product works really well on old Victorian Tiles like these and being water based it doesn’t leave a smell as it dries.

Victorian Tiled Hallway Floor After Cleaning Sealing Chesham

The Victorian tiles looked so much cleaner and brighter after I had finished, and my customer was very happy with the transformation. For aftercare I recommended the use of Tile Doctor Neutral Tile Cleaner to maintain the floor, it has a nice fresh smell and can be used regularly due to its pH neutral nature which won’t prematurely erode the sealer like stronger bleach based cleaners.


Professional Victorian Tiled Hallway Renovation in Buckinghamshire

Victorian Tiled Hallway Floor Deep Cleaned and Sealed in Chesham Read More »

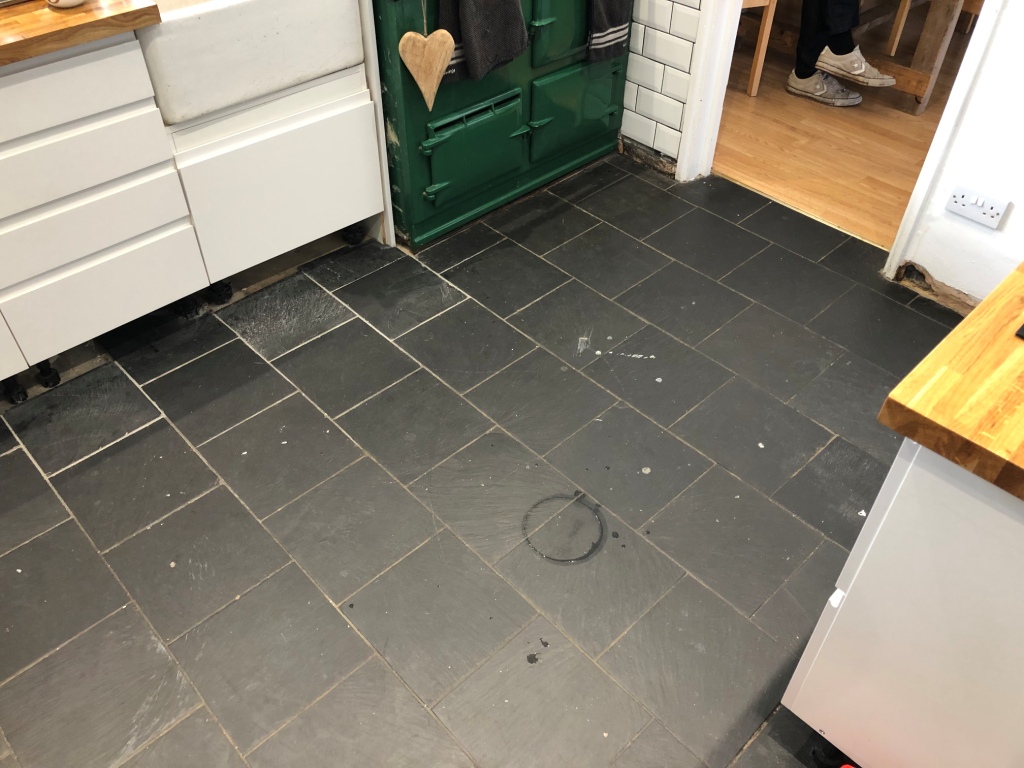
Slate Floor Before After Renovation High Wycombe

Tired Black Slate Kitchen Floor Renovated in High Wycombe

This Customer moved into a property in High Wycombe around a year or so ago and the Black Slate floor in the kitchen was more grey than black. The slate looked tired and had clearly not been well maintained. They had recently had a new kitchen fitted and had decided to retain the existing floor, so I was asked to bring it back to life. High Wycombe is a large town in Buckinghamshire well situated as close to London with great links to nearby Reading and Maidenhead.

Kitchen Slate Floor Tiles Before Renovation High Wycombe

I initially went to survey the floor and confirmed my suspicion that any sealer that was once present on the floor had now completely worn off. This is a typical problem with stone floors and without a sealer in place the Slate had lost its protection allowing dirt to become ingrained in the pores of the stone and difficult to remove. I carried out a test clean which went well, my quote was accepted and arranged a date to return to renovate the floor.

Kitchen Slate Floor Tiles Before Renovation High Wycombe

Cleaning a Slate Tiled Kitchen Floor

First, I taped up the plinths on the new kitchen and the skirting boards to ensure no solution would be splashed on them. I then applied a strong dilution of Tile Doctor Pro-Clean to the tiles, I left this to dwell for a short time so it could start working on breaking down the dirt and any old sealer. I then worked it in with a large black scrubbing pad fitted to a rotary buffing machine to get the dirt out of the slate. I also used a stiff hand brush along the grout lines with neat Tile Doctor Pro-Clean to really get the grout clean. The floor was then rinsed off with water and the slurry extracted with a wet vacuum.

There were a few problem tiles with stubborn marks which I managed to resolve with a further application of neat Tile Doctor Pro Clean and some assistance from a steamer. The floor was then inspected again and once I was happy it was left to dry off over the weekend.

Sealing a Slate Tiled Kitchen Floor

I returned the following Monday to seal the Slate tiles first checking they were dry with a moisture meter; all was so I started applying the sealer. I selected to use Tile Doctor Seal and Go for this floor as it works really well on Slate. Seal and Go is a specially formulated water-based blend of acrylic polymers that provides both a stain resistant surface seal and a durable low-sheen finish. Four coats of Seal and Go were applied allowing each coat to dry before starting on the next one. Once done you could see the floor looked amazing and the new sealer gave the floor a lovely subtle sheen finish without being over shiny.

Kitchen Slate Floor Tiles After Renovation High Wycombe

The client was very happy with the result, the floor now appeared brand new and looked great under the new kitchen.

Before leaving I took time to discuss aftercare with the client and advised her to use Tile Doctor Neutral Tile Cleaner, this is a pH neutral product that won’t prematurely erode the sealer which is a big problem with most supermarket cleaning products. This should make it easy for the client to maintain the floor and only a small amount of product it needed to clean the floor.

Kitchen Slate Floor Tiles After Renovation High Wycombe


Professional Restoration of a Slate Tiled Floor in South Buckinghamshire

Tired Black Slate Kitchen Floor Renovated in High Wycombe Read More »

Porcelain Tile and Grout Before After Cleaning Beaconsfield

Cleaning Porcelain floor tiles and grout in Beaconsfield

Recently I was called to visit this client in Beaconsfield who had moved into their house several years prior. Their hallway floor tiles were already dirty when they moved in and with several young kids the problem had slowly got worse. The hallway should look nice and bright and inviting, but instead the Porcelain tile and grout was looking dull and worn. According to the previous owners the tiles had not been down long before they sold the property.

Porcelain Tile and Grout Before Cleaning Beaconsfield Hallway

I went around to survey the floor and could see the biggest problem was the grout which had darkened due to the trapped dirt. It is always easiest for us to view the job and then we can see what work is involved. Pictures alone rarely provide enough information. I did a test clean with great results and once we had agreed a price, I was invited back to do the job. I booked it in for a few weeks’ time.

Porcelain is a popular choice in homes these days, they come in a huge variety of colours, styles and are hardwearing and versatile enough to be used in bathrooms, kitchens and on floors such as these. With the addition of underfloor heating, there is no need for the myth of a tiled floor being cold to exist either. With a small amount of maintenance, the floor can be kept looking nice.

Cleaning a Porcelain Tiled Hallway Floor

To clean the Porcelain tile and grout I applied a strong dilution of Tile Doctor Pro-Clean worked in with a black scrubbing pad fixed to a rotary floor buffer. The abrasive action of the pad combined with the cleaning power of Pro-Clean got to work cleaning all the tiles and got the worst out of the grout. We followed this by rinsing with water and extracting the soil with a wet vacuum, keeping the mess to a minimum.

Porcelain Tile and Grout During Cleaning Beaconsfield Hallway

Some of the grout lines were still not 100 percent so I went back over them using neat Tile Doctor Grout Clean Up scrubbing it in by hand with a stiff brush and then giving the floor another rinse. Once I was satisfied the tile and grout was as clean as it could be the floor was left to dry off overnight.

Sealing the Grout on a Porcelain Tiled Hallway Floor

The next day I returned and used a pipette to apply Tile Doctor Ultra Seal to all the grout lines. Porcelain tiles themselves won’t usually accept a sealer, however the grout will benefit hugely and hopefully they can now keep the floor looking much cleaner for longer.

For aftercare I recommended that they use Tile Doctor Neutral Cleaner on a regular basis rather than the household cleaners which are available in supermarkets. It is pH neutral, so it won’t prematurely degrade the sealant on the grout.

The client was very happy with the work we had completed, the floor looked pristine, and the hallway looked welcoming. They now felt confident they would be able to keep on top of it going forward.

Porcelain Tile and Grout After Cleaning Beaconsfield Hallway


Professional Clean of a Porcelain Tiled Hallway in South Buckinghamshire

Cleaning Porcelain floor tiles and grout in Beaconsfield Read More »

Ceramic Tiled Floor Before and After Renovation Uxbridge

Removal of Linseed Oil from a Ceramic Tiled Floor in Uxbridge

This is a small Ceramic tiled floor that a client had laid in his workshop next to his house in Uxbridge. As you can see from the photo the floor was in an indescribable mess and I was asked to pop round and quote for sorting it out. Uxbridge is actually classed as Middlesex but being close to the M25 and M40 I find it easy to reach.

Ceramic Tiled Workshop Floor Before Cleaning Uxbridge

As requested, I called in to survey the floor which was not a pretty site. In turns out that the tiler had applied boiled linseed oil to the floor (which the tiles did not need), and this had formed a horrible sticky residue on the surface. The client had conducted several unsuccessful attempts at cleaning up the floor and was unsure it could be rectified. Once of the attempts involved using acid which failed to remove the oil and unfortunately did do some damage to the grout causing it to discolour.

Undeterred, I was confident we could sort the problems out and restore the appearance of the tile and grout. I discussed with the client what we could do to clean the floor and we agreed a price to carry out the work out.

Cleaning a Ceramic Tiled Workshop Floor


Returning the following week, I first tackled the floor using Tile Doctor Pro-Clean applied neat, left to soak for ten minutes and then scrubbed in with a rotary floor buffer fitted with a black scrubbing pad. Pro-Clean is a highly concentrated multi-purpose tile cleaner, which when left to dwell, breaks down all types of dirt from oils through to grease and grime. It’s particularly good for very heavily soiled areas and it did a good job at removing the Linseed Oil. I rinsed the soiled solution with water and extracted the now soiled cleaning solution off the floor with wet vacuum. Wet vacuums are a great resource for Tile Doctor work, they make light work of removing liquids and this keeps the mess to a minimum.

I followed up the cleaning with a light buff of the tiles using Tile Doctor Grout Clean-up to remove the grout smears also left behind by the tiler. Cleaning the excess grout off the tiles made a huge difference to the floor, which you can see in the completed picture.

Ceramic Tiled Workshop Floor After Cleaning Uxbridge

Ceramic tiles have a glazed surface that won’t accept a sealer or Linseed Oil for that matter. There is therefore no need to apply any sealer or coating to this type of tile. They are generally very hardwearing and a suitable choice for a workshop like this. Hopefully, now the sticky oil has been removed the client will find the floor much more durable and easier to maintain.

The treatment worked well and I was able to complete the project in one day. The floor now looks like it should have done following the initial installation. Although it is only a small area, the difference is quite dramatic. My client was certainly pleased with the transformation and left the following feedback.

“Andrew is an expert in his field, and after an inexperienced tiler incorrectly used boiled linseed oil, Andrew worked to restore the tiles to their original beauty. I felt confident in him, he was a pleasure to work with, and his extremely professional. Very happy & highly recommended”


Professional Restoration of a Ceramic Tiled Workshop in Middlesex

Removal of Linseed Oil from a Ceramic Tiled Floor in Uxbridge Read More »

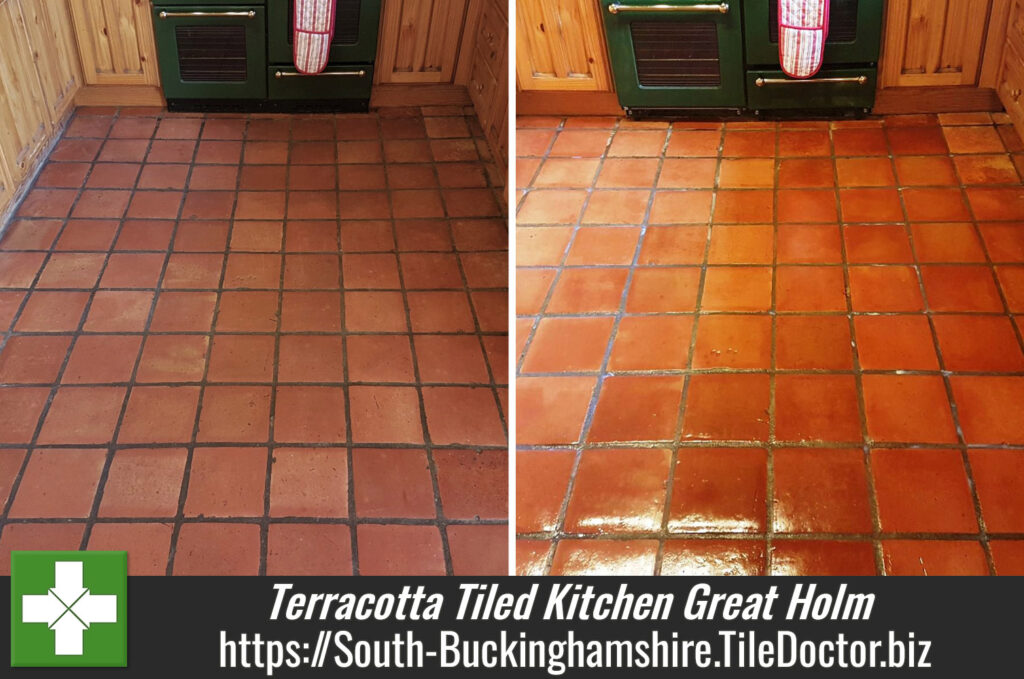
Renovating a Terracotta Tiled Kitchen Floor in Great Holm

Renovating a Terracotta Tiled Kitchen Floor in Great Holm

The Terracotta tiled kitchen floor in the kitchen house of this house in the residential district of Great Holm, just outside of Milton Keynes had been laid some time ago and was now well worn and dirty. The houses in the area are not that old and so I suspect the floor may have been down since the house was built.

The Terracotta tiles had not been professionally cleaned for many years and the floor had lost its’ lustre where the sealant had worn away and dirt had become ingrained in the tile, the Grout had also darkened. I went over to look at the floor and perform a test clean, so I could give the owner an accurate quote for renovating the floor.

Terracotta Floor Before Cleaning Milton Keynes
The quote was accepted, and we agreed a date to do the work which would take place over a four-day period. One day to clean the tiles, two days between for it to dry and one day to seal the floor in order to protect it going forward.

Deep Cleaning Terracotta Kitchen Tiles

We started by applying a strong solution of Tile Doctor Pro-Clean to the floor. Pro Clean is a concentrated, multi-purpose high-alkaline cleaner, stripper and degreaser. It is ideal for heavily soiled and neglected floors. After about 10 minutes dwell time we used our scrubbing machine fitted with a black buffing pad to scrub the floor and loosen the ingrained dirt from the pores of the tile.


A wet pick up vacuum was then used to remove the now dirty cleaning solution, we then thoroughly rinsed the floor by hand to remove any trace of cleaning product and so we could inspect the tiles to see if more work was required. In this instance I felt the floor could do with more work, so the process was repeated, and the edges scrubbed by hand.

We let the floor dry a little over lunch but noted a few of the areas were not quite perfect. To get the best result on these areas we then used Tile Doctor Oxy-Gel, this is a stronger gel-based version of Tile Doctor Pro Clean which is perfect for spot cleaning specific stubborn areas.

With the floor clean it was time to turn our attention to the grout and for this we used more Tile Doctor Pro-Clean and a specialized narrow grout brush to meticulously scrub each grout line. The floor was then completely rinsed with water.

Terracotta Floor During Cleaning Milton Keynes
The floor was now spotless but before it could be sealed it would need to be dry, so we left specialised drying equipment in the room and allowed the floor two days to completely dry out.

Sealing a Terracotta Tiled Kitchen Floor

After two days we returned, we used a moisture meter to test that the floor was dry enough to seal. It was thoroughly dry, so we were able to carry on with applying the sealer which can be quite time consuming as you have to wait for the first coat to dry before applying the next. In this case the Terracotta proved to be very porous which is not unusual for a clay tile and it took eight coats of sealer before I was satisfied the tiles were fully sealed. The sealer used to protect the floor was Tile Doctor Seal and Go which leaves a nice subtle satin finish on the tiles. Tile Doctor have a variety of sealers available and we select the sealant to suit dependent on the finish the client wishes to achieve.

The customer was absolutely delighted and left a great review (please see the feedback below)

“Andrew explained the process clearly and the floor looks absolutely stunning. It is hard to believe the difference between before and after. I would have no hesitation in recommending Andrew.

Fiona W, Great Holm”

Terracotta Floor After Cleaning Milton Keynes
 

Professional Cleaning of Terracotta Tiled Kitchen in South Buckinghamshire

Renovating a Terracotta Tiled Kitchen Floor in Great Holm Read More »

Porcelain Tiled Kitchen Floor Before and After Cleaning Henley-on-Thames

Deep Cleaning Dirty Ceramic Kitchen Tiles in Henley-on-Thames

This customer from the picturesque town of Henley on Thames got in touch to ask about cleaning and sealing her Ceramic tiled kitchen floor. Now Ceramic tiles are glazed and so normally won’t absorb a sealer so intrigued I scheduled a time to pop over and take a look. When I got here I could see the tiles were in deed dirty but as I suspected they were not Ceramic but micro porous Porcelain which does need to be sealed. In this case the sealer had worn off and dirt had become ingrained in the tiny pores of the tile.

Porcelain Tiled Kitchen Floor Before Cleaning Henley on Thames
The tiles were a Terracotta style Porcelain, but this was hardly recognisable due to the accumulation of dirt. I discussed all of this with the owner and agreed I would give the tile and grout a thorough deep clean and then reseal them to ensure the dirt was kept out of the pores in the Porcelain going forward.

Deep Cleaning a Terracotta Style Porcelain Tiled Kitchen Floor

As well as cleaning the floor I would need to remove any trace of original sealer if I was to achieve a consistent appearance later. To achieve this, I soaked the tile in a strong dilution of Tile Doctor Pro-Clean which was then left it to dwell for ten minutes, so it could get to work on breaking down old sealers and dirt.

The next stage was to work the Pro-Clean into the floor with a rotary floor buffer running on slow speed fitted with a black scrubbing pad. The cleaning solution soon changed colour with the dirt that became released. The floor was rinsed with water and the soiled cleaning solution extracted using a wet vacuum. The grout given the same treatment but this time by hand using a stiff brush and more Pro-Clean.

The floor was then rinsed again with water and then dried with a wet vacuum. Being micro-porous Porcelain, this didn’t take as long as clay tiles such natural Terracotta or Victorian.

Sealing a Terracotta Style Porcelain Tiled Kitchen Floor

The floor was then left to dry and I returned later to re-seal it for which I used a couple of coats of Tile Doctor Ultra Seal which is a natural look sealer that protects the tile from within by impregnating the pores in the tile with sealant thus preventing dirt from becoming trapped there.

Porcelain Tiled Kitchen Floor After Cleaning Henley on Thames
I think you will agree the floor now looks much cleaner and fresher, certainly my customer was happy with transformation and left the following note on the Tile Doctor feedback system.

“My manky old kitchen floor is absolutely transformed. So much easier, quicker and cheaper than getting the floor replaced. Andrew did an amazing job, highly recommended. Yvonne B, Henley”


Deep Cleaning and Sealing a Micro-Porous Porcelain Tiled Kitchen Floor in Buckinghamshire

Deep Cleaning Dirty Ceramic Kitchen Tiles in Henley-on-Thames Read More »

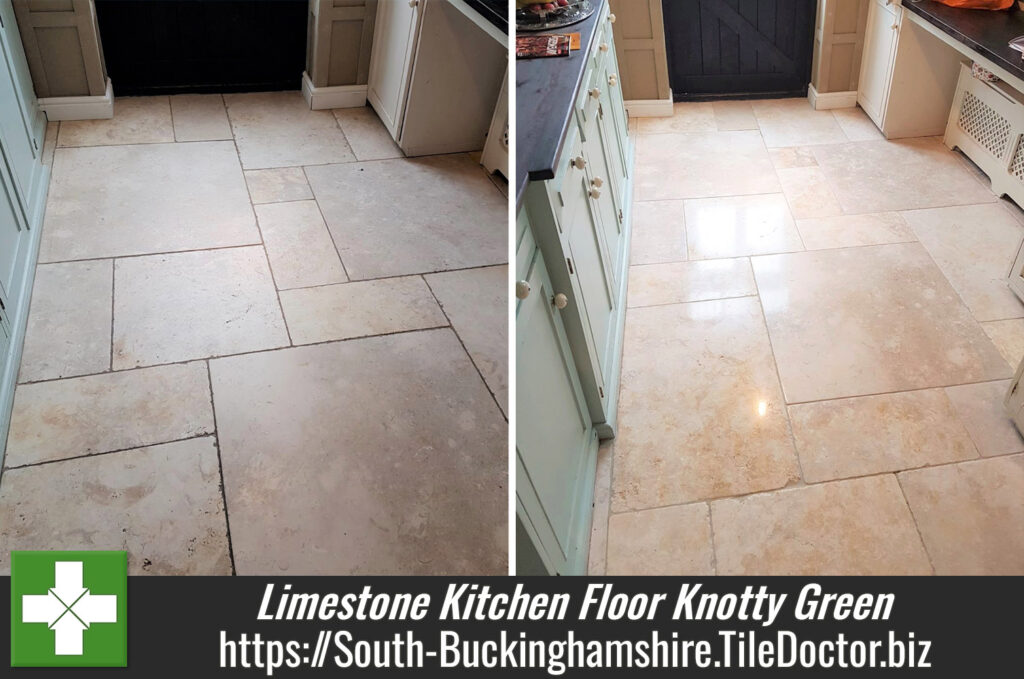
Limestone Kitchen Floor Tiles Transformed in Knotty Green

Limestone Kitchen Floor Tiles Transformed in Knotty Green

Below are photographs of a Limestone tiled kitchen floor at a house in Knotty Green near Beaconsfield. The stone floor had lost its polish with use and now appeared flat and unattractive additionally the grout had darkened severely with dirt and was overdue a good scrub to get it clean.

Natural stone is actually a porous material that needs to be sealed in order to prevent dirt from becoming ingrained however unless its maintained constant foot traffic on floor tiles wears down the sealer leaving the stone vulnerable and difficult to clean effectively.

Limestone Tiled Kitchen Floor Before Cleaning Knotty Green

Burnishing and Cleaning a Limestone Tiled Kitchen Floor

If you have read other posts on my website, you will know that we find the best way to restore the appearance of polished stone is through the application of a set of diamond encrusted burnishing pads of varying grits to grind away dirt and slowly build the polish on the stone.

You start with the application of the coarse 400-grit pad which is fitted to a rotary buffer machine and applied to the floor with water to lubricate the process, the resultant slurry is then rinsed off with water and extracted with a wet vacuum. Next is the Medium 800-grit pad and then the Fine 1500-grit pad, both applied in exactly the same way.

Once I had completed the whole floor with three of the four pads I got to work cleaning the grout. For this, I used a strong dilution of Tile Doctor Pro Clean, our reliable alkaline cleaner, in combination with a handheld scrubbing brush. Once the grout was clean I gave the floor another rinse with water and then removed as much liquids and moisture as possible using the wet vacuum leaving it to dry off fully overnight.

Sealing a Limestone Tiled Kitchen Floor

The following day I returned to complete the floor starting with the application of the fourth diamond encrusted pad in the set of four which is a Very fine 3000-grit using a method we call a spray burnish which essentially involves applying the pad dry to the floor with a small amount of water sprayed on the stone. This process closes the pores in the floor and adds a good quality sheen to the tile.

Finally, I applied two coats of Tile Doctor Ultra Seal which is an impregnating sealer that penetrates into the pores of the stone to provide maximum stain protection from within. This sealer is also completely transparent, so it does not affect the natural look of the stone.

Limestone Tiled Kitchen Floor After Cleaning Knotty Green
The Limestone responded really well to the treatment and the floor now looks like new.

Polishing Limestone Kitchen Tiles back to Health in Buckinghamshire

Limestone Kitchen Floor Tiles Transformed in Knotty Green Read More »

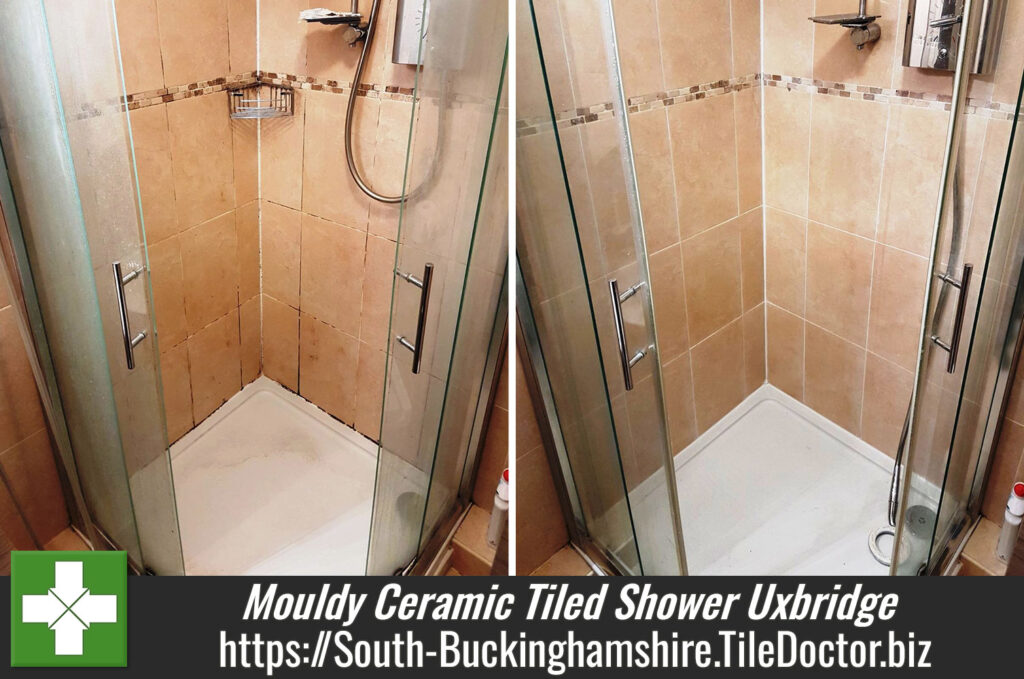
Mouldy Ceramic Tiled Shower Renovated in Uxbridge

Mouldy Ceramic Tiled Shower Renovated in Uxbridge

Ceramic and most Porcelain tiles are very easy to clean which makes them a good choice for shower cubicles, the one problem you will find though is that due to the cementitious nature of grout the top layer does attract dirt as can silicone. As a result, we recommend rinsing down showers with Tile Doctor Oxy-Pro on a regular basis or the problem will build. Mould can also be a problem especially if your bathroom is quite small or has inadequate ventilation to extract the hot steam in which mould thrives.

Ceramic Tiled Shower Cubicle Before Cleaning Uxbridge
This Ceramic tiled shower cubicle at a house in Uxbridge had all these problems and would need something much stronger to deal with the mould and remove the limescale which had also built up. Limescale from hard water is a problem that affects 60% of the UK with the South and East of England is particularly impacted due to the local chalk and limestone geology the water is filtered through. Buckinghamshire is known to have hard to very hard water and these tiny mineral deposits build up slowly on the surfaces of shower cubicles during use.

Deep Cleaning a Ceramic Tiled Shower Cubicle

To get the shower cubicle clean I began by spaying the tile and grout down with Tile Doctor Duo Clean which is a dual action product that is designed to clean grout and remove mould. You leave the product on the tiles for ten minutes and then scrub it in with a stiff brush, it’s hard work and you need to repeat in the stubborn areas, but it gets good results.

The tile and grout were then rinsed down with water and left to dry whilst I popped out for lunch. On my return I dried off any damp areas with a heat gun and took a step back to review the work I had done.

The results were good but unfortunately there were still a few dark stains in the grout which I was unlikely to be able to remove. When this happens, I find the best solution to achieve a consistent appearance is to apply a grout colourant to the grout. Tile Doctor grout colourants come in ten colours are relatively straight forward to apply, I always keep some of the popular colours in stock and on this occasion, I felt a White colourant would work best.

Normally the first stage would be to prepare the grout first with a pre-treater but given the grout had already been scrubbed hard I was able to move onto applying the colourant with a small brush. Grout Colourants not only recolour and rejuvenate the grout lines but also adds a barrier over the grout sealing it in and protecting it from further staining.

Whilst waiting for the colourant to dry I stripped out the mouldy sealant strip between the tile and shower tray and replaced with mould resistant silicone.

Ceramic Tiled Shower Cubicle Before Cleaning Uxbridge
The shower cubicle now looks much fresher and I’m sure will be a pleasure to take a shower in.

Professional Renovation of a Ceramic Tiled Shower Cubicle in Buckinghamshire

Mouldy Ceramic Tiled Shower Renovated in Uxbridge Read More »

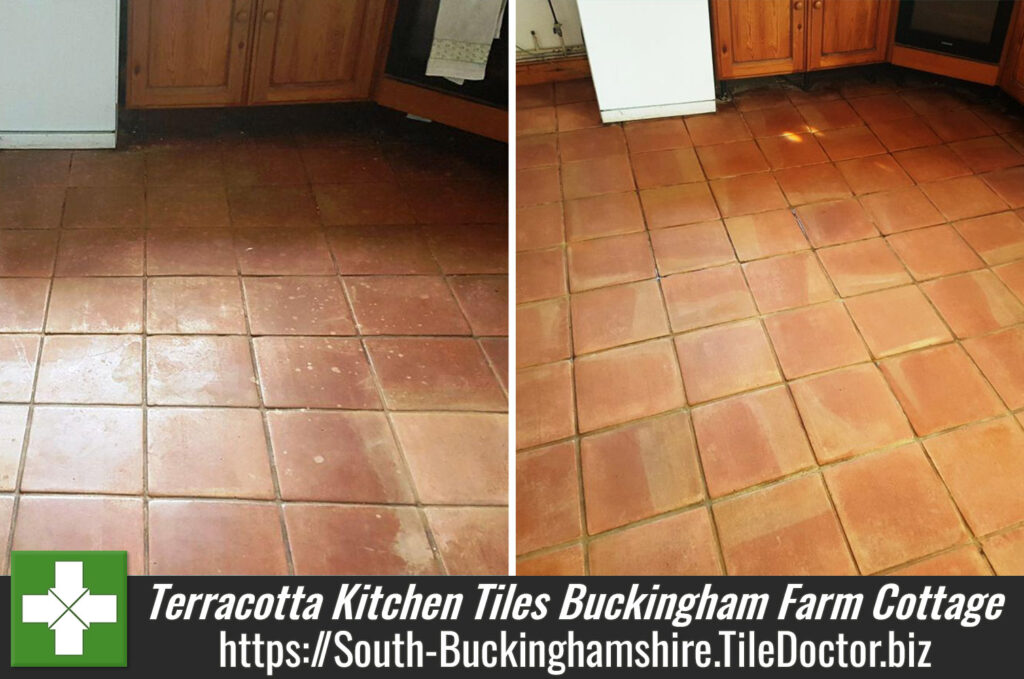
Terracotta Kitchen Tiles Refreshed in Buckingham Farm Cottage

Terracotta Kitchen Tiles Refreshed in Buckingham Farm Cottage

I was recently contacted about the restoration of a fantastic example of a Terracotta tiled floor in the kitchen of a farm cottage just south of Buckingham.

Terracotta Tiles Before Cleaning Buckingham Farm Cottage
There was a very noticeable build-up of dirt on the tiles and in the grout lines. Additionally, there were lots of white spots on the tiles in front of sink area because of a caustic soda spillage. Caustic soda is also known as sodium hydroxide, as is commonly used as a drain unblocking agent. It’s a highly alkaline product and isn’t very friendly to Terracotta.

Terracotta Tiles Before Cleaning Buckingham Farm Cottage
The grout was also stained and naturally, the homeowner was keen to get her floor back into the best shape possible – and I was on hand to see what could be done.

Terracotta is a very attractive and useful material that has been in use for over two millennia throughout the world. It has been used perhaps most famously for sculptures and other forms of art, although it has since the days of the Ancient Romans been used as a building material – including in the form of floor tiles. It’s still a popular choice for tiles amongst homeowners today, since Terracotta tiles are typically thicker, and the red colour adds a warm country feel to the home.

Cleaning Stained and Dirty Terracotta Kitchen Tiles

Before beginning the restoration, I first removed the kickboards from underneath the kitchen units to protect them from splashes from the cleaning products I would be using.

Once this had been done, I got straight into deep cleaning the tile and grout lines using a strong dilution of Tile Doctor Pro-Clean which is a strong alkaline cleaner. To get the best result I left the solution to soak into the pores of the tile for approximately ten minutes before being agitated with a black scrubbing pad fitted to a rotary machine.

The floor was then rinsed with fresh water and the resulting slurry of soiled cleaning solution was promptly extracted using a wet vacuum. This process left the tiles and grout looking much cleaner and fresher, however, the white spots caused by the caustic soda would need something extra to remove them.

I treated these spots using Tile Doctor Acid Gel in combination with a steam machine. Acid Gel is a mixture of phosphoric and hydrochloric acids in gel form, and can be used to neutralise alkali-based stains such as these. We also commonly use it to treat efflorescence (mineral salt deposits).

The floor was then once again rinsed with fresh water to remove any trace of cleaning products and neutralise the floor, before being left to dry off fully for two days.

Sealing Terracotta Kitchen Tiles

I returned after 48 hours and the floor was dry enough to be sealed. The customer wanted to retain the natural-looking and rustic appearance of the Terracotta, so I suggested that we seal the tiles using Tile Doctor Colour Grow. This sealer is impregnating and colour-intensifying (so it emphasises the patina of the stone), but also leaves a matte finish.

Terracotta Tiles After Cleaning Buckingham Farm Cottage
The after photos show the result of the restoration – I job well done if I say so myself. And certainly, my customer agreed!

Terracotta Tiles After Cleaning Buckingham Farm Cottage
 

Professional Cleaning of a Stained Terracotta Kitchen Floor in Buckinghamshire

Terracotta Kitchen Tiles Refreshed in Buckingham Farm Cottage Read More »

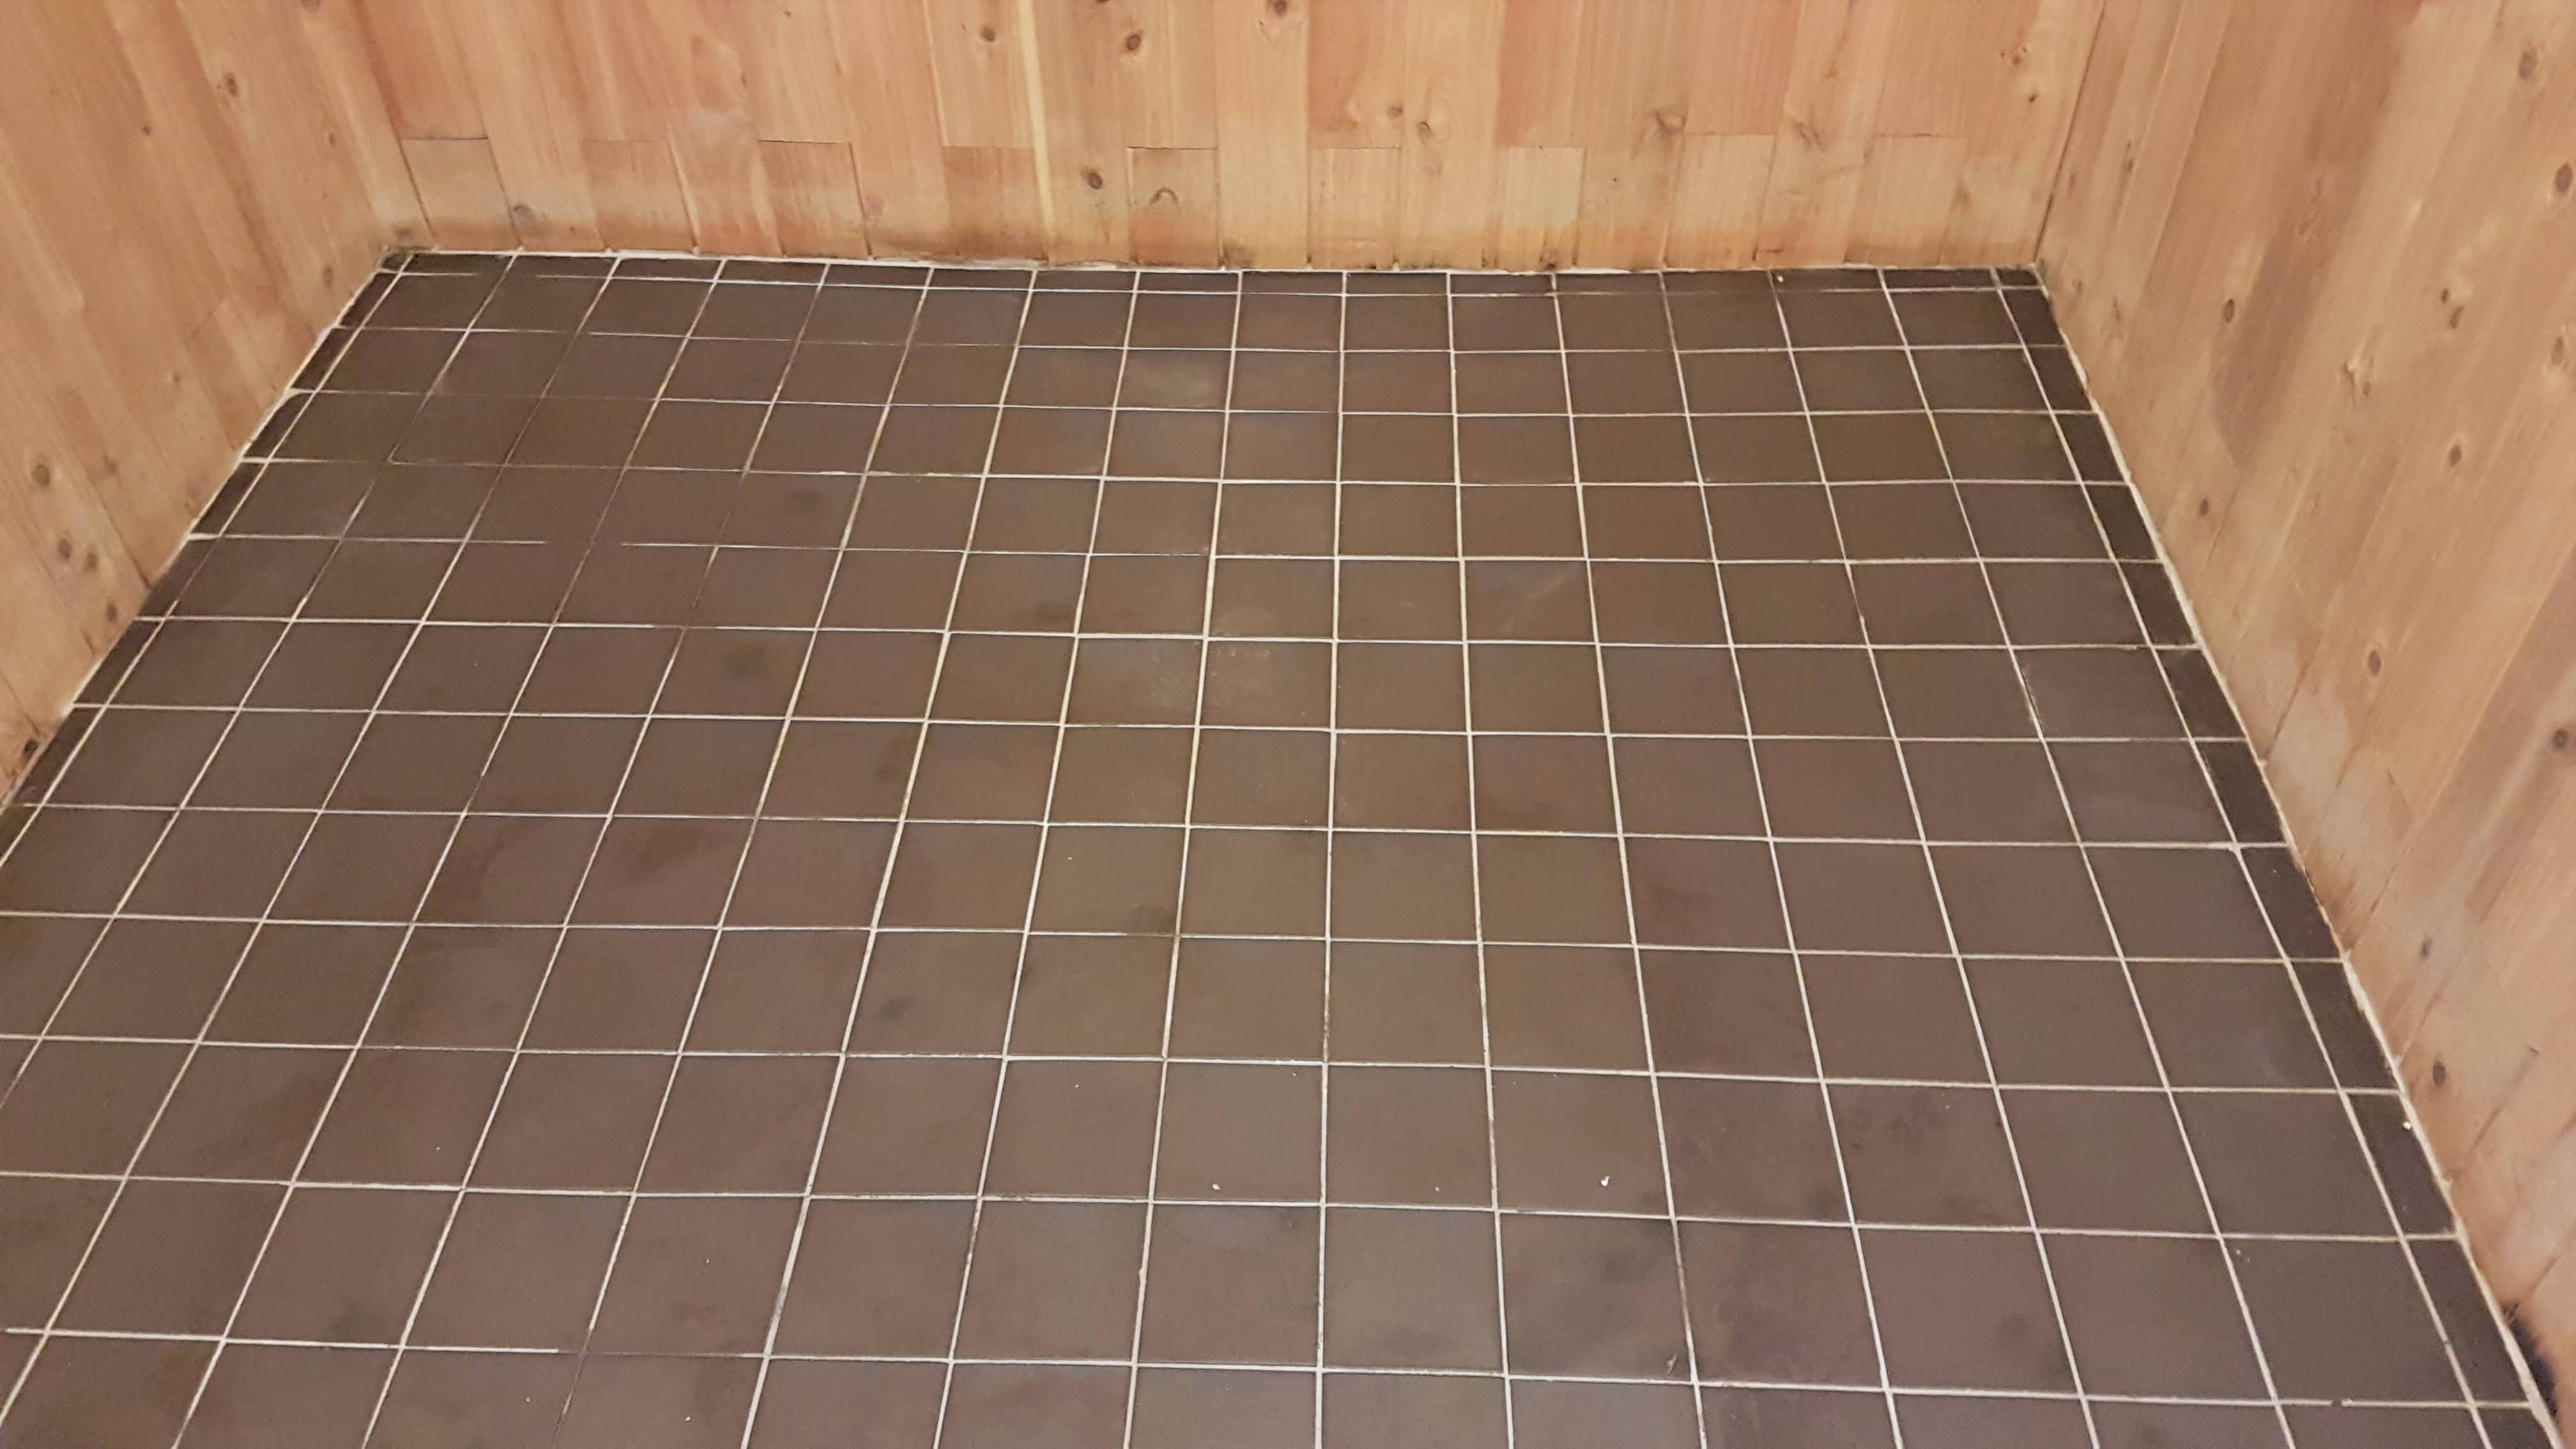
Recolouring Stained Grout in Milton Keynes Office Toilet

Recolouring Stained Grout in Milton Keynes Office Toilet

Although much of the work Tile Doctor does is residential were more than happy to take on commercial tile cleaning jobs, as well. In fact, many office buildings contain very nice tiled kitchens and bathrooms, but the cleaners who visit them daily are rarely have the right training and products to keep stone, tile and grout looking it’s best.

In some cases, a long period of time passes before the facilities manager or cleaning company reach out to seek help from companies like Tile Doctor and by this time the tiles can be a very bad way. With this in mind I received a call from an office manager in Milton Keynes who needed help to restore the appearance of the tile and grout in a Porcelain tiled toilet.

Commerical Porcelain Toilet floor Milton Keynes Before Cleaning
You can see from the photograph that the White floor grout had become stained and unsightly through use and a lack of adequate grout cleaning. The owner of the building had decided, in fact, that he wanted to change the grout to a dark colour but was concerned about the cost and time it would take to remove the original grout and applying new.

I suggested to him that we give the tile and grout a deep clean and then simply recolour the grout with a Tile Doctor Grout Colourant. Additionally, it’s a relatively quick process which could be done outside of office hours to minimise disruption. The customer was happy with this solution, so I we agreed a time for me to come back and carry out the work.

Cleaning and Grout Recolouring of a Porcelain Tiled Office Toilet

The restoration process began with a deep clean of the tiles using Tile Doctor Pro-Clean, which is a strong alkaline tile and grout cleaner. The product was applied to the tile and grout and then left to dwell for a short period before being worked in with a large scrubbing pad fitted to a rotary machine. Pro-Clean very reliably breaks down ingrained dirt and muck and can even be used to remove sealers in a concentrated form.

Next, I paid special attention to freshening up the stained grout lines. This was done using Tile Doctor Grout Clean-Up, an acidic product which is usually used to remove grout smears from the tile surface but in this case applied to etch the grout surface to ensure a stronger bond with the colourant.

The tile and grout was rinsed and then dried before I could continue with the final step of recolouring the grout lines to make them darker, as per the customer’s request. This was done using the Tile Doctor Grout Colourant in Grey, which is just one of ten colours available. Other options include White, Chocolate, Sandstone and Black.

The Grout Colourant serves not only to recolour and rejuvenate the grout lines but also adds a barrier over the grout sealing it in and protecting it from further staining.

Commerical Porcelain Toilet floor Milton Keynes After Grout Colouring
I think you’ll agree, looking at the photo of the result below, that the toilet now looks much smarter and more professional. The customer was very happy with the outcome of the work and left me the following feedback on the Tile Doctor feedback system.

Great diligent work undertaken by Andrew-very pleased with the outcome.
Mr. Hirani, Milton Keynes 03 February 2018

Professional Renovation of a Stained and Discoloured Porcelain Tiled Office Toilet in Buckinghamshire

Recolouring Stained Grout in Milton Keynes Office Toilet Read More »

Terracotta Tiled Floor Refurbished in Amersham Council Building

Terracotta Tiled Floor Refurbished in Amersham Council Building

A local cleaning contractor called us in to work on the Terracotta tiled floors at a council building in Amersham. The Terracotta had not been deep cleaned and resealed for about ten years and the sealer had worn off leaving the tile vulnerable to dirt becoming ingrained in the pores of the tile. The grout had also suffered the same fate and had almost gone black in many areas.

Terracotta Floor Files Before Cleaning Amersham Council Offices

This is a common problem with Terracotta which is quite porous and once those pores become ingrained with dirt the tile becomes difficult to clean effectively. The solution is to seal the tile however sealers wear off over time and this was basically the problem.

Terracotta Floor Files Before Cleaning Amersham Council Offices

After discussing the issues we agreed on a plan of action to deep clean the Terracotta tile and grout and then re-seal to protect it. Due to the busy nature of the building we agreed to do the work between Christmas and New Year when we knew the building would be empty.

Cleaning Old Terracotta Floor Tiles

We started by applying a strong dilution of Tile Doctor Oxy-Gel which is a strong tile cleaning product that being in a gel form ensures it sits on the tile for longer, giving it a longer effective dwell time so it can really eat into and loose the dirt. After approximately twenty minutes the gel was scrubbed into the tile with a black scrubbing pad fitted to a rotary machine. This broke down most of the dirt and removed any remaining sealer. Once the whole floor had been treated in this manner it was rinsed thoroughly with water which was then extracted using a wet vacuum.

With the soiled cleaning solution removed I could see the next step would be to spot clean stubborn staining and clean the grout. For this task I used a strong dilution of Tile Doctor Pro-Clean scrubbing it in by hand using stiff brushes and aided with a hand-held steamer to help treat the stubborn staining. Once done the floor was given a final rinse and then as much moisture as possible removed with the wet vacuum.

Sealing Old Terracotta Floor Tiles

We then left the floor to dry off completely and came back a couple of days later to seal the Terracotta tile.

I mentioned earlier that Terracotta is porous; in fact it’s probably the most porous material I deal with, so to fully seal the floor I had to apply eight coats of Tile Doctor Seal and Go which will provide complete and long lasting protection against staining and dirt. Seal and Go also adds an appealing satin sheen to the tile and the new seal will make it much easier to clean in future.

Terracotta Floor Files After Cleaning Amersham Council Offices

The floor tile and grout now look much healthier and I’m sure the council will be very impressed when they go back to work after the holidays.

Terracotta Floor Files After Cleaning Amersham Council Offices

Happy New Year…

Professional Terracotta Tiled Floor Renovation in Buckinghamshire

Terracotta Tiled Floor Refurbished in Amersham Council Building Read More »

Restoring a Poorly Sealed Slate Kitchen Tiled Floor in Milton Keynes

Restoring a Poorly Sealed Slate Kitchen Tiled Floor in Milton Keynes

Sealing is a fundamental part of any stone floor installation. If your builder or tiler hasn’t sealed your floor, he’s done something wrong – and it can cause significant problems. To the untrained eye, it may be difficult to tell whether a floor has been sealed, but you will quickly see that an unsealed floor attracts a lot of ingrained dirt and loses its lustre easily over time.

This was a problem for one of my recent customers, who lives in Milton Keynes in Buckinghamshire. They have a Slate tiled Kitchen floor which had been laid approximately 5 years prior, but had not been sealed properly on installation – and had not received any professional treatment since.

Consequently, the floor had become difficult for the customer to keep clean and it had lost its lustre and coloration due to ingrained dirt. Additionally, recent building works had left thick deposits of plaster on the tiles.

Slate Kitchen Floor Before Cleaning in Milton Keynes

Cleaning a Dirty Slate Tiled Kitchen

To begin restoring the Slate tiles, I applied Tile Doctor Pro-Clean, which is a powerful alkaline-based cleaner for natural stone. I mixed a strong dilution of the product, spread it liberally across the area and left it to dwell for 20 minutes to seep into the pores of the stone.

Next, I scrubbed it into the stone using a brush fitted to a heavy weight rotary machine, before rinsing the floor with a high-pressure water and wet extraction unit.

The next stage of the cleaning process was to get rid of the plaster deposits and some of the heavier stains. To deal with these I needed to apply an even stronger cleaner, known as NanoTech HBU (Heavy Build-Up Remover).

As its name suggests, the product uses nano-sized cleaning particles to penetrate beneath difficult stains to dissolve them and lift them out. I did this in combination with a steamer to help loosen up some of the plaster.

Sealing a Slate Tiled Kitchen

After allowing the floor to dry overnight, I returned to the property the next day to seal the tiles. I did this using five coats of Tile Doctor Seal and Go, which is a double-action sealer: not only does it provide a robust, topical seal, it also provides a durable low-sheen finish which is aesthetically pleasing.

Slate Kitchen Floor After Cleaning in Milton Keynes

The sealer has done a fantastic job of emphasising all the natural colours in the Slate and the appearance of the entire floor has been lifted. The customer was really pleased with the restoration which certainly had been a long time coming.

Restoration of a Dirty and Stained Slate Tiled Kitchen Floor in Buckinghamshire

Restoring a Poorly Sealed Slate Kitchen Tiled Floor in Milton Keynes Read More »

Porcelain Tiled Kitchen and Hallway Refresh in Leighton Buzzard

Porcelain Tiled Kitchen and Hallway Refresh in Leighton Buzzard

This Porcelain tiled floor had been laid in the hallway and kitchen of a house in Leighton Buzzard five to six years earlier. During that time the floor had become very dirty and the grout was discoloured to the point where it had turned black and no matter how hard the customer tried they were unable to get the grout clean.

On my initial visit to the property we discussed the options with the customer and decided that the best thing to do would be to thoroughly clean the grout and then seal it with grout colorant saving a messy and costly replacement of the grout.

Hallway Porcelian Tile and Grout Before Cleaning Leighton Buzzard

Cleaning Porcelain Tiles and Grout

To get the porcelain tiles clean and deal with the worst of the grout I treated the floor with a strong dilution of Tile Doctor Pro-Clean. The product was mopped onto the floor and then left to dwell for 20 minutes. It was then scrubbed into the tiles with a black pad fitted to a rotary machine running on a slow speed. I also ran a stiff grout brush along the grout lines to get the grout as clean as possible.

The floor was then rinsed with water under high pressure and the slurry extracted using a wet vacuum. As we were grout colouring later I gave the grout a further scrub using Grout Colourant Pre-Treater which ensures a better bond between the grout and the colourant, this was then rinsed off with more water and also extracted using the wet vacuum.

Kitchen Porcelain Tile and Grout After Cleaning Before Grout Colouring Leighton Buzzard

Re-Colouring Grout

Once the grout was dry I started applying the Grout Colourant in a colour that best matched the original grout and colour of the tile. The process is quite straight forward and involves using a small brush to carefully apply the colorant along each grout line. When I was finished, I made sure to clean any excess product off the tiles before it had time to dry.

Kitchen Porcelain Tile and Grout After Cleaning and Grout Colouring Leighton Buzzard

My photographs probably don’t do the floor justice but hopefully you can appreciate how the grout is now uniform in colour and with the protection of the grout colourant which forms a barrier over the grout it will stay that way for a long time to come.

Restoring the Appearance of Porcelain Tile and Grout in Buckinghamshire

Porcelain Tiled Kitchen and Hallway Refresh in Leighton Buzzard Read More »

Travertine Kitchen Floor Tiles Transformed in Aylesbury

Travertine Kitchen Floor Tiles Transformed in Aylesbury

Travertine is a type of Limestone which unique and distinctive features, making it a highly sought after and expensive type of natural stone tile. Not only is it a very attractive stone, it’s also a very useful building material. In fact, it’s been used since Ancient Roman times when it was the main component of temples, aqueducts, monuments, bath complexes, and amphitheatres.

In the modern era it remains popular, but to keep Travertine in fantastic condition it is necessary to ensure regular and professional maintenance. In this case seven years after this customer in Aylesbury had a Travertine tiled kitchen floor installed, the stone had significantly declined in appearance. Over time the sealant had worn away, allowing the dirt from everyday life to sink deep into the pores of the floor resulting in dirt becoming ingrained in the pores of the stone that the customer was unable to remove by themselves. Having tried hard to clean the floor to no avail – and keen to see the sheen restored to the tiles – the customer called me in for some expert assistance.

Travertine Tiled Floor Before Cleaning Aylesbury

Burnishing and Cleaning a Travertine Tiled Kitchen Floor

As with all of our customers, I conducted an initial free on-site survey and demonstration clean for the customer. During the survey, I determined that the sealer had completely broken down and that the best option was to use our Tile Doctor burnishing system to restore the tiles to a like-new appearance. We demonstrated this process, which involves the application of different diamond encrusted pads of varying grit to grind away dirt and refine the polish on the stone, on one of the most badly soiled tiles. The results were very impressive and the customer remarked on how much it transformed the tile.

After provision of a detailed written quote, the customer requested that I complete the service and two weeks later I was back to restore the whole floor.

The process took two days. On day one, I used the Coarse, Medium and Fine diamond burnishing pads to resurface the tile. This process uses water in conjunction with the burnishing pads to gently remove the top layer of the tile, along with any ingrained dirt, old sealer and scratches. Once I had completed the whole floor, I got to work cleaning the grout. For this, I used a strong solution of Tile Doctor Pro Clean, our reliable alkaline cleaner, in combination with a handheld scrubbing brush.

I then rinsed the floor, removed any excess water, and allowed it to dry overnight.

Sealing a Travertine Tiled Kitchen Floor

The following day, I returned to the property to seal the floor. Before I could seal it I needed to perform a dry buffing process using the fourth diamond encrusted pad with a Very fine grit. This process closes up the pores in the floor and provide a good quality sheen to the tiles.

Finally, I applied two coats of Tile Doctor Ultra Seal. This is an impregnating sealer that penetrates the tiles to provide maximum stain protection, especially in food preparation and serving areas. This sealer is completely transparent, so it does not affect the natural look of the stone.

Travertine Tiled Floor Before Cleaning Aylesbury

Once the second coat of sealer had dried, I buffed the floor one more time to remove any excess sealer. The customer was absolutely delighted with the result, leaving the following feedback:
“Andrew did an excellent job on our kitchen floor. The tiles are much cleaner than before and I’ve never seen them so shiny! Andrew was professional, knowledgeable, and very polite and friendly. Would not hesitate to recommend him!”

Polishing Travertine Kitchen Tiles back to Health in Buckinghamshire

Travertine Kitchen Floor Tiles Transformed in Aylesbury Read More »

Tile Cleaning and Grout Re-Colouring of a Porcelain Tiled Kitchen in Buckingham

Tile Cleaning and Grout Re-Colouring of a Porcelain Tiled Kitchen in Buckingham

Grout is an incredibly important feature of tiled floors, not just from a structural perspective, but from an aesthetic perspective too. If the grout lines are dirty and stained, it ruins the overall look of the floor. It’s important to try and keep them clean, but with grout being rough in nature it does attract dirt and if left un-checked it can easily get to the point where cleaning becomes very difficult.

A good case in point was this Porcelain tiled kitchen floor at a property in the historic university town of Buckingham. The floor had been installed approximately eight years prior and while during this time the property owner had made the best efforts to keep the tiles clean, the dirt and grime had begun to build up – particularly in the grout lines.

I visited the property to see what could be done, starting with an initial test clean with a strong solution of our high alkaline cleaner, Tile Doctor Pro Clean. The tiles came up beautifully, but due to the extreme porosity of the grout, some of the dirt had been absorbed too deeply into the grout to get it completely clean.

Porcelain Floor Before Cleaning in Buckingham

The customer was worried that this would mean ripping all the grout out and re-grouting, which is a messy and time consuming process. As an alternative, I advised him that recolouring the grout would be the better option, using one of the excellent grout colorants made by Tile Doctor which are available in ten popular colours.

These products not only restore a clean and uniform appearance to the grout, they also provide a waterproof barrier which prevents any dirt and grime from penetrating the grout in the future. The recolouring process is a relatively quick, affordable, and a tidy alternative to re-grouting.

Cleaning Porcelain Tiles and Grout

Impressed by the efficiency of the Pro Clean product and the cleanliness of the test patch, the customer requested that we go ahead and deep clean the tiles and re-colour the grout.

The work took two days. On the first day, we deep cleaned all the tiles and grout using the same strong solution of Pro-Clean. The solution was applied to the floor and left to dwell for approximately ten minutes and from there I used a rotary machine fitted with a black scrubbing pad to loosen the soil from the tiles.

Once the floor had been thoroughly scrubbed, I used our wet pick up and rinsing machine to remove all the dirty water, and rinse the floor with clean water.

Porcelain Floor During Cleaning in Buckingham

Next we moved on to cleaning the grout. I started by applying Tile Doctor Pre-Treatment Cleaner and left it for approximately 15 minutes before scrubbing it in by hand using a stiff grout brush.

This process serves two purposes: firstly, it helps to remove as much dirt as possible from the grout lines prior to re-colouring and secondly, the acidity in the product etches the grout slightly, helping to make a better bond with the Grout Colourant.

Once the process was complete, I rinsed and dried the floor one more time and left it to dry off overnight.

Recolouring Grout

The next morning, I returned to colour and seal the grout with an Ivory Grout Colourant as selected by the customer. The process is quite straight forward and involves using a small brush to carefully apply the colorant along each grout line. When I was finished, I made sure to clean any excess product off the tiles before it had time to dry.

Finally, I buffed the floor with a fine white buffing pad, leaving the tiles looking clean and fresh, with the grout uniform. The customer was absolutely delighted with the service and the results.

Porcelain Floor After Cleaning in Buckingham

Restoring the Appearance of Porcelain Tile and Grout in a Buckinghamshire Kitchen

Tile Cleaning and Grout Re-Colouring of a Porcelain Tiled Kitchen in Buckingham Read More »

Old Terracotta floor refurbished in Shenley Brook End

Old Terracotta floor refurbished in Shenley Brook End

This old Terracotta floor in Shenley Brook End near Milton Keynes was already dirty with very little sealer intact when our customer moved into the property. Then after having extensive building work done throughout the property they were in desperate need of a Tile Doctor service to improve the look of the floor.

Old Terracotta Floor Before Cleaning in Shenley Brook End

Cleaning Old Terracotta Floor Tiles

We started by applying a strong dilution of Tile Doctor Pro-Clean to the floor which is our go to cleaning product for all types of Tile, Stone and Grout. After approximately 20 minutes of dwell time we scrubbed the floor with a black scrubbing pad fitted to a rotary machine. This broke down most of the dirt and removed any remaining sealer. Once the whole floor had been treated in this manner it was rinsed thoroughly with water which was then extracted using a wet vacuum.

Having removed the soiled cleaning solution, we could see the result achieved on the floor and although there was a massive improvement there were some tiles we still were not totally happy with. We went back to these tiles and applied a stronger Tile Doctor product called NanoTech HBU which stands for Heavy Build-Up remover. We gave this an hour to dwell.

Whilst the NanoTech was doing its magic on the problem tiles we went to work scrubbing all the grout lines by hand using more Pro-Clean. Once we had finished cleaning the grout we gave the whole floor one more rinse and were pleased to see the problem tiles were now looking much better.

Sealing Old Terracotta Floor Tiles

We then left the floor to dry off completely overnight and returned the following day to seal the floor. Made from clay Terracotta is very porous and needs to be sealed to stop dirt becoming ingrained in the tile, it also improves its general appearance.

To fully seal the floor, we used six coats of Tile Doctor Seal and Go which will provide complete protection against stains and dirt, Seal and Go also adds an appealing satin sheen to the tile.

Old Terracotta Floor After Cleaning in Shenley Brook End

For an old floor that has been exposed to building work it’s now looking much cleaner and healthier; more importantly the customer was delighted with the service and left the following glowing review which is always appreciated:

Andrew and his colleagues (including Gemma in the office) could not have been more helpful and courteous. They are some of the tidiest tradesmen we’ve met! The results have exceeded our expectations and the service is very cost-effective compared to the cost of a new tiled floor, so happy customers all round. Thanks again!

Professional Terracotta Floor Renovation in Buckinghamshire

Old Terracotta floor refurbished in Shenley Brook End Read More »

Heavily Soiled Terracotta Kitchen Floor Transformed in Penn

Heavily Soiled Terracotta Kitchen Floor Transformed in Penn

The new owner of this house in the very old and quaint English village of Penn, Buckinghamshire wanted to refresh the look of the Terracotta tiled kitchen floor before they moved in. It had suffered from a heavy soil build-up of dirt over time due to inadequate maintenance and ineffectual sealer.

Since Terracotta (which came into popular use in the West in the 19th century) is highly porous, large amounts of dirt can become ingrained very quickly if not taken care of. Restoring this floor would be a two-day job, including thorough cleaning and stripping, as well as the application of a fresh sealer to provide long-term protection.

Terracotta Tile Before Cleaning in Penn Bucks

Cleaning a Heavily Soiled Terracotta Tiled Floor

The first day was spent giving the tiles a deep clean. To begin, I mixed a strong solution of the heavy duty alkaline cleaner, Tile Doctor Pro Clean, which a versatile product suitable for tackling heavy soil build up on a range of natural stone floors.

The solution was spread evenly across the surface area of the floor, before being worked into the stone with a commercial rotary machine fitted with an abrasive scrubbing pad. This really helped to break down the layers of muck. Next, I paid particular attention to the grout lines, scrubbing them with the acid-based Tile Doctor Grout Clean Up to remove dirt and neutralise any grout haze and mineral salts that had built up. Thanks to this the stained grout lines were restored to their original colour.

The final task on day one was to strip away the remaining failed sealer using Tile Doctor Remove & Go, which is specially designed for this purpose. Similar to earlier, the product was worked in using the rotary machine and abrasive pad. Once the cleaning process was complete, I washed the floor to remove all chemicals and slurry, before leaving the floor to dry naturally overnight.

Sealing a Terracotta Tiled Floor

Returning to the house the next day, I firstly checked for any remaining moisture on the, which is important as it can negatively impact sealer performance. With everything in good condition I proceeded to seal the tiles using the solvent-based, topical sealer known as Tile Doctor Seal and Go.

I applied multiple coats in order to build up sufficient protection on the surface of the tiles to reduce the damage of future spillages and staining. The sealer will also provide a durable and aesthetically pleasing low sheen finish.

Terracotta Tile After Cleaning in Penn Bucks
As you can see from the before and after photographs, a remarkable difference was made to the condition and appearance of this Terracotta tiled floor. My customer was very pleased with the results, and I’m sure the new home owner will be even more pleased to find the floor looking great when they move in.

Deep Cleaning a Heavily Soiled Terracotta Tiled Floor in Buckinghamshire

Heavily Soiled Terracotta Kitchen Floor Transformed in Penn Read More »

Very Dirty Victorian Tiled Hallway Cleaned and Sealed in Prestwood

Very Dirty Victorian Tiled Hallway Cleaned and Sealed in Prestwood

Recently I travelled down to the village of Prestwood in the Chiltern Hills of southern Buckinghamshire, to work on a Victorian tiled porch and hallway. Victorian tiles are commonly found in the entrance areas of older houses and unfortunately in this case the tiles had become heavily ingrained with dirt over time, and had suffered from additional paint and plaster spillages. The result was an unsightly mess; my client was considering covering the floor with lino after several unsuccessful attempts at cleaning it. I was called upon to provide a professional clean and seal, restoring these great Victorian tiles back to looking their best again.

Victorian tiled hallway before cleaning and sealing Prestwood Victorian tiled hallway before cleaning and sealing Prestwood

Cleaning dirty Victorian tiles

On my first day at the house, I mixed up a solution of 50 per cent Tile Doctor Pro-Clean, a high alkaline cleaner, and NanoTech HBU (formerly known as Ultra Clean), which is a cleaning product that contains nano-sized abrasive particles that penetrate deep into the stone to lift ingrained dirt to the surface. This solution was worked into the tiles using abrasive scrubbing pads fitted to one of my commercial rotary machines.

Victorian tiled hallway after cleaning Prestwood
The cleaning process left over a slurry of residue which I rinsed away with clean water and extracted with a wet vacuum. I was still left with the issue of stubborn paint spillages, so I applied a layer of Tile Doctor Remove & Go, a stripper with cleaning properties which is very effective at breaking down paint and adhesive stains.

Once the paint spillages had been dealt with I gave the area another rinse with clean water. I then left the house, allowing the floor enough time to dry overnight.

Sealing Victorian tiles

Upon my return the day I set about sealing the newly cleaned Victorian tiles. Before starting the sealing process I inspected the floor to check for any dampness, knowing that any excess moisture could potentially damage the performance of the sealer.

When I was satisfied that the tiles were fully dried, I applied Tile Doctor Seal & Go, a sealer which offers durable surface protection, along with an aesthetically pleasing, low-sheen finish which brings out the colour in the stone. This product can be used to seal internal, porous surfaces including Victorian, Slate, textured Quarry and Sandstone tiles.

Victorian tiled hallway after cleaning and sealing Prestwood
The process made an amazing difference to the floor as you can see from the photographs; additionally the restoration of such an original feature adds a lot of value and looks so much better than lino!

Victorian tiled hallway and porch floor restoration in Buckinghamshire

Very Dirty Victorian Tiled Hallway Cleaned and Sealed in Prestwood Read More »

Tiled Terracotta Kitchen Floor, Winchmore Hill

Tiled Terracotta Kitchen Floor, Winchmore Hill

This was a rather dirty Terracotta kitchen floor located at a house in Winchmore Hill in Buckinghamshire, not to be confused with the Winchmore Hill in London. The sealer on the tiles had worn off some time ago and now the dirt was becoming trapped in the pores of the Terracotta making it impossible to clean.

Terracotta Kitchen Tiled Winchmore Hill Before

Deep Cleaning Terracotta Tile

To deep clean into the pores of the Terracotta a diluted solution of Tile Doctor Pro Clean, which is a strong tile cleaner sage to use on tiled floors, was applied to kitchen floor and left to soak in for around ten minutes. Then with the aid of a commercial rotary machine the solution was scrubbed into the tiles to release the many years of accumulated ingrained soiling which was removed from the floor using a wet vacuum.

Although this deep cleaned the tile the grout lines needed further attention and were treated with Tile Doctor Grout Clean-up solution and then washed down with fresh water which was removed with a wet vacuum.

There was still evidence of sealer remaining on the floor in some areas so the next step in the process was to apply Tile Doctor Remove and Go again working it into the tile using a scrubbing pad fitted to a rotary machine. Remove and Go as its name suggests is used to remove waxes and sealants from tile and stone. It certainly did the job and once the resultant slurry was vacuumed up and the floor given a final rinse to remove any chemicals used in the process the floor was looking much cleaner and left to dry overnight ready for our return

Sealing Terracotta Tile

The next day came back to do the sealing and checked the floor first for any spots we might had missed and also to ensure it had dried sufficiently. Tile Doctor Seal and Go was then applied in coats to fully seal the floor. As well as adding protection Seal and Go adds a nice subtle satin finish to Terracotta and being water based it doesn’t give off an odour when it’s drying.

Terracotta Kitchen Tiled Winchmore Hill After
 

Terracotta Floor Cleaned and Sealed in Buckinghamshire

Tiled Terracotta Kitchen Floor, Winchmore Hill Read More »

Slate Tiled Farmhouse Kitchen Floor Cleaned and Sealed in Little Hampden

Slate Tiled Farmhouse Kitchen Floor Cleaned and Sealed in Little Hampden

These slate tiles had been laid in the kitchen of a farmhouse in the village of Little Hampden around twenty years ago and since that time had become heavily soiled with a build-up of dirt and over applied sealants.

Slate Tiled Kitchen Farmhouse Floor Before Cleaning in Little Hampden

Cleaning a Slate Tiled Floor

To get the floor clean a strong dilution of Tile Doctor Pro-Clean was applied to the floor, allowed to soak in for a while and then scrubbed into the tile and grout with the aid of a commercial rotary machine. Once done the floor was washed down with water which was then removed along with the soiled cleaning solution using a wet vacuum.

The Pro-Clean removed the top soiling throughout the floor but it became clear that something stronger would be need to remove the heavy build-up of old sealants. Fortunately we have a product called Tile Doctor Remove and Go which is designed to strip floors of sealers so this was applied to the floor in a similar fashion as before and this tackled the problem. The next task was to clean the grout lines with Tile Doctor Grout Clean-up and give the whole floor a final rinse with more water to ensure any chemical residue is removed leaving the floor ready for sealing.

Sealing a Slate Floor

The floor was left to dry overnight and I came back the next day to seal it to protect for years to come and improve the general look of the slate which really does look better when sealed.

To seal the floor I used a combination of products to get the best results. First a coat of Tile Doctor Colour Grow was applied which is a colour enhancing impregnating sealant which occupies the pores in the stone protecting it from within and then a number of coats of Tile Doctor Seal and Go were added to add a nice subtle sheen to the floor.

Slate Tiled Kitchen Farmhouse Floor After Sealing in Little Hampden
Our customer was extremely pleased with the results and took up our offer of a Tile Doctor maintenance contract to enable her to keep the floor in pristine condition.

Slate Tiled Kitchen Refresh in Wiltshire

Slate Tiled Farmhouse Kitchen Floor Cleaned and Sealed in Little Hampden Read More »

Cleaning and Polishing a Limestone in Aston Clinton Communal Hallway

Cleaning and Polishing a Limestone in Aston Clinton Communal Hallway

This Polished Limestone floor had been laid in the communal hallway of a block of flats in Aston Clinton and as you can see from the photograph below the stone had become ingrained with dirt over time and was now overdue for a deep clean and polish. Apologies for sounding like a dentist and also the photographs as the lighting wasn’t brilliant in the corridor.

Polished Limestone before cleaning in Aston Clinton

Cleaning Limestone Tile and Grout

Due to the heavy soling of the stone and grout lines we started by applying a strong dilution of Tile Doctor Pro-Clean which is an alkaline cleaning product that’s safe to use on Stone and Grout. The solution was scrubbed into the floor using a commercial rotary machine fitted with a fitted poly brush; once the cleaning solution had become dirty the floor was rinsed with water and the process re-applied until the stone and grout were clean.

Polishing Limestone Floor Tile

Our next task was to re-build the polish on the stone using a set of Tile Doctor Diamond encrusted burnishing pads which are applied to the tile in sequence from Coarse to fine further cleaning and polishing the stone until its returned to its original condition. The pads come in a set of four and you start with the coarse pad together with a little water. This this cuts through and removes surface grime, dirt and any remaining sealer. The floor is then rinsed and you move on through the remaining pads until the polish has been restored to the tiles. This process took up much of the first day so the floor was given a final rinse and left to dry overnight.

Sealing Limestone Tiles

On the second day we returned to find the tiles had dried and we started to seal the Limestone using three coats of Tile Doctor Colour Grow which is a colour intensifying sealer that soaks into the pores of the stone bringing out the natural colours whilst providing that all important lasting protection.

Polished Limestone after cleaning in Aston Clinton
 

Limestone Tile Cleaning and Polishing in Aston Clinton, Buckinghamshire

Cleaning and Polishing a Limestone in Aston Clinton Communal Hallway Read More »

Deep Cleaning and Polishing a Limestone tiled kitchen floor in Marlow

Deep Cleaning and Polishing a Limestone tiled kitchen floor in Marlow

We were asked by the new owners of this property in Marlow to clean and seal the Limestone tiled kitchen floor which was in a heavily soiled condition and it was apparent that the tiles and the grout lines hadn’t been professionally cleaned for some time.

Limestone Tiled Kitchen Floor Before Cleaning in Marlow Limestone Tiled Kitchen Floor Before Cleaning in Marlow

Cleaning a Limestone Tiled Floor

To lift the ingrained soiling and restore the grout we started by applying a dilution of Tile Doctor Pro-Clean which was hand scrubbed into the grout lines with a stiff grout brush, this was followed up with Tile Doctor Grout Clean-Up which returned the grout lines to the original colour. The resultant soiled solutions were then removed from the floor with the aid of fresh water and an industrial wet vacuum.

Polishing Limestone Tiles

Our next task was to re-hone the stones using the Tile Doctor Diamond encrusted burnishing pad system which cleans and polishes natural stone returning it to its original condition. The pads come in a set of four and you start with the coarse pad together with a little water. This this cuts through and removes surface grime, dirt and any remaining sealer. The floor is then rinsed and you move on through the remaining pads until the polish has been restored to the tiles. This process took up much of the first day so the floor was given a final rinse and left to dry overnight.

Sealing Limestone Tiles

On the second day we returned to find the tiles had dried and as expected and we started to seal the tile which we did with two coats of Tile Doctor Colour Grow which is a colour intensifying sealer that soaks into the pores of the stone bringing out the natural colours whilst providing that all important lasting protection.

Limestone Tiled Kitchen Floor After Cleaning and Sealing in Marlow Limestone Tiled Kitchen Floor After Cleaning and Sealing in Marlow

The customer was amazed with the clean appearance of her tiled floors and said it had transformed her house ready to live in.

Limestone Tile Cleaning and Polishing in Marlow, Buckinghamshire

Deep Cleaning and Polishing a Limestone tiled kitchen floor in Marlow Read More »

Cleaning and Polishing a Travertine Tiled Floor in Ashton Clinton

Cleaning and Polishing a Travertine Tiled Floor in Ashton Clinton

These Travertine tiles were laid five years ago at a residential property in Ashton Clinton and our client had never been entirely happy with the tillers finish from sealing which was marked with smears and also had the tillers bare footed prints embedded within the seal. The sealer was now wearing off and polish fading so it was due to be re-done and we were given the call.

Cleaning Travertine Tile in Aston Clinton During

Burnishing a Travertine Tiled Floor

The owner had maintained the floor well so we set to work removing the old sealer using rotary machine fitted with a coarse number One diamond encrusted burnishing pad and a little water. The resultant slurry was rinsed off and removed using a powerful wet vacuum the grout lines were given a good scrub by hand using a stiff brush and Tile Doctor Grout clean–up. With the same method we cleaned and polished the tiles with the number Two and Three burnishing pads followed by a final clean and rinse and then left to dry overnight.

Polishing Travertine Tile in Aston Clinton During

Sealing and Polishing Travertine Tile

The next day the tiles had completely dried we used the final number Four burnishing pad which is a very fine pad to polish and add shine to the travertine floor. The last stage was to seal the Travertine which we did with two coats of Tile Doctor Colour Grow which is a colour intensifying sealer that brings out the colours in natural stone and provide lasting protection.

Travertine Tile in Aston Clinton After
 

Travertine Tile Cleaning and Polishing in Ashton Clinton, Buckinghamshire

Cleaning and Polishing a Travertine Tiled Floor in Ashton Clinton Read More »

Cleaning White Porcelain Tiles at Premises in Aylesbury

Cleaning White Porcelain Tiles at Premises in Aylesbury

This commercial unit in Aylesbury had white porcelain tiles laid in the restroom and reception areas several years prior and had been assured they would be easy to clean, however over the years they had deteriorated leaving an unsightly grey staining throughout and were now in need of a thorough deep clean.

Aylesbury Office Porcelain Floor Cleaning Aylesbury Office Porcelain Floor Cleaning

Cleaning White Porcelain Tiles

A mixture of Tile Doctor Pro-Clean combined with NanoTech UltraClean impregnating cleaner products was spread evenly across the tiles and worked into the floor using a rotary scrubbing machine set on slow speed. We proceeded to work the floor in this manner to lift the soling followed by black stripping pads on a 150rpm rotary machine. When we were satisfied that the ingrained dirt had been lifted from the porcelain tile we used our van mounted pressure cleaning system to wash the dirt from the floor, this system has been a great investment for us and uses heat and high pressure to clean and remove the slurry back to recovery tanks in the van.

Aylesbury Office Porcelain Floor Cleaning

We let the floor dry and returned the second day to scrub along the stained grout lines and return them to their original colour using a strong mix of Tile Doctor Grout clean-up and with this solution rescrubbed the areas using our rotary machines and with a complete final clean and rinse buffed the tiles to a high shine.

Aylesbury Office Porcelain Floor Cleaning After


Porcelain Tile Cleaning in Aylesbury

Cleaning White Porcelain Tiles at Premises in Aylesbury Read More »

Cleaning Micro-Porous textured Porcelain Tiles in a Beaconsfield Kitchen Diner

Cleaning Micro-Porous textured Porcelain Tiles in a Beaconsfield Kitchen Diner

Our customer in Beaconsfield had been having great difficulty cleaning a textured Porcelain tiled floor that was installed in the kitchen and adjacent dining room; despite numerous attempts whatever she tried never have the desired effect. During the home survey we demonstrated on a single tile how using our cleaning agents we could remove the soiling and restore the original colour of the tile which hadn’t been seen for a number of years.

Micro porous textured porcelain in beaconsfield before cleaning Micro porous textured porcelain in beaconsfield Before Cleaning

Scrubbing Micro-Porous Textured Porcelain Tiles

Equal amounts of Tile Doctor Pro-Clean combined with Tile Doctor NanoTech UltraClean was spread evenly throughout the floor and worked in with a rotary machine fitted with a scrubbing pad running at slow speed. The tiny abrasive particles in the cleaning solution worked deep into the tile to bring out the dirt so once the whole floor was treated in this manner we switched to the next machine.

Cleaning Micro porous textured porcelain in beaconsfield Cleaning Micro porous textured porcelain in beaconsfield

The next machine we used was a truck mounted device that directs hot water onto the tile at high pressure using a second hose to remove the soiled solution back to a storage tank in the van. It’s a very effective machine that has an instant effect on the tile.

Cleaning Micro porous textured porcelain in beaconsfield
Once this process was completed we scrubbed out the grout lines using a mix of Tile Doctor Grout Clean-Up which did a good job of cleaning the grout and also removed any soiling left from our previous clean. Once this was done we gave the floor a final clean and rinse and then left to dry overnight.

Sealing Micro-Porous Textured Porcelain tiles

Most porcelain tiles like ceramics won’t take a sealer however Micro-Porous Porcelain tiles do need sealing due to their porosity so we came back the 2nd day to apply two coats of Tile Doctor Seal And Go which will protect the tile from staining and aid the future maintenance. I should mention that we recommended the use of Tile Doctor Neutral tile cleaner for regular maintenance; its neutral PH formula is ideal for sealed floors as domestic acidic cleaners will eat away at the sealer over time and reduce its life.

Micro porous textured porcelain in beaconsfield after cleaning
 

Porcelain Tile Cleaning in Beaconsfield

Cleaning Micro-Porous textured Porcelain Tiles in a Beaconsfield Kitchen Diner Read More »

Night Club WC Tile Cleaning After

Cleaning Ceramic Wall and Floor Tiled Toilets in a London Night Club

Our client’s project was to refurbish four toilets in a London Night Club but didn’t want the expense of replacing all the existing ceramic floor and wall tiles; after come across our web site we were invited to visit the club and provide a demonstration after which we were awarded the contract. Our main task on this project was to deep clean the ceramic wall tiles and floors and colour seal grout lines which had over the years had stained to a yellow appearance.

Night Club WC FloorTile Cleaning Before Night Club WC FloorTile Cleaning Before

Night Club Toilet Cleaning Day One

We started by giving all the tiles a though deep clean with Tile Doctor Pro-Clean which is a strong alkaline cleaner that is able to penetrate into the tile and lift the years of built up soiling on the tile and grout lines. This was followed with a further treatment of on the wall tile grout lines using Tile doctor Grout Clean up and another deep clean with Pro-Clean and pressure cleaned using our powerful truck mounted system which cleans under heat and high pressure and returns all the slurry to our recovery tanks for disposal.

Night Club WC Tile Cleaning After Night Club WC FloorTile Cleaning Before

Night Club Toilet Cleaning Day Two and Three

The tiles looked fantastic and like new again with the exception of the grout lines which although being deep cleaned of twenty years of dirt and grease still had a yellow appearance. The solution was to use a Grout Colourant to colour all the grout lines white again, the product we use is brilliant as not only does it give the appearance of newly applied grout is also protects the grout with a waterproof and stain proof barrier that is very easy to clean. Once dried we removed all the excess grout colourant residue from the tile and then polished the tiles to a pleasing high shine.

Night Club Urinal Wall Tile Cleaning Night Club WC Tile Cleaning After

The client was totally satisfied and impressed with our work which cost a fraction of what it could of cost to replace all the wall tiles. In fact a member of the management team was adamant that we had replaced the tile and grout as he thought it impossible we could of managed this good as new look any other way.


Commercial Tile Cleaning at a London Night Club

Cleaning Ceramic Wall and Floor Tiled Toilets in a London Night Club Read More »

Slate Tiled Floor in Tring Bucks Before and After

Riven Slate Tiled Kitchen floor cleaned and sealed in Tring Bucks

These Riven Slate tiles at house in Tring Buckinghamshire had been laid five years earlier and the original sealant had worn off especially around the high traffic cooker and fridge areas. This has led to dirt getting trapped into the pores of the tile and the whole floor becoming rather dull.

Slate Tiled Floor in Tring Bucks Before

Cleaning Riven Slate Floor Tiles

We started with a strong dilution of Tile Doctor Pro-Clean which is an alkaline tile cleaner designed for use on tile, stone and grout. It was scrubbed into the tile and grout lines to give the floor a deep clean and then rinsed with clean water. To strip the remaining sealant we used Tile Doctor Remove and Go spread throughout the floor and then left for 45 minutes to soften the sealant, then with the use of an aggressive black pad fitted to a rotary machine the remaining sealant was stripped from the tile. The last step was to rinse the floor with clean water to remove any cleaning products and neutralise it before sealing, it was then left overnight to dry.

Sealing Riven Slate Tiles

The next day we came back to seal the floor, the customer had previously requested a matt finish for the floor so Tile Doctor Colour Grow was chosen as the sealer, this product provides the desired matt finish but also lifts the natural colours in the stone as well as providing the necessary stain protection going forward.

Slate Tiled Floor in Tring Bucks After
 

Cleaning and Sealing a Slate Tiled Floor in a London shop

Riven Slate Tiled Kitchen floor cleaned and sealed in Tring Bucks Read More »

Ceramic Tile Wendover After

Deep Cleaning Textured Ceramic kitchen floor tiles Wendover Bucks

We were asked to clean these textured ceramic floor tiles in Wendover Bucks which had become heavily soiled and ingrained with dirt leaving the tiles with a black appearance, the grout lines had also become stained and discoloured. Our customer had tried all types of cleaning agents but could never get the desired effect.

Ceramic Tile Wendover Washing Ceramic Tile Wendover Washing

Cleaning a Textured Ceramic Tiled Floor

A dilution of Tile Doctor Pro-Clean alkaline tile cleaner was applied throughout the tiled floor and worked in with the aid of a scrubbing pad fitted to a rotary machine, a stiff hand brush was also used along the grout lines and this managed to lift most of the soiling from the floor.

Next step was to use our powerful truck mounted heated turbo system which jet washed the remaining particles out of the crevasses of the stone. This system uses high pressure heated water though a spinner tool, it’s an amazing tool that returns the dirty water directly back to a recovery tank leaving the floor chemical free and neutralised.

Before leaving I recommended to the customer that regular use of Tile Doctor Neutral Tile cleaner would help to keep their tile and grout in better condition.

Ceramic Tile Wendover After Ceramic Tile Wendover After


Deep Cleaning Ceramic Tiles in Buckingham

Deep Cleaning Textured Ceramic kitchen floor tiles Wendover Bucks Read More »

Marble Floor Cleaned in Ealing

Marble Tiled Floor Cleaned and Polished in Ealing

These photographs were taken at a house in Ealing, West London where the customer had requested a deep clean and polish of the marble tiled floors installed in a kitchen and conservatory which had become dull and dirty over a period of time.

Marble Floor Cleaning in Ealing

Marble Tiled Floor Polishing

The first step was to give the Marble floor a thorough clean throughout with a medium dilution of Tile Doctor Pro-Clean which is an industrial strength Tile Cleaner safe to use on natural stone floors, we also took this opportunity to use a stiff brush along the grout lines to get them nice and clean, the soiled cleaning solution was removed using a wet vacuum and the floor rinsed with clean water.

The next step was to use a set of diamond encrusted Twister Burnishing Pads fitted to a rotary buffing machine to polish the floor. The pads come in a set of four; you start with the Red pad together with plain water and this cuts through and removes surface grime and any surface seal. You then progress through one by one until you get to the final Green polishing pad which provides a high polish, we managed to complete most of this process before the end of day.

Marble Floor Cleaning in Ealing

Polishing and Sealing Marble Tile

The next day we completed the polishing process with the Green pad which really brought a deep shine to the floor. To protect the floor it was then sealed using Tile Doctor Colour Grow sealer which provides a natural finish whilst enhancing the natural colours in the tile. We waited for the sealer to dry before buffing it with a white buffing pad to bring up the shine further.

Marble Floor Cleaned in Ealing
 

Marble tiled floor cleaned and polished in Ealing

Marble Tiled Floor Cleaned and Polished in Ealing Read More »

Terracotta Tile in Denham Before and After

Terracotta Tiled Floor Maintained in Denham, Buckinghamshire

This terracotta floor installed in a house in Denham, at the southern end of Buckinghamshire, had become discoloured with ingrained soil and a mix of old sealers and wax coating leaving an unsightly looking kitchen floor that was in need of stripping, deep cleaning and reseal.

Terracotta Tile in Denham Cleaning

Cleaning Terracotta Tile

I started the job using a solution of Tile Doctor Pro-Clean, which is a heavy duty alkaline product ideal for cleaning natural products such as Terracotta; this was scrubbed into the tiles quite aggressively with a black pad fitted to a rotary machine on slow speed. Once this had been completed we could see the remaining old sealers and wax layers and started to remove them using a strong tile stripper called Tile Doctor Remove and Go. Once we were satisfied we had removed all of the coatings we gave the floor a thorough rinse with clear water to remove any remaining residue and left it to dry overnight.

Terracotta Tile in Denham Cleaning

Sealing Terracotta Tile

The next day came back to do the sealing and checked the floor first for any spots we might had missed and also to ensure it had dried sufficiently. Tile Doctor Seal and Go was used to seal the floor, it’s a water based sealer so it doesn’t give off an odour when it’s drying and also offers durable stain protection together with a satin finish. Terracotta is very porous and in the end the floor actually took nine coats of sealer before it was fully sealed. Applying a sealer does takes a long time to apply as you have to wait for it to dry before applying the next coat.

Terracotta Tile in Denham After
The work took two days in all and you can see the difference for yourself, the floor is much cleaner and will be a lot easier to maintain going forward.

Terracotta Floor Cleaned and Sealed in Buckinghamshire

Terracotta Tiled Floor Maintained in Denham, Buckinghamshire Read More »

Limestone Floor Before and After Cleaning

Cleaning and Polishing a Limestone tiled floor in High Wycombe

The photographs on the page come from the kitchen and dining area of a house in High Wycombe which had previously been rented out to tenants and the client wanted required the Limestone Tiled floor tiles to be cleaned and polished before the next occupant moved in.

Limestone Floor Before Cleaning Limestone Floor Before Cleaning

Cleaning a Limestone Tiled Floor

We started the project with a deep clean of the tiles and grout using a dilution of Tile Doctor Pro-Clean which is a heavy duty alkaline cleaning product specially designed for use on natural stone floors. This was left to dwell for a while and then agitated using a rotary machine fitted with a Black Scrubbing pad. The soiled solution was then removed using a wet vacuum and the floor was then rinsed down with fresh clean water; the process was repeated until a satisfactory result was obtained and we also treated the discoloured grout lines with more Pro-Clean and a stiff brush.

Limestone Tiled Floor Polishing

We used a set of diamond encrusted Burnishing Pads fitted to a rotary buffing machine to polish the Limestone floor. These pads are ideal for restoring the shine on hard stone surfaces such as Limestone and Marble, the come in a set of four and you start with the Red pad together with plain water and this cuts through and removes surface grime and any surface seal. The floor was then washed down again, this time with Tile Doctor Neutral cleaner which is an everyday cleaning product and then left to dry overnight.

Sealing Limestone Tiles

On the second day we gave the Limestone a polish using a Green burnishing pad which is a very fine pad that provides a high polish. The last step was to seal the Limestone which we did with two coats of Tile Doctor Colour Grow which is a colour intensifying sealer that brings out the colours in natural stone and provide lasting protection.

Limestone Floor After Cleaning
 

Limestone Tile Cleaning and Polishing in High Wycombe, Buckinghamshire

Cleaning and Polishing a Limestone tiled floor in High Wycombe Read More »

Textured Marble floor in Chesham After

Polishing a Textured Marble Tiled floor in Chesham

A customer recently purchased a property the village of Chesham and hoped we could improve the appearance of her textured marble tiled floors which had over a number of years become dull and lost the polished marble look one would expect from a floor of this quality.

Marble Tile Cleaning and Polishing

For polished stone like Marble and Limestone the only way to restore the finish is to burnish the floor and this floor was no different. The burnishing pads are diamond encrusted and come in a setup of four seventeen inch pads for use with a heavy rotary machine, each pad having a different purpose.

So we started with the Red pad which is designed to remove sealers together with a little water, we then took the opportunity to clean up the grout by applying a dilution of Tile Doctor Pro-Clean and scrubbing it into the grout lines to get them clean. Next step was to remove the soiled cleaning solution and wash the floor down with water before moving onto the white burnishing pad which will grind off ingrained dirt and is the first step in polishing the floor. We then completed the floor polishing using the Yellow then Green polishing pads which smooth down the surface and produce a shiny finish.

Textured Marble floor in Chesham Before

Sealing Textured Marble Tiles

Once the floor was polished we applied Tile Doctor Shine Crystallising Powder to the marble tile using a rotary machine fitted with a white polishing pad. This last step gives a very deep high shine as well as a tough durable finish.

Textured Marble floor in Chesham After
When the customer returned she asked was it safe to walk on as the floor as at first glance it looked wet; we assured her this is the Tile Doctor high shine appearance and is perfectly ok.

Textured Marble Floor Tiles Cleaned and Polished in Buckinghamshire

Polishing a Textured Marble Tiled floor in Chesham Read More »
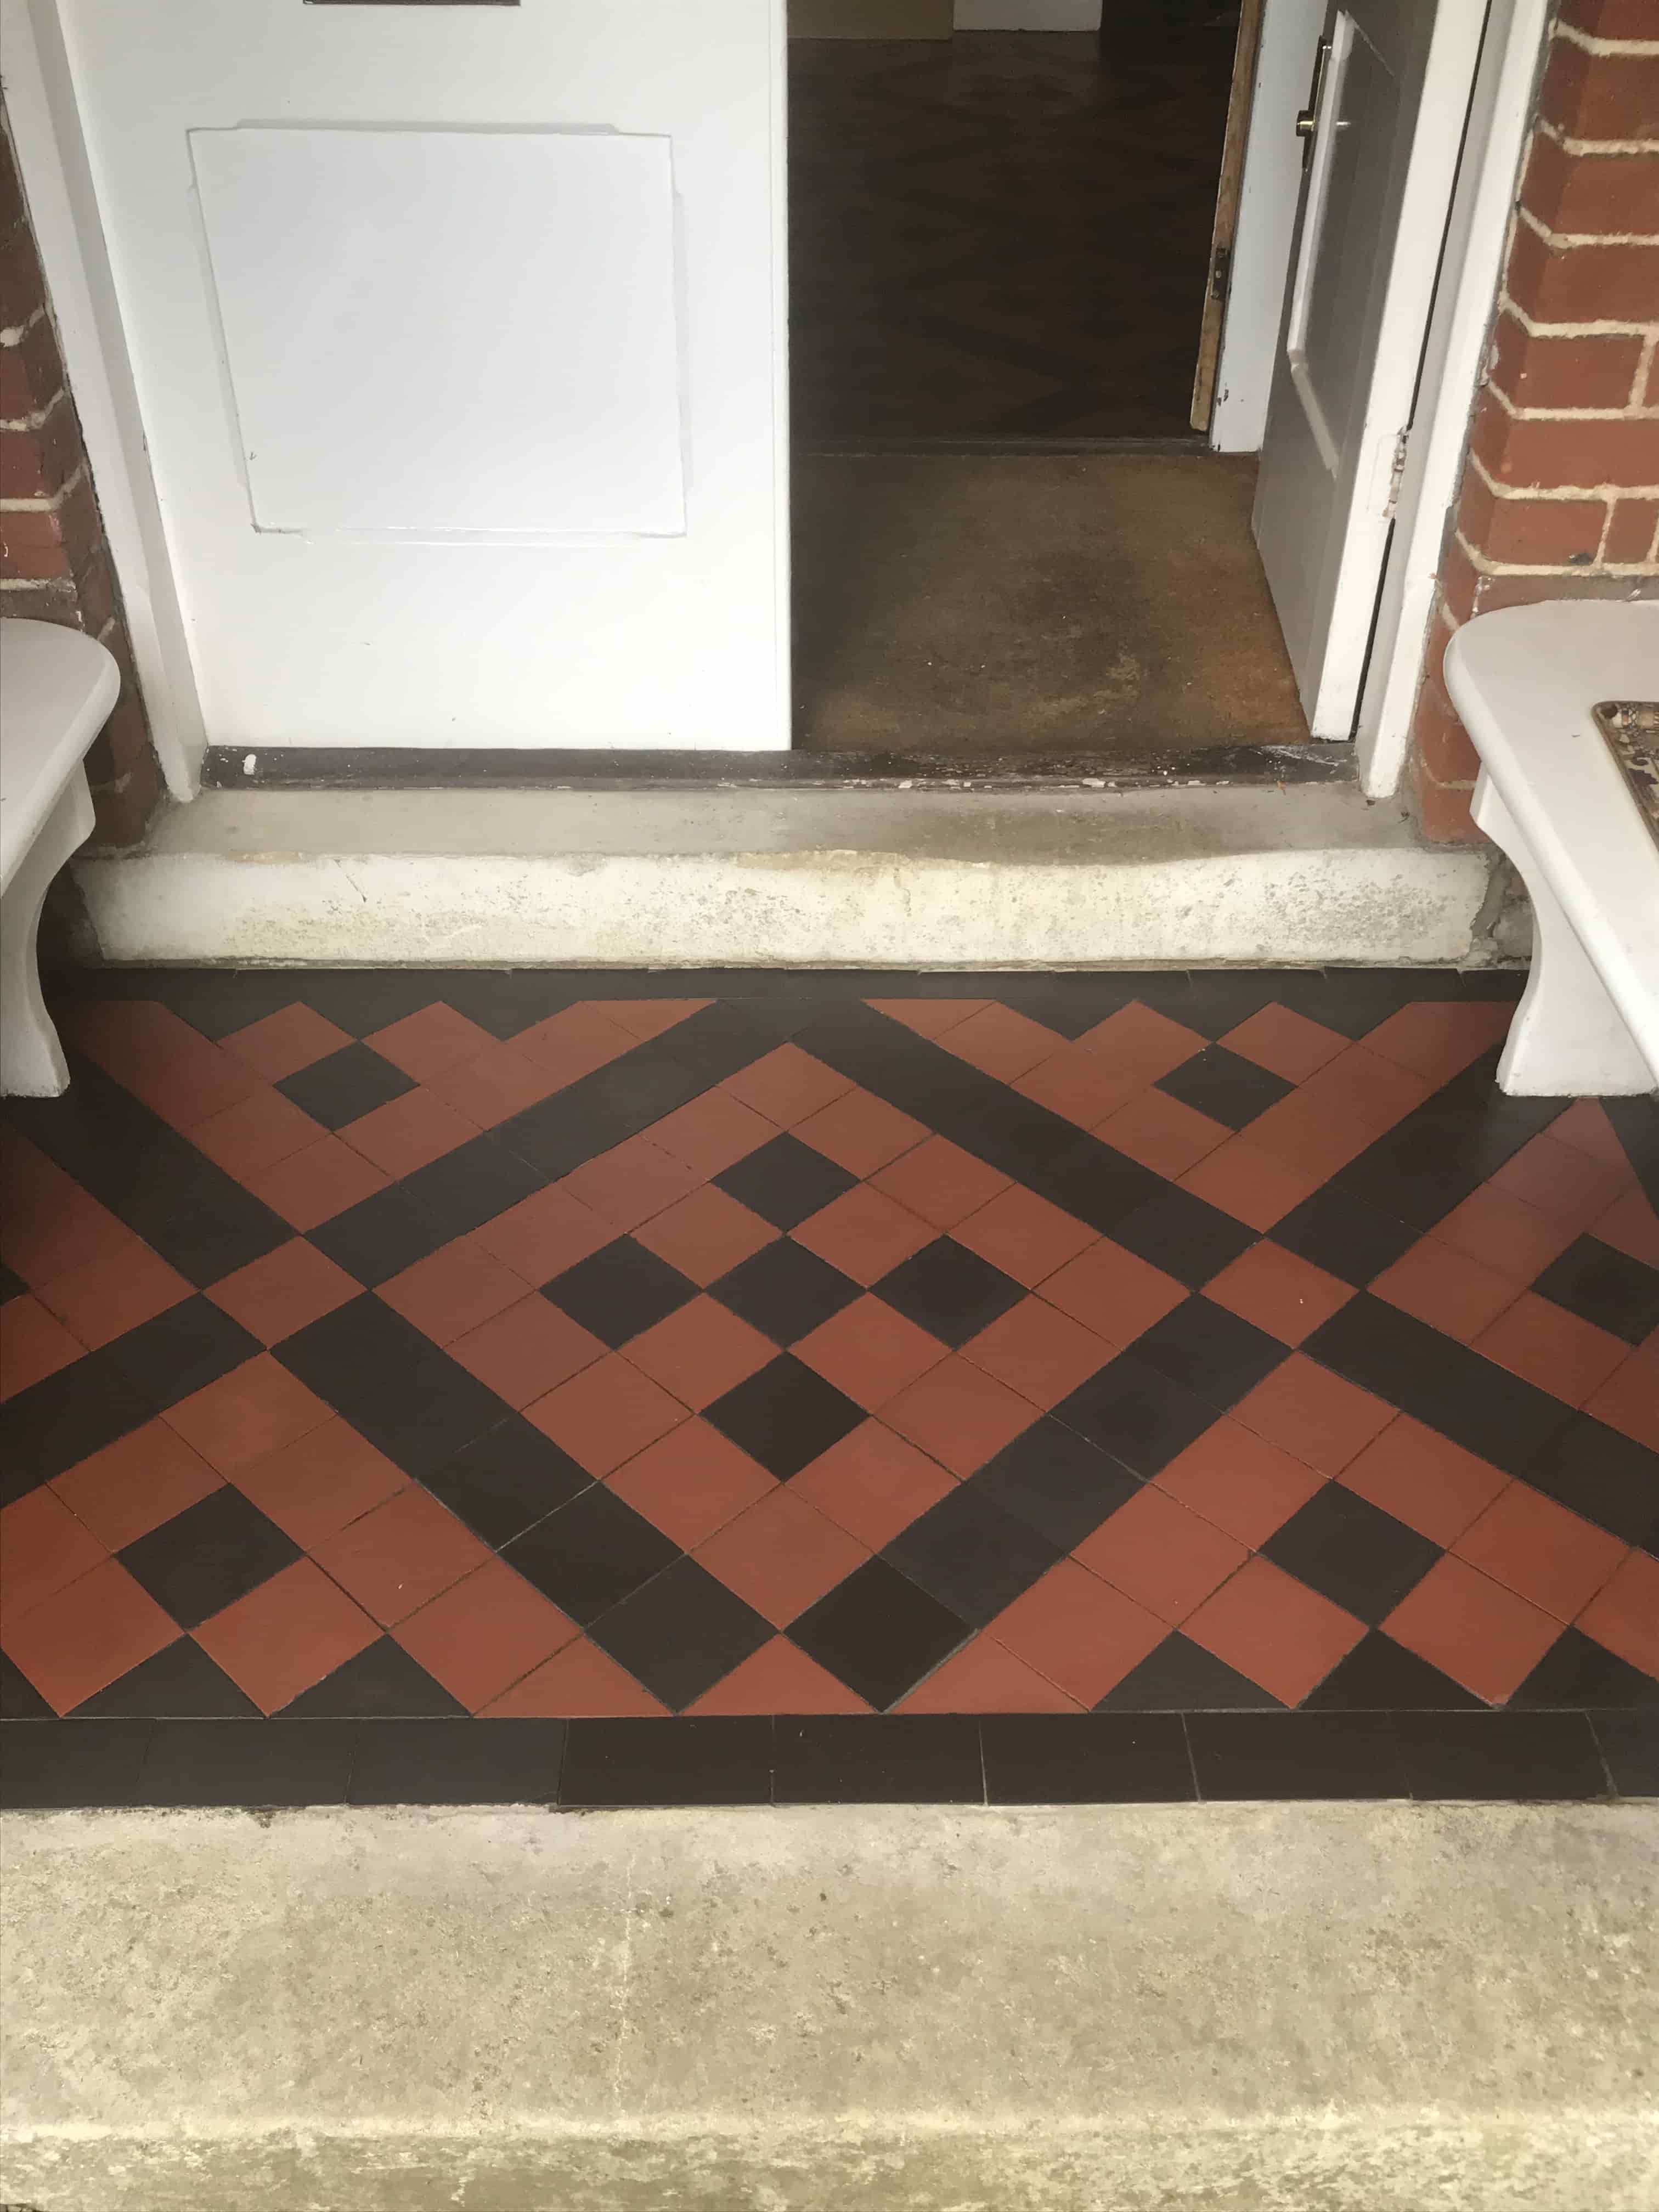
Ceramic Tile and Grout Before and After

Grout colour seal and Ceramic tile clean in Chalfont St Giles

We were asked to improve the appearance of this Ceramic tiled floor and Grout installed in a kitchen in Chalfont St Giles which over a few years had become difficult to keep clean and the grout lines had become stained and discoloured.

Ceramic Tile and Grout Before Ceramic Tile and Grout Before

Cleaning Tile and Grout

Our first task on day one was to clean the Ceramic tiles and Grout so we created a diluted 50/50 mixture of tile doctor Pro-Clean and Nanotech UltraClean, the two products combine to provide a very powerful tile friendly alkaline cleaner with tiny sized abrasive particles. This was left to soak into the tile and grout before being agitated and scrubbed with a scrubbing machine running on low speed. We also used stiff grout hand brushes along the grout lines. Once we were happy with the overall condition of the tile and grout it was washed down using clean water and the resultant soiled solution extracted from the floor using a wet vacuum. I’m pleased to say that using this method we were able to return the tile and grout back to its original colour.

Whilst this was a fantastic transformation the grout lines being porous would untreated soon become dirty and discoloured. The only answer to this problem is a permanent colour seal to the grout lines which not only aids the future floor cleaning, but improves the whole appearance of the floor.

Applying the Grout Colour

Before applying a Grout Colour it’s important to ensure the grout is clean of grease and dirt naturally we had just cleaned this floor so this was not a problem I only mention it in case you were considering taking on a similar task yourself.

Once the grout has dried you can start applying the colourant which is a relatively straightforward process of squeezing the product onto a toothbrush and running it onto the grout. Don’t be tempted to use an old toothbrush for this purpose as it may contaminate the colourant leading to discolouration in the finish.

We completed the project the next day using an Aqua Mix sand coloured Grout Colourant; the customer was extremely pleased and commented how whole clean and efficient the process was.

Ceramic Tile and Grout After Ceramic Tile and Grout After


Tile Cleaning and Grout Colouring in Buckinghamshire

Grout colour seal and Ceramic tile clean in Chalfont St Giles Read More »

Terracotta Tiles Before and After Sealing

Terracotta Kitchen Tiles Deep Cleaned in Great Missenden

This customers Terracotta tiled floor was installed in the kitchen of a house in Great Missenden and had become ingrained with dirt and soiling over the last twenty years leaving an unsightly black greasy appearance which was impacting the sale of the property.

Cleaning Terracotta Tiles

On the first day we covered the floor with a strong dilution of Tile Doctor Pro Clean which is a heavy duty Tile Stone and Grout Cleaner mixed 50/50 with Tile Doctor Ultra Clean which adds abrasive particles into the mix. The resulting combination provides a powerful cleaning agent that penetrated deep into the tile and in conjunction with a rotary machine fitted with a scrubbing pad managed to remove several layers of soiling. We then rinsed the floor with fresh water and removed the vast amount of slurry with a wet vacuum.

Terracotta Tiles During Cleaning
The next step of our cleaning process was to apply Tile Doctor Remove and Go across the tiles and let it soak in as before; Remove and Go is a coatings remover that will strip the floor of any seal or wax coatings which had been applied to the floor over the years, again the product was worked in using a scrubbing pad and then washed off.

Once we were happy with all cleaning and seal and wax removal and the floor had returned to its original condition we left the floor to dry.

Terracotta Tiles After Sealing

Sealing Terracotta Floor Tiles

Once the floor was dry we started to seal it in order to protect it and for this we chose Seal and Go which not only leaves a surface protection but also brings though the true colour of the stone returning the floor to its original beauty, Terracotta is very porous and it took seven coats before it was fully sealed.

Our customer was very happy with the difference and I have since been informed they have received a first offer on the property.


Terracotta tiles deep cleaned in Great Missenden, Buckinghamshire.

Terracotta Kitchen Tiles Deep Cleaned in Great Missenden Read More »

Limestone Floor with Slate Inlays After

Limestone Tiled floor cleaned and polished in Little Chalfont

This Limestone tiled floor with Slate Inlays was installed in a house in Little Chalfont, Buckinghamshire; the previous sealer had failed and was no longer offering any protection allowing dirt to become ingrained in the stone and become dull from soiling.

Limestone Floor with Slate Inlays Before

Cleaning and Polishing Limestone Tiles

To get the Limestone Tiled floor back to its original condition we used a set of diamond encrusted 17” Burnishing Pads fitted to a heavy rotary buffing machine. It’s important to give the floor a quick clean first to prevent grit from getting trapped in the pads and leading to deep scratches on the surface. You start off with the coarse red pad together with a little water which can remove sealers before moving onto the other pads.

At this point we gave the floor a deep clean using Tile Doctor Pro-Clean which is a heavy duty alkaline cleaning product that’s safe to use on Stone floors mixed 50/50 with NanoTech Ultra-Clean which adds tiny abrasive particles into the solution; this combination is especially effective on grout so we took the opportunity to get into the grout lines as well. The resulting soiled solution was removed using a wet vacuum and the floor washed down with clean water before continuing the burnishing process with the White cleaning pad followed by the Yellow Polishing pad which smooth’s the surface and finally the Green pad which gives that high shine finish.

Sealing Limestone Tiles

The floor was washed down to remove any particles left over from the polishing and left to dry before we set about sealing using three coats of Tile Doctor Colour Grow. Colour Grow is recommended for a number of stone surfaces and does well to lift the natural colours in the stone as well as providing on-going surface protection.

Limestone Floor with Slate Inlays After
Before leaving we recommended that the customer use Tile Doctor Concentrated Tile & Stone Cleaner for cleaning going forward, like Pro-Clean it’s an alkaline cleaning product that will clean the stone without eating into the sealant. The house owner was very satisfied with the results and promised to recommend our services to family and friends.

Limestone Tiled Floor Restored in Buckinghamshire

Limestone Tiled floor cleaned and polished in Little Chalfont Read More »

Travertine Floor Aylesbury After

Honed Travertine Tiled floor Re-Sealed in Aylesbury

Details below of a newly laid Travertine Honed & Filled floor in Aylesbury that needed stripping and re-sealing. The work was done at the request of a building company who had just completed a pair of semi-detached houses laid with Travertine tiles on the ground floor. Unfortunately the tiling contractor had failed to clean the tile surface properly before sealing and had trapped particles of dust and debris into the sealer, as a result the whole floor was as rough as sandpaper and needed to be stripped and re-sealed prior to their clients moving in the following week.

Travertine Floor Aylesbury Before

Cleaning Travertine Tile

To remove the existing sealer and to polish the stone we used the Tile Doctor diamond burnishing system. This involves burnishing the floor with diamond encrusted pads fitted to a heavy rotary machine, the system consists of a set of four seventeen inch coloured pads and you work your way through the pads from red (sealer removal) through to green (final polishing). This work returned the stone to its original condition ready for sealing.

Travertine Floor Aylesbury After

Sealing Travertine Tile

We sealed the floor with three coats of Tile Doctor Colour Grow which provides excellent stain protection whilst enhancing the natural colours in the stone. The building company was pleased that we had managed to resolve the problem before the owners moved in as it had avoided an embarrassing situation for them. Interestingly we have since completed three other jobs with this same type of problem.

Sealing Honed and Filled Travertine tiled floors in Buckinghamshire

Honed Travertine Tiled floor Re-Sealed in Aylesbury Read More »
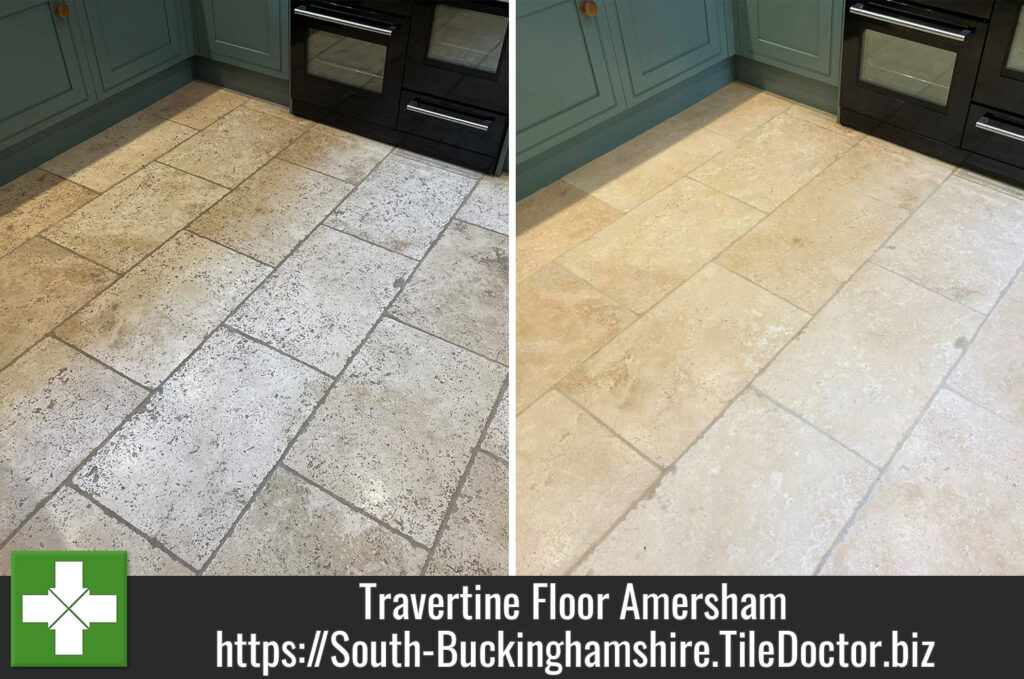
=================================

South Buckinghamshire Tile Doctor

================================= Read More »

Scroll to Top